Showing posts with label technique. Show all posts

Saturday, May 30, 2020

Divide and Conquer

  It was last year when I purchased several pre-printed panels.   I made a small wall hanging as a daily reminder to me to have a grateful heart.    It resides on the pantry door and I see it often during the day.


  A couple of months later I put together another small wall hanging to use as a gift.   I used an accent color to frame the main part,  and added butterflies for an accent.
  That left a larger section to divide up or use together.  I knew I wanted to add a narrow frame around the next batch and blend with the 2'' squares of floral fabrics.


    The larger section got cut up after all.  I wanted to frame the two main portions for an added pop of color.  I had just a small bit of this purple for the 1'' border.    I love how it makes the purple in the printed sections stand out.
   I played around with  very irregular/asymmetrical blended sections.  I tried to keep the darkest to the corners so as not to detract from the center.   It worked to create the depth I was hoping for to give a more artsy feel.
  Garden of Praise is a wall hanging that is 33'' by 36''.


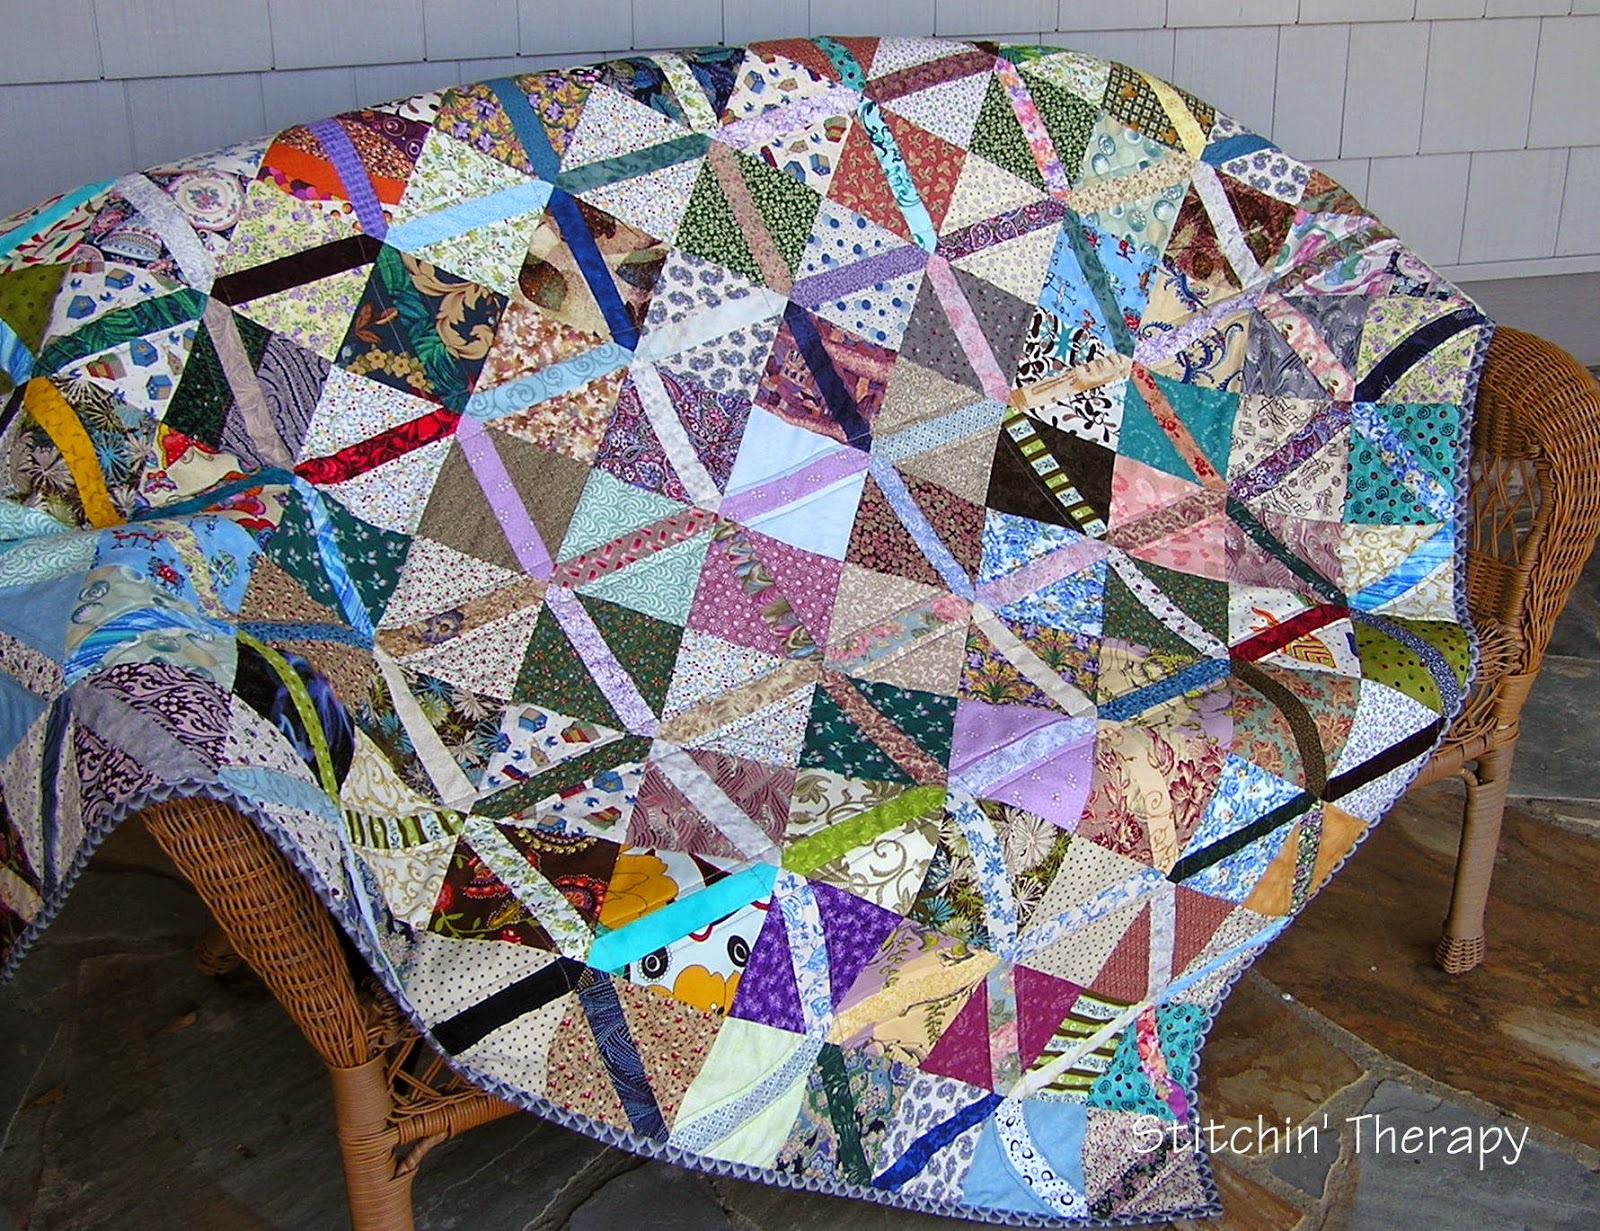
Today all were finished!  With the sun out  and no rain drops to spoil the photo taking process, we ventured out to the deck.    I wanted to have a photo comparison of the finished projects.

   
    Those large pre-printed panels can be intimidating.  They have inherently uneven blocks or sections, or the printing may be crooked.  You need coordinating fabrics to blend with the printed sections, and so on.   
   So this series for me became a Divide and Conquer idea.  Even though I used the same watercolor technique to enlarge each portion I cut out---the divide part--I conquered the designs by altering the type of layout.


   The two on the left are symmetrical  with the blended portion moving around the top one, and in the lower one just accented in opposing corners. 

  The two on the right are the ones just finished.  The larger one I discussed all ready.  The small one...is just that a small left over that just didn't fit into the other ones.  I couldn't let it go to waste, so using the leftover bits from the larger one, I made a small table top mat as a Blessing! 


      I still have the insanity during the pandemic quilt to quilt.  My hands and wrists need a few days to rest and recover before I tackle that.

   And one last look at the 4 in the series of divide and conquer.
  Happy stitching. 

Wednesday, January 18, 2017

De-stash with string piecing

  I caught Bonnie Hunter's Quilt-Cam on Sunday afternoon.  It was a short version but always fun.  In between her latest news/adventures she was doing some string pieced blocks she intended to use for a border.  So when I need some relaxing mindless sewing I tend to do string blocks too.


  I have done string blocks in various sizes, and color ways, and many different layouts.  

  •  Shaded floral strips to create light and dark blocks.  
  • Color family  blocks with black strip dividing each block.  For a line drawing to plan this one  here is the post. 
  •  Shaded colors to create butterfly wings. 
  • Leftover random string blocks joined for a quick quilt.  
  • More floral strings with sashing to form window panes.   


     I do not have a specific project in mind for these, but did like the suggestion that Bonnie gave about the center string.  She was using various red strings in the center---corner to corner to begin.  She was mixing widths, but many commented that a narrow or single width might be best and eye-pleasing.
I am experimenting with 2 sizes of strings to begin.   One set I will use narrow dark strings, and the second group is getting random width dark strings.  I am hoping to empty--maybe--one bin and have it more a controlled mess as string blocks.

  I am using old phone book pages as foundations this time.  I often/usually use muslin or old light weight fabric.  But the fabric does add weight to the quilts overall, so I just decided to shorten my stitch length to tiny and sew on paper.  I also prepped by using a glue stick to hold the center starting fabric in place, since that first piece likes to slip and slide on me.
Happy stitching. 

Friday, January 1, 2016

First month of Quilty 365

 I am on day 32 of the Quilty 365 project, after beginning on December 1.......


and I am a few short!  I missed a few days during the holidays that I will try to catch up on.  Today I added the end piece second row of orange dots on light purple.....to remember Clemson's win last night at the Orange Bowl.  Lol....I thought they would get stomped on.   


   My circles are machine stitched.  I am using a fusible interfacing technique to stitch the circle first.  It is the same technique I used on the orange peels...click here for that post.   The square fabric is cut away beneath the circle after being stitched down.  

    I am also making a few 1/2 circles to end every other row.....I wanted a staggered layout for interest.    Of course, a plain piece would work too.
I am enjoying this project a lot.  I get to dig in the scrap bins, look for pieces I have saved, hunt up some different backgrounds, and play around with color combinations.  Soon I am going to have to pull fabrics from the stash closet for large enough pieces.....no complaints about that.  It will be like shopping :)

  I noticed lots of variations, and sizes at the link up party.  Check it out here at Quiltyfolk blog.   It's not too late to start!  Happy stitching.  

Tuesday, October 27, 2015

Orange Peel ----some details

 I am working one the Orange Peel blocks in an off and on  tempo.  The steps get tedious, so I am just working a few at a time.   Here are 4 I completed.....all light value.  Along the way in this process, I realized I was doing a couple of things that I had not mentioned in my previous post.

  Thus for the record, here are some details.


  • Trace pattern on to the fusible interfacing onto the non-bumpy side.  
  • My fabric is cut into hunks....not cut out by pattern.  The interfacing is placed bumpy side down onto the right side of the fabric. 
  • Stitch completely around the drawn pattern.  Use a very tiney stitch length....I am using a 1.8 length.
  • Trim away the excess.  I am leaving about 1/4 seam allowance on the sides/curves.  At the point I am trimming very close....1/8'' probably.  
  • Cut slit in the interfacing for turning.  Carefully turn right side out.
  • Smooth the side curves with finger or  "the purple thing" tool---my choice.  Gently poke out the ends with the tip of the tool.  I found that if I carefully kept the purple tool  against the fabric (not the interfacing) I could nudge it out better.  Note here:  You might have to use a pin at the point to get it pulled out.
  • Turn the peel over and finger press....or use the wood clapper to flatten!
  • Fuse peel to background and stitch in place.


  I did a finger press to establish the diagonal line on the background fabric ---4 1/2" squares--- before fusing the peel in place.   I am using a buttonhole stitch with a deeper bite/wider width and a shorter stitch length than the factory settings.  My width is 2.5 and length is 3.5.  Slow sewing, especially at the tips!


Sir Old Man has been in the workshop for a whole week.....and I have been summoned for a preview.  It's windy and raining and cold......off to grab a jacket and galoshes....lol.  Got to see what is happening there.  Then I will get the soup on for dinner tonight.   And I will add a couple of slices of bacon for flavor, no matter what the world powers think!   :)  Happy stitching. 

Friday, June 5, 2015

Friday Finds June 5

Quilting Tip of the Day: Dawn dishwashing soap is great to wash your finished quilts. It's similar to Synthrapol, a detergent dyers use to keep fugitive dyes from redepositing on fabric. I use just a tablespoon or two per quilt so it doesn't foam up the machine. I also wash new fabric with it for the same reason. (Wash new fabric in HOT water.) Cheap and available everywhere.I know you have seen this, but.........it is sure worth sharing and repeating.
     Personal experience just this weekend.  My young nephew was helping  his big brother work on his boat and motor.  Young nephew was wearing brand new shorts....brand new that day.  You guessed it.....black grease on  one leg....all over the leg actually.  They came to Aunt Deb to solve the problem.  Well, the best de-greaser I know is Dawn.  I smeared it on, heavy, and let it sit about 20 minutes.  Then rub, rub, rub.....toss it in the wash.  Viola, new shorts saved and I am the hero.   And yes, I wash my quilts with it too!
  See this and more tips of the day at 42 Quilts.


Scrappy Summer Top
From Cluck Cluck Sew


   A free pattern  tutorial for a great summer time quilt.   This would be perfect in all scraps, and what a great picnic quilt.
 You can find it at Cluck Cluck Sew.


  Who  needs a 9 patch technique tutorial?   Apparently, I do.   This tutorial shows how to get 2   4 1/2"  9 patch blocks from 2  6" squares!   A clever sew, cut and re-sew technique that could consume some of those 6" squares I have stashed.   This is posted by Rachel Greco and you can find it here.  

 Size adjustments are possible with this technique, too.  Start with  7 1/2" squares to make 2 blocks at 6 ".


  As always, please visit the links to pin and save.
I'm going quiet for a couple of days......have some things that will not wait and need to be done.  Back next week and hope to share the storage photos then.  Crossing fingers.  Enjoy the weekend, and happy stitching.

Monday, January 19, 2015

Joining rows for English Garden


  Joining the rows for the English Garden quilt is a little unnerving for me.   First, almost every row in this quilt is different!  The staggered drop is the villain that causes this to happen.
Second, in the quilt world,  those perfectly matched seams are so prized, and expected of someone with experience.  Ha!  In this quilt layout, I find only a few spots to match a seam with long stretches of nothingness to guide and reassure me.


   I have 3 vertical rows joined here.  Two wide ones and one narrow one on the left side.   I have a few more vertical rows sewn that are just pinned to the wall, too.  The first 2 rows were a breeze.....then the third one came along.
  The top row of the first block in the third row--confused yet?----needs to align with bottom row of the first block in the first row.  Giggle/grin/sigh.....I know, that is exactly how I felt.


  This close up should help you see why I was a bit unnerved.  I got to the third row and found little to match.  The staggered blocks are a blessing---ease of sewing---and a curse---nothing to register with.
   So out came the pins....those long, pointy things with knobs on the top  that leave pricks along the way.  I pinned the places that need to align....and hoped for the best.

  Actually, the rows are going together well....just a bit slower sewing than normal.  Since each one is different, I am slowing down in an attempt to avoid mistakes  in joining pieces.  I sure would hate to have to return to the store and buy more fabric!
  One other little trick I used while piecing the vertical rows for this one.....I used a sticky note on the layout photo in the book to mark which row I was piecing.  Example......when I finished up the third row, I moved the piece on to the fourth row----lining up the edge of the  sticky note with the row in the book.  It helped keep the confusion down.

  I also got one donation quilt pinned.
  This is a guild quilt for Habitat for Humanity that I was volunteered to quilt.  LOL.....wait till I show the backing...it's a doozy.   I am pinning a table topper/runner right now too.  I am just stacking them up for Hot Legs.
Happy stitching.

Wednesday, December 31, 2014

Booking It...again

  Let's Book It over at Vrooman's quilts has kept me going this year.  So why miss out on a good thing?  Thanks, Sharon, for having the insight to enable so many of us to make those projects!
  From August....a finish.
I showed this a few days ago, but here it is again.  I called it A Nickle Saved because of the 5"squares that it used up.

Sonja's Windows  For the New Year, a new Let's Book It project.  I offered a PDF version of the pattern yesterday.  So far I have sent about a dozen off, but several commenters are "no-reply" bloggers.  That means I have no way to reply and send a pattern.  so either link your email or send me a personal email.
   I thought I would share a few tips to make the Sonja's Windows pattern.

Once the "slabs" of strips are made, you need to square them up to 14" by the pattern.  (Of course, you could make them smaller---like 12".)  But for this one, I think bigger is better.  I do not have a 15" square ruler.....so I rigged this up.


   By taping together two different rulers, I created something that would be stable and not shift while cutting.  I used my 12 1/2" square taped to a longer 6" ruler.   I used a wide blue painter's tape for this.   Then I used the narrow 1/4" masking tape to mark the correct edge measurement.  That is a help for these older eyes of mine.
  Secondly, I made the first cuts to size by trimming the long straight edges first before trimming the top and bottom---across the strips.
 
 Pin the corners before you sew  two slabs together.  Remember that one slab is running vertical strips and the other one is running horizontal strips.


  Then cut diagonally from corner to corner ---both ways.  You end up with 4 blocks that are 9".  The edges are bias, so don't cut until you are ready to add the narrow strips to stabilize the blocks.


    This is the first batch of blocks with the added strip in a goldish tan. Actually, I am using a couple of different fabrics of the tan.  Also, you might note that some of my strings/strips are pieced.....I needed to do that to get enough length for some pieces.
  More slabs to make....more strips to piece....a couple of quilts to make.
Happy stitching....while Booking It!


Sunday, June 23, 2013

Catching up again

   Once again, I find myself playing catch up and trying to get back to my plans.  I'm glad I got all the baking done on Thursday,  because I  got a call  from our guild Program VP asking if I could help  fill in the  program for Monday night.  I know how hard it is to arrange programs, so I  agreed.

   That meant I needed to dig out the braid quilts.....oh, yeah, her request was the French Braid...get them washed. One was on the wall, one on the guest bed, and the other packed up till winter.
   I also needed a sample project to demo the piecing technique with....that meant digging out fabric and finding a ruler and rotary cutter.    (My sewing room is in the state of chaos/mess/can't find anything  until the cutting table made by Sir Old Man is brought up from the workshop.)


 I spent about an hour looking for a project box that I had set aside for a future braid project.....no where to be found.  So I raided the stash closet for floral  fabrics---they were the easiest to reach--- instead to make a short runner as a French Braid sample.  


  Luckily this technique is a quick sew project.  The hardest part is picking the fabrics.  I decided to use a different accent for the small squares rather than the large floral that is the starting 6" square.  I actually like this impromptu selection....an unexpected  NewFO for June.

  I had planned to be re-making the Roman shades for the guest room and in the garage......so hopefully that will get done this next week!  


And one more doll quilt!
  This one arrived from Jackie, Mrs. Claus in Iowa.  She is representing Hawaii for the HGTV Message Board group of Mrs. Claus participants.  I apologize for being late in getting this posted.
  I love her creative endeavor on this one.  Scrappy squares are top-stitched down on each larger square. I think the colors are so great and the scattered placement is fun!  Thanks so much for helping.

  One week left of June.....exactly where has this year gone?  I feel like I have been standing still and the escalator is passing me by at 100 mph.  I need to get on and get things done!  Happy stitching.

Friday, April 12, 2013

Question and doll quilts

  I've been marking squares and sorting strips with little to show at this stage on the Buzzsaw.   A question was asked about why I chose the 10" size for the squares for the block.  It was dictated by the size of some batiks in my stash that I wanted to use.  I could just squeeze a 10" cut out of them and nothing larger.
     Here's the math I used for this block.  From the 10" squares--one background and one batik--- make 2  HST blocks.  These should be 9 1/2" blocks.  
You need to make 4 subcuts.   9 1/2" divided by 4 equals 2 3/8".   I could live with that measurement.
That also means that the extra full strip needs to be trimmed  to 2 3/8" by 9 1/2" long.
Note:   When you do the subcuts, be sure to keep the fabric lay out exactly the same---dark on the bottom right for me.  If it was changed to the top, I would be creating mirror image blocks.....that does not work for the buzzsaw.

 A better and more ideal size would be 10 1/2" for the squares that you turn into  10" HSTs.   And your subcuts would be 2 1/2" wide.   Any measurement that is easily divided by 4 is the trick  for this block.

And in the mail.......2 doll quilts from Mrs. Claus in Montana!


 These two cuties came from StinMT, who is a member of the HGTV Message Board.  She used the cutest fabrics.....almost like an I Spy quilt in miniature size.   And she embroidered the label directly to the back fabric.   I really appreciate these gals and all they do to help.  And I really admired their great, great stitching, fabrics and exact matching!   Thank you, Shirley, for these.


I am baking some Amish Cinnamon Bread today for a family breakfast tomorrow.....my brother is bringing Remy up for the weekend.  Remy has the weekend all planned......help Uncle Russ cut grass, and pull weeds in the garden for Aunt Deb, and wash big brother Justin's truck.   He also wants to go to Clemson for the game, go downtown for the rides, and so on!  I'm tired just thinking about it, but at 4 he has energy enough for all of us.
Enjoy the weekend and happy stitching.

Wednesday, April 10, 2013

The first cut

   Why is the first cut always the hardest?   All that lovely fabric just waiting for the rotary cutter.....and I was so hesitant to take the first slice.   Be brave and do it, so I did.
   At the top of the photo are  the  large
10 " squares of background fabric and squares of the batiks and Stonehenge fabrics, along with extra strips.  Below is the first test block to check for size and measurements.  Well, actually, it is 1/4 of the full block.


   So what the pattern?     Sir Old Man saw the buzz saw quilt on Wanda's blog--Exuberant Color--- one morning and really liked the pattern.  I'm not sure if it was the name or the pattern that appealed to him, but that is what he wanted.   So I agreed....anything to convince him I need that free motion machine soon.


 The technique is not hard and just takes a little planning.  It is  the Scrappy Mountains method  that Bonnie Hunter does.     Plus an additional strip added to one side to make a square block.    You get great looking points with no match sewing, and  I love that.
    So, I officially started a NewFO this month.   And I will be at it for a while as this one is to be large.  I will have to find a couple of small projects to throw in this month, just to keep things interesting.   But I did get a bonus....a nice pile of strings to add to my collection, and plenty of extra fabric for a Pineapple Blossom throw that I want.

   Insight:   The more  quilts and projects you make, the more scraps and strings you create.    I'm sure this is obvious to most of us, but the reality hit me after today's cutting session.   Now to create something with them.
   All this complaining about Spring being late....today I think summer arrived as it is 83 degrees outside!   Sounds like a good reason to stay inside and sew.  Happy stitching.  

Saturday, December 22, 2012

Endless feathers and new challenge

    I dropped in to check out what The Nifty Stitcher  had been doing lately.  And once again her stitching blew me away.  She had a sample of a curling /swirling feather that was so fabulous.  Rhianon  has a link to a Russian gal who is doing this technique.  Of course, I was mesmerized by the videos....that I watched them twice and then again!  How did she do that?  She doesn't mark anything?  Just off she goes.  I had to try at least.  Paper practice first...lots of pages filled with feathers of a sort.  Then to the machine.


  I used polyester batting and 2 pieces of white muslin to practice on.  This is the first one.....my feathers look a lot more angular than they should.  I haven't figured out the way to make them curl around each other.  I am hoping to coax/ beg/ plead / entice Rhianon  at the Nifty Stitcher to pass on some guiding advice on achieving that.
    So check out the link.....really beautiful feathers.


 Notice the new button.....2013  The Year of the Never Too Hot To Stitch!
Finished Project.   Lynne at Never to hot to stitch is organizing a monthly linky party to motivate us to finish up those projects hidden away, or stacked in the corner.  Please click over and check it out.   No rules, but do set your own guidelines.   Lynne's idea for herself is to finish 2 projects before she can start another.  That should help her clear out those UFOs.
   My own general guide lines  will still apply to me---or kind of apply---one project  to be quilted, one being sewn, and one in the planning stage.  Eek...right now I have two I am sewing and 2 being planned.   Already I am breaking my own rules and playing around with feathers.   Of course, the small projects that pop up on the horizon  and fill in some space and time, do not have to play by my guidelines.  Just so you know.
This may prove to be a very dangerous new year.    Happy stitching.  

Monday, December 10, 2012

4 patch methods

    I heard from a lot of you about the last post on reducing your usage on the Picasa Web Albums.....so I know many were busy the last couple of days resizing photos.  I have an album with 700 photos to resize, so yes, it takes a while but is worth the effort.  Hang in there!  One more hint.....while you are re-sizing photos, you can also add text for marking your photos in the Creative Kit online.  Most of my older photos are not marked, so I am taking the time to add my blog addy to them.

   Guess we all know how to make a basic 4 patch unit or block....cut 4 squares the same size, sew 2 together, then sew the 2 patch units together and you have a 4 patch.  Both the patterns I am working on call for 4 patch units, and I used different methods on both for each of them.  So I thought a little comparison would be good.
  First,  there's the  the mystery at Quiltville called Easy Street.  I know I said I would not do another mystery, but here I am in the midst of part 1.  I decided not to use gray, and  I chose a light blue.  Bonnie's preferred method of making 4 patch units calls for sewing the strips together, and matching the long strips in pairs before cutting  the 2 patch units.  Once cut they are already matched and just need to be joined and pressed.  She gives  excellent details and photos on her blog.
   Pros to this method....everything is matched up, and by working thru  the directions correctly the intersection seam does swirl and lie flat.
 
   Then there is the method  from Missouri Star Quilts that makes 4 patch units from pre-cuts or in my case
 5" squares.   It can also be adapted when working with jelly roll strips.      

   This technique worked perfect for this scrap quilt because I was concentrating on value rather than color.  I wanted 4 patch units  of light fabrics, and units of dark value fabrics.
  Rather than explain the whole technique, check the link above for the tutorial.  My photo shows the final cuts for the 4 patch units....all are different and very scrappy.  Perfect for this!
  Pros to this method.....quick,  working with large sections, produces very scrappy units, and you are not sewing small pieces together.

  I think there is a time and place for each method depending on what you are trying to achieve.  No cons to either method really.    I am about ready to put a block together for the scrap quilt....maybe tomorrow.  Happy stitching.

Sunday, October 21, 2012

Doing the string thing

   I promised a tutorial for the string blocks and I had second thoughts.....why try to improve on my original source.    The very best place for a tutorial on string quilts is at the Scrap Queen site of Quiltville .  Bonnie includes details and lots of photos of the sew and flip method for covering your foundation fabric.  So click on over there for the best information on the basic technique and a few setting ideas.  You can print out her info and have a great reference.
    If you prefer to use paper as a foundation that is fine.....just a couple of cautions.  Be sure to use a smaller stitch length.  When the paper is removed, the stitches often pull out on the edges.   You should also spray  starch your block before removing the paper to help stabilize it.....all the edges are bias.

   Decide on the size block you want to use.  I used  8" but it is your choice.  I don't think I would go smaller than 6", but I think a 10 inch one would be great to work with.

 For creating your layout plan, you will need to print out (or draw your own) this photo and color it in.  The diagonal through each block should be consistent, as it is your frame around each color.
   Note:   I ended up adding an additional row of blocks on the left side and bottom to increase the size.  It is so easy to do that with this pattern.


    Here's a quick recap of the steps I used.

 Step 1:  Mark your foundation block with the 2 colors.  I used a regular pencil for this.  It is going to be covered anyway.
   Step 2:  Place a 2 inch strip on the diagonal between the 2 marked sides.  This is your frame around the blocks.
   Step 3:  Begin in the center and sew and flip strips in the color family to cover the foundation.  (Refer to Quiltville tutorial!)  Be sure to extend strips beyond the foundation.   Press each strip as added.
  Step 4:  Repeat for the opposite side.
  Step 5:  Trim and square up your block.

     I found it less confusing to work with  blocks of one color family at a time.  I worked in groups of 3 or 4 blocks at a time---doing all reds, or greens, etc.  I had a stack of half covered foundations for a while.  Then I began working on the opposite side in the same way.  I found I could cover 3 or 4 blocks in about 30 to 45 minutes this way.  I tend to sew in short allotments of time between other things, so this worked for me.
     I pinned 5 projects over the weekend.....quilts and wall hangings.  And I discovered where a lot of  those strings come from......I had a huge pile of strings from trimming the backings!    Need strings, then make quilts!  Happy stitching.  

Thursday, August 30, 2012

Here's the answer

   Several questions were asked about how I would cheat to sew the color wash together.  So maybe cheat is not the best description, but  it is quick and easy.  I learned to quilt back in the old days of "templates" for everything, including triangles and squares!  Today our methods are termed "speed techniques", like quick flying geese using special rulers, thangles for all sizes of half square triangles, and for me gridded interfacing for the water color quilts.  It's a "cheat" on the old techniques, but works so well.
   The prospect of sewing  408   2 1/2" squares together was daunting.  No, a better word would be overwhelming.  I have a short attention span.  I flit around.  I get bored so easily.   I knew that after sewing  a half dozen rows I would begin to feel boxed in and frustration would cover me up.  So after PT  I stopped by the store and purchased  a couple of packages of regular fusible interfacing.....the very inexpensive type that happened to be on sale.  No lines on this and only 15 inches wide.  A little math.....6 x2 1/2" =  15.... Perfect, works for me.   One strip cut to the correct width would be exactly what I needed for 6 rows.

      I have a gridded cover on my ironing board that proved to be a huge help to keep the squares lined up and even as  I placed them on the interfacing.  This interfacing is the lightest weight and just serves to hold all the pieces into a sew able---straight seam---mass.

   I transferred the squares by rows....one at a time, to keep from getting confused.  (Even if I was to sew each pair, I would need to correctly stack and mark each row to keep them in order.)   Three rows laid down and then I fused them, carefully keeping the iron away from the exposed fusible.  Repeat for all rows.....done and ready to sew.
  Total time for arranging and fusing---1 1/2 hours.
 I know I could have been sewing during that time instead....but now I just sew.  First, I will join the 4 sections then  I sew all the verticals, clip the intersections, and then sew the horizontal rows.  No worry with matching the seams at intersections....they will match using this method.   No stopping to press until the seams are all sewn.
  So that is where I am....ready to stitch away.   Ready to enjoy the long weekend, the end of summer---but not the humidity, and ready for a few finishes.  Happy stitching.

Tuesday, August 21, 2012

Thinking Christmas and flying geese

   For the guild quilt show, I am demoing how to do the one seam flying geese block.   I learned this technique last year and did a journal quilt with the units.
    I recently ran across a You tube video with another variation of this.  Suzanne MeNeill does a 5 minute block that is really the same thing.   So I am not going to repeat her great tutorial, and  I did use one of her projects.  (Her book  on this is due out this month....got to get one!)
    First she showed a pinwheel block.....love  those curves!   They are just stitched down---no curved seams to sew.   I used scraps that were already pieced and leftover from an earlier project, instead of the strips she used.   I have 4 more blocks that I can put together.....why that's at least half a quilt size!   I may just cut some strips and make a few more to get a whole top.
    What is really great about this----any size you want to do----the math is easy.  I found this at
Connecting Threads -----scroll down to Method 4 for the one seam flying geese.

   On to the small project.....I call it ....
 10 days to Christmas.  Growing up, I knew that when my birthday arrived on the 14th of December,  there were only 10 more days to Christmas.  And there are 10 little pockets on this tree.....that could be filled with small gifts (for me, by me) or hold Christmas cards.  There is also a larger pocket at the base  that was added after quilting the main project.  The binding finishes it off and joins the two sections.  Of course you can leave off the pocket.
   This would be very cute done with more trees....maybe  3 of different  heights, or adding  a tall skinny house between 2 trees. Or a row of pinwheels, or.....you design it!
   I used 4 inch squares for this one  and the overall length is 32" and I made it about 10" wide.  It took about 1 hour to cut, sew, press,  stitch on the star and then pin for quilting.   So I do mean this is quick and easy.
   OK, so now I am beginning to think Christmas......it's still summer, and I am jumping to December.  Maybe I should do this in fall tones, too....that sounds more reasonable.
  Happy stitching.  

Tuesday, July 17, 2012

Follow up on 60 degree triangles

   Two rows of 60 degree triangles put together, and the ends chopped off.  That means  the edges are bias! 
   This technique is not for the faint of heart.  It reminds me a lot of paper piecing....sew a seam and trim, then repeat.   I was using a regular ruler and lining the sewn seam up on the 60 degree line for trimming.  If I did this again, I would purchase the 60 degree triangle.
  You need a lot of triangle units because you join small ones together to create larger ones.   The tutorial that Kim did gave several ways to make different triangle units to get a varied look.   Some of my points got very tiny from the adding and trimming.  And then others got chopped off completely.   I got a little lazy and threw  in a long filler strip in a couple of spots. 
   After 2 more afternoons of sewing, I came up with enough units to put together a small wall hanging banner.   I did a "cop out" on the upper right hand corner and used long strips to finish off with the white corner....no more triangle  units. 
   Once I had it trimmed up, I added a 1 1/2" strip --cut on the straight of grain---all the way around to stabilize the bias edges.
   Did I get the look of the Olympic banners?  Yes, I think so.  The effect using the technique is very similar.
   Will I do this again?   No, probably not, well maybe..  I could select fabrics and colors, but not really control where they ended up.  That was a little frustrating for me.    Making the units was fine, but joining and chopping them off seemed wasteful to me.  Maybe I should have just tried the 1000 pyramids............
   But on the upside....it is done.  I tried a new technique, and got this out of my system.  Maybe later on, I will try this again as a way to use up lots of scraps for a lap quilt.  It does have possibilities.      
Related Posts Plugin for WordPress, Blogger...