Showing posts with label waste not. Show all posts

Sunday, October 30, 2016

A banner for Let's Book It

    I thought I would step out of my usual box to make a small project for Let's Book It---hosted by Sharon at Vrooman's Quilts.  The Pineapple Blossom quilt is on-going--a couple of months now---and I just needed a finish :)


   Actually, it's a dual duty project...... I combined my leaf blocks and pumpkins from the Autumn Jubilee from Carole at From my Carolina Home.

  I had some extra squares, and HSTs and rather than toss them into the scrap bin, I strung them together for a border of sorts.   Neither side matches, and the colors are light mixed with bold......very unplanned. Another "waste not" project. I lightly stipple quilted between the blocks and on the border.  No binding either, I did a stitch and turn  edge finish.


Scrappy goodness!  This could be a runner for the side table, or banner over the fireplace.  Size is 12'' by 37''.  My token project for fall.  Thanks to Sharon and Carole for motivating and spurring me on:)
Happy stitching.

Friday, October 14, 2016

Finished runner


  I finished up the runner.....quilted and bound with pieced together leftover binding strips.  I like using up those pieces.  I call it a waste not technique.
   As a matter of fact, the plumes were cut from mostly left over fusible backed leftovers too.  With all the patterns and fabrics used in the center strips, I did not have to worry if anything matched.


   You may remember the full quilt I made for a friend that I called Plume Crazy.   This is a smaller version of that quilt.

 For me it's a good size to practice my FMQ skills, and have a finished project.


   This one can be a great table runner, or a door banner.   I like that option.   The finished size is 62'' by 16''.


   There is something about finishing up a project that satisfies the quilter in me.  Seeing the completed project makes me smile.  It's a feel good thing. And no UFO to worry about.

    Do you have UFOs to finish?  Do you dislike those blocks/parts now?    It could be time for a UFO Assault!  Here's my find of the week.......
Read the ideas that Mary at Quilting thru Rose colored trifocals shares.   She has some ultimate recycle type finishes for UFO Assault.

Now attack those UFO, send them into completion, or give them away.  Make room for new ideas and fabric.
 I am....happy stitching.  

Thursday, February 18, 2016

Two for Habitat means free space

  I finished up the second quilt for guild for the Habitat quilt project.  We support our local Homes for Habitat organization by providing a quilt for each member of the family moving into their new home.  It's a very big undertaking for us, as we usually donate 60 to 75 quilts each year.  Fortunately, we have willing members and lots of support for this.   Both quilts  were pieced by members and I did the quilting and binding.  Many hands make the work lighter.

So Habitat gets 2 quilts and I get a little free space in the sewing room.  While cleaning up, I noticed a couple of things I had set aside.


  Last year sometime, I began a Let's Book It project that I did not like and got tired of working on.  Instead of trashing the dozen blocks, I cut them up and put them together as a long runner.  Looking at it now, I think I have a different idea on how to finish this up into a quilt.  I just need to decide on the fabric to finish it off.    I like to have one or two small throws on hand to give away if needed and this will fit the bill.


  Second discovery.....a water color that needs to be sewn.  How did that happen?  I am not sure why I did not finish this or when I put it together.  Has life been that crazy?    I will move this one to the top of the list and get it sewn up.

  I have a stack of fabrics to cut for bow tie blocks, another pile for circles and backgrounds, plus a bin of scraps by my chair.  Sir Old Man asked if I was running out of space in the sewing room....lol.  I tried to explain my system, but his eyes glazed over, so I shut up.
   I did discover why all the "man glitter"--sawdust---is turning up around here.  He has begun a new project that will go in the sewing room.  It seems he thinks I need a side table by my machine to hold all my necessary stuff.  I am afraid it will be too beautiful to use!  Lucky me :)    Happy stitching.

Thursday, January 14, 2016

Waste not 3

  A little sewing time yielded a finish!

  Bands of stacked coins and a few strings make a great use it up or waste not style quilt.   Perfect to have on hand for a donation quilt, too.   I used mixed black strings as separator bands for the stacked coins.

  That is one thing Bonnie Hunter mentioned about her scrap quilts......she usually uses one consistent color  in the block/ in the border / or  in the sashing  to bring some unity to all the chaos.  It may not be the same fabric, but the color will be close.    Take a second look at some of her quilts to see what I mean.

  Looking back, I realize I have used the color consistency thing as a design element....just not as much as I should.    For me it is pleasing to the eye.  I often will mix different prints of blue or black or etc for inset strips.


Back to the finish-----
   Quick meandering all over for the quilting gives a soft effect when washed.  And the binding is a long mixture of leftovers from other quilts.

  A little cutting is happening too.....just getting those scraps under control and into usable sizes.  I actually found a place to sort and store them.  I will share more on that as things get into place :)

Remember  Enjoy .....happy stitching.  

Wednesday, June 17, 2015

A project folder

   I generally keep my current project notes, printouts  and details in a folder, along with any book or magazine with info or layout details.  Today, I wasted time hunting for it....moving things and looking all over the place for it.   I did find it shoved under the next quilt to be quilted.  LOL!
   But the hunt gave me an idea.  Instead of a plastic folder, I could cover some stabilizer with leftover blocks/strips and make a folder pretty enough to enjoy.


 I used Pellon stiffener----the one used for making postcards and purses---as the base.  I measured, marked the size, adding extra length at the bottom.....to fold up for the inner pockets that I wanted.  
   Then I fused heat and Bond light to both sides.  To the inside of the folder, I fused plain bleached muslin.


  The outside was to be the fun part.   I had a section of leftover bargello strip that was just too narrow to do much with.  I cut two sections of the bargello for the outside of the cover and added extra batik strips on the ends and between the sections to cover it all.
   I did some straight stitching to hold the raw edges in place.


  All the outer edges were overcast with a zig-zag stitch.  The bottom portion was folded up and straight stitched in the center and on the sides.


  A finished folder for my favorite and current projects! I can stuff all my notes and ideas into it, leave it by the machine and enjoy it.

   I see lots of possibilities for a cover....leftover blocks, scraps and bits of favorite fabrics, even a small landscape.   A great waste not project.


  So what would you stuff into your folder?    Happy stitching.

Tuesday, June 9, 2015

Evening of power sewing

Here is where I was with the small Carolina Chain blocks last week.  I decided to stop making blocks and keep it a small lap quilt.
  Link to earlier post is here.....big version and the start of the smaller size blocks.


  I cut a few strips of the dark batik as the inner border.  While digging through a stack of scraps earlier, I found some pieced bands that were left over from other projects.  I kept digging until I found just enough to string together and use for the second border band.  An added bonus....waste not!  Finding those bands speeded up the process.  So far, so good.


  And it all came
 together with an additional dark strip on the outer edge!


Then a little breeze came up, but I really like it anyway.


  Not quilted yet.....but soon to be.  Not named yet.....but bound to be.  Just add it to my Year of Florals....destined to be one of my favorites.

   A little power sewing sure can go a long way to relieve a little stress, resolve a design issue, and turn into something you love.    Happy power sewing!

Thursday, April 30, 2015

Progress in the workshop

  There is progress in the workshop on the bed---ala Sir Old Man's handy workmanship.  Want to see the pieces?

Bed rails, and slats, and foot board/head board top pieces.......one coat of finish applied and sanded in.  This is labor intensive but in the end, it will be so worth it!


  And the legs....can't forget the legs.  Aren't they beautiful?  You can see the mortise cuts into the side of the leg.  Now ask me how much the chisel set cost to make those cuts.  **grin**  Let's just say, as much as a lot of fabric.

  This photo is truer to the color so far.  Each coat adds depth and patina to the wood.  Can you tell I am excited.....believe I am.    Hopefully the weather will stay beautiful so another coat can be added, as it requires a couple of days to dry between each one.  


  Sir Old Man put the drying time to use on a small project.   A small box....not really that small.  The front piece was a section of maple from the bed that was unusable for the sections because of the knot.    Yet, it is perfect here as an artistic statement.  Waste not wood, or fabric!


Note the inset accent pieces of each corner.  Don't ask me how he did that....it looks great.  You must press one end to open and lift the lid out.  

The grain in the top is  amazing.  A couple more coats of finish and it will be so beautiful.   There is more to this box than meets the eye, but I will wait to share that when it is completed.  
  Off to make more saw dust......happy stitching.

Thursday, April 9, 2015

Home Ties

 
   Spring is here in full force. Flowers in bloom, warm temps---84 degrees today---with cool mornings.   So this quilt is just what is needed for early mornings on the porch...along with a nice cup of coffee.

   I finished up the scrappy binding yesterday, for a finish this month.  Yay!  I had debated on a border for this one, but instead I opted for just a nice snuggle size of 50" by 60".  

  Simple straight line quilting on this one.  I almost used an all over swirl, and then decided to keep it clean and simple.  I just wanted to accent the diagonal lines of the blocks rather than weight it down with too much thread.


   I began putting these blocks together last December, so this one has been hanging around for a while.  The block is Carolina Chain from Bonnie Hunter.   Originally shown in Quiltmaker 2010, here is a link to see the block.  I believe Bonnie has put this into one of her latest books.....but it is simple enough to figure out just from the photos.  Wink.....I am thinking about a floral version using 2" strips this time along with batiks.


  A simple scrappy binding.....I just dug through the bin with leftover binding pieces and sewed them together.    This is one of my favorite "waste not" techniques.   Eventually, every binding scrap finds a home.
  Home Ties is done....and looking for a home. I have somebody in mind for this one ;D
 
  I love a finish....it motivates me to move forward and think ahead.   That means I need to do some cutting.   And ponder the layout for the strings I took off the design wall.  I think I have an idea that just might satisfy me.
Happy stitching.

Thursday, January 8, 2015

Colorful cover for machine

  I had a few  string blocks tucked away.  They were odd sized.....4" by 6"....and I had no memory of why I made them.  It must have just been a little play time after seeing something similar somewhere.   So if I stole the idea from you.....let me know!
   So what to do with them?   Six in a row for a runner, two by two for a narrow banner?   I slept on it and came up with a 3 by 3 arrangement for a new throw cover for my sewing machine.

   My Janome has a wide end and a narrow end and the arm that stands above it for threading.....which makes a traditional slip cover awkward.  I settle for a throw type cover with string ties to keep the extra dust bunnies from nesting there.


    I turned the 6 string blocks into spool blocks by adding strips on either side.  Then by adding a black strip to the top and bottom, the blocks finish off at 6" by 9".   A few spacer strips in leftover black and white prints---remember Easy Street Mystery from 2 years ago---were put in the center.   They cover the wide top of the machine and allowing the spools to be seen completely from the front or back.

  I love the color, I love the theme, I love a finished project that is useful!  So what have you got tucked away that needs to be used?  It's time to clean out some things.    And take a chocolate reward on a completed goal!  Happy stitching.
   

Tuesday, July 16, 2013

A blue sky day

    Finally, the sun was shinning when I woke up this morning.  We actually were blessed with blue skies.....no gray in sight.  It has been weeks since that happened.  Of course, that means the heat  has set in....we just need the soggy, boggy ground to dry out a bit.  So we will take the heat for a while.

  I finished up the last 4 blocks needed for the Buzz Saw quilt border.......I have to keep my part of the bargain, don't I?   Actually, this part is the easy part....it is just so dang big and awkward to work with right now.   That is why I am dragging my feet on it.


   Over the weekend, I messed around with the tension on the Tiara.....a lot of trial and error and not a lot of improvement.  I just wasn't getting the good stitch I wanted with certain threads.  All I did was make myself frustrated, until  I came to the conclusion I was a complete idiot and did not know what I was doing. Almost 40 years of sewing experience and I could not get the tension set.   So, I went on-line and began to hunt down some help.
    I ran across an excellent video by Handi-quilter called TNT---as in thread, needles, tension.
   Aha!   I proved my point.....I was attempting to solve my problem backwards!   The correct way to set the tension on these things is to start with the bobbin tension.  Get it right and you are half way to home base.  Then you set the top tension to it.    I watched the video a second time and then to the machine.  Within 10 minutes, I was pleased/ happy / smiling----balanced stitches, at last.

 A tip I also ran across.....this helps prevent "drag" when machine quilting that happens when the quilt sandwich does not slide over the table edge smoothly.  It is perfect for the Tiara but should/could help even when using a domestic machine that is recessed into a table with a lip edge.
   Use the Q-snap quilting (hand quilting) frame cover on the edge of the table top to create a nice rounded edge.  I slipped 2 of the 4  pieces onto my table front edge.   Perfect!   A good re-cycle and I am glad  I never threw that set up away.....pack rat that I am.

Happy stitching.

Friday, December 7, 2012

What to do with 5" squares

    Somewhere along the way I ran across this handy chart  from the Moda Bake Shop  with ideas on using 5" squares.  Since I have a large stash / box of 5 " squares, it seemed like a good time to put them to use.
   A few years ago I designed a simple quilt in EQ5 that used hsts and 4 patch units.  And these 5 " squares will work perfectly for this quilt.  It is totally scrappy---anything goes---and the size will just depend on the number of blocks I can get out of the scrap squares.   It is also a  quilt that relies on placement by  value, using mainly dark and light value fabrics.  A few mediums will work themselves in for some variety, of course.
  Waste not and a new FO for next year.....I'm already breaking my own rules because I plan on starting Bonnie's mystery quilt too.  Help!  Happy stitching.

Monday, December 3, 2012

For the birds

  A couple of really cute items came my way from my daughter....as an early birthday.    One was the decorative birdhouse with the beautiful glass knob for the perch.  It is covered with all kinds of seed packet graphics!  I just love it.  So colorful and unique.  This is going into my sewing room for sure.

   On the left in the photo is a cage filled with nesting material for the birds!  I thought this was so creative.  The  cage is a type of feeder that usually holds a seed  and berry cake for birds. Instead, here it is filled with wool bits and ends that are too small for spinning.  Now  the birds can pick and pull out what they need to build their nests.    And I can add to it by saving bits of thread and tiny bits of batting, etc.  A way of recycling for the birds!   What I like to call "waste not".    Thank you, Deana, these two are just perfect for me.

   I had a great visit with my brother this weekend, and tomorrow we are heading for Charlotte for the day.  There's a stop at Mary Jo's planned for me---read fabric into that--- before we unload the furniture at Deana's that we have had in storage for her.   She leaves for the north on Friday....  :(   Yes, sad, but happy for them.  Happy stitching.  

Thursday, February 16, 2012

Out of the trashcan

    I spent a great day on Tuesday with  The Fiber Friends in Landrum / Tryon area that  meet at The Tryon Arts and Crafts School .   I shared my journal quilt challenges and in return enjoyed seeing their projects---fabulous silk dying (shibori),  a beautiful  jacket done with shasiko stitching, a series of wall hangings based on a photo and everyone was different.  They have a series of challenges planned that will be fun to follow.  Thanks for all the wonderful inspiration, ladies.
   One quilter was carrying her items in a tote that really caught my eye, and me without a camera!  On close inspection, I realized it was constructed  like I make the handles for tote bags and purses.  The finished "handles" were stitched together with a zigzag stitch much like the clothesline wrapped bowls and bags.  That means the inside is finished off like the outside---no lining---and the bag itself has structure and does not flop over.   Oh, the possibilities!  
    While putting everything away yesterday, I found trimmings of batting in the trash can from a few dolls quilts I had finished up.   Shame on me!  I could turn them into a bag.   I cut the batting waste into 1 1/2" strips and 1 " strips, and began making "handle" pieces last night.


Technique to make finished "handle":
   Strip of fabric  (3 1/2" wide)  is placed wrong side up and 2  1" batting strips are  placed on  top down the length of the strip of fabric.  (Or use a 2 " wide strip if you have scrap batting that wide).
   You can see I used all the scrap / waste of batting!  Just butting the ends up to each other.
.    Then press the long side edges over the batting---about 1/2 on each side.


  Then fold down the center matching the long edges.  Press well.
  Stitch along the long side about 1/4" from the edge to secure in half.


   Now join the finished pieces using a wide zigzag stitch.  Be sure to catch both pieces as you stitch.

 This is the first small section that I put together last night.  I used whatever leftover short strips I had and pieced them together if the strip was too short.
  I also mixed the width size of the fabric strips.  There are 2 1/2" strips (with 1 1/2" strip of batting encased), that finish at about 3/4".  And the 3 1/2" strips (with the 2 1" strips of batting encased) that finish at about 1".
 
Since this is an experimental project, I am winging it with the measurements.  I figure I need about 28 of the finished strips to sew together to make the 2 sides of a small  bag.  I plan on binding off the top and adding a couple of pockets to the inside.
Happy stitching.

Sunday, January 8, 2012

Calendar / Journal cover

  I wanted a fabric cover (I really hate those plastic ones)  for my small calendar that I carry in my purse.  And there are lots of tutorials for journal covers.   The part I hate is turning the whole thing inside out and then closing off the hole used  for turning.  Mine seems to always look uneven and wavy.  And then the batting in the flap areas create too much bulk.  So I looked for an easier way to finish it off.  

  I measured the cover to determine the size of the piecing for the cover and added 1/4" to that measurement to allow for some ease for turning.  To each end I added wide strips that would become the end flap.  I made these about 4" wide and hemmed the outer edge. *Note: the end flaps will end up about 2" in the finished project.  The flaps have no batting--just 2 layers of fabric---to reduce bulk.
On the back side I pinned a piece of batting cut to the exact size of the cover.  Mine was 7 1/2" by 8".   The end flaps will not have batting between the 2 layers of fabric.    Then do a little quilting to hold the batting in place...this is a good place to practice some  free motion  quilting, or straight lines even.

   Now to put it together.....quilted cover is face up.  One one end, fold the end flap extension wrong sides together and bring the edge that is hemmed to meet the side seam of the pieced cover.   Now fold  the folded end flap towards  the center of the cover ---right side to right side of fabric.  Cut a piece of lining fabric to the exact of the cover unit you created.  Place lining fabric right side to the cover right side.  Pin at the top and bottom.
  You have created the sandwich of quilted cover with the end flaps folded to the center, and topped with the lining fabric.  Now turn this sandwich over, pin if needed to hold it all in place. 

Almost done....just 2 seams to stitch.  Stitch along the top and bottom of the sandwich you created.  Stitch 1/4" from the edge.  The batting will not be caught in the seam.....it won't matter because it is already quilted.
Slide your hand between the lining fabric and the cover from one of the open ends.
Now turn the whole thing inside out.
Press.  Once turned inside out, this is what you see.  

Now turn the end flaps back towards the lining.  Done! 
 The lining ends are hidden and no opening to finish off, or bulk in the seam lines to trim away.


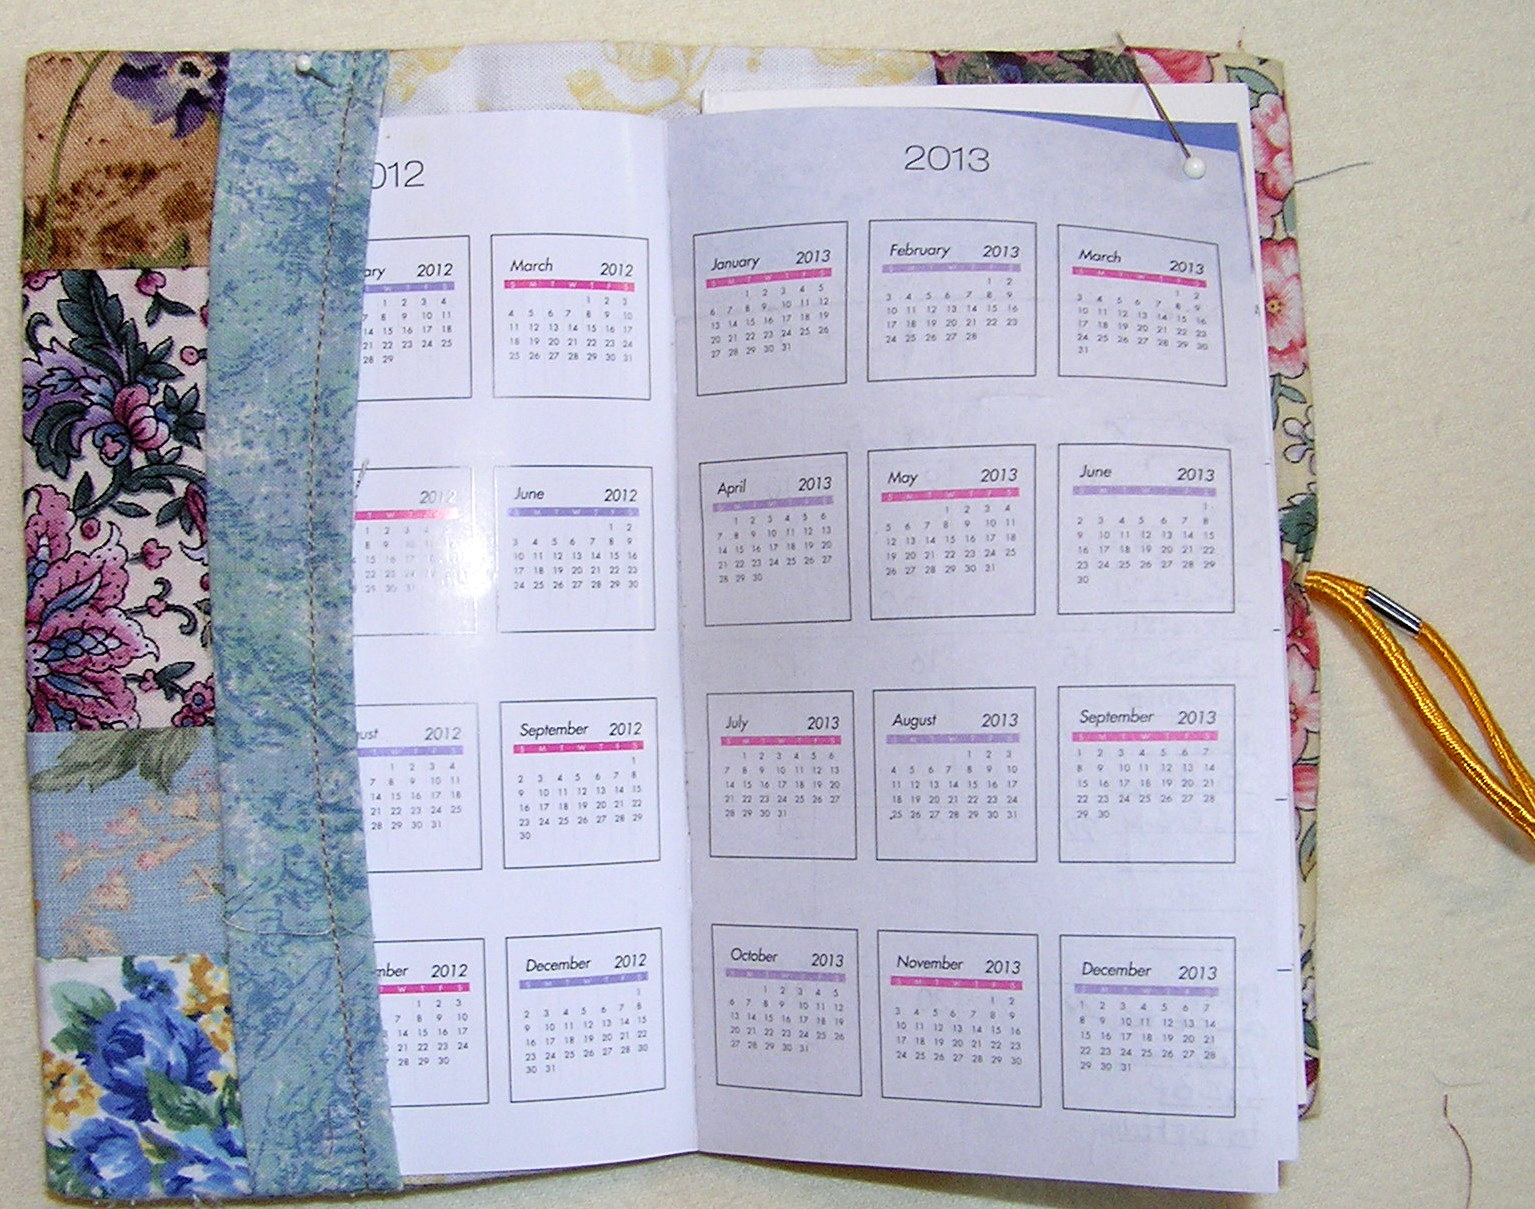
Add a closure if desired.  I just stitched an elastic hair band to the back edge at the center point.  When closed the band can be easily stretched over the cover to hold it closed.  A ribbon and button could be used, too.  Add calendar---got to keep all those doctors appointments, exams, and meeting times straight---and a small notepad in the back, if desired.
  Journal covers can be done the same way, just be sure to measure the journal and add about 1/4" for ease to your measurement.  A great waste not, use up the small scraps project.  Actually, these would make great gifts and stocking stuffers for next Christmas.  Got to add these to my gift list.
Happy stitching.


Friday, January 6, 2012

  Before I even thought of sewing I decided to do something with the pile of batting scraps from the 2 quilts I pinned.   Waste Not---- I used a 3 step zig zag stitch to join the strips by butting the edges together.  So now I have enough small batts----3 for placemats, 4 for snack mats, and about 6 for mug rugs.  Now I can work on piecing the  small tops at night and have plenty of things to practice on for the FMQ Challenge.
  Then I cleaned the machine and got rid of all those dust / lint bunnies and put in a new needle.....it's a new year, so a new needle for quilting made sense.  

I quilted the doll quilt ---number 1 of the year---using the meandering leaf design.   My leaves are more heart shape on this one.  I had a few bobbles along the way, but think I got the hang of it.  I will try it some more and work on controlling  the shape at the top to make it smoother rather than a true heart.    Now on to the big ones....happy stitching.
  Update:  More leaves to come because Frances Moore put out a new "element"  for this months FMQ design.  And here I was thinking, I can do this quickly......ha, ha,  the  joke is on me!

Related Posts Plugin for WordPress, Blogger...