Showing posts with label swirls. Show all posts

Sunday, September 1, 2019

September begins....

Image may contain: plant, sky, cloud, tree, outdoor and natureI am starting the month with 2 finishes from August.    Oops, not quite  true.  Ok, I am starting at zero and here are two finishes from August.  I am blaming my fuzzy head to the nice weather.

    It has been a beautiful few days.  We rode up to the Mountains on Thursday and went to the apple orchard.  Justus Orchard is a great spot for that.  I love seeing the new trees loaded with apples.  And the car smelled so good on the drive back.  My labor tomorrow will be making a batch of apple bread.


 This small quilt is the  Crossroads pattern  from Connie at Freemotion by the River.  It is a simple and fun project.  I use 2'' strips in many projects.  And any leftover strips are often cut down to 3 1/2'' by 2'' pieces  and set aside.   That is how I had the variety for this project.
  I cut the larger squares at 3 1/2'' and dove into the 3 1/2'' pile to put this one together.
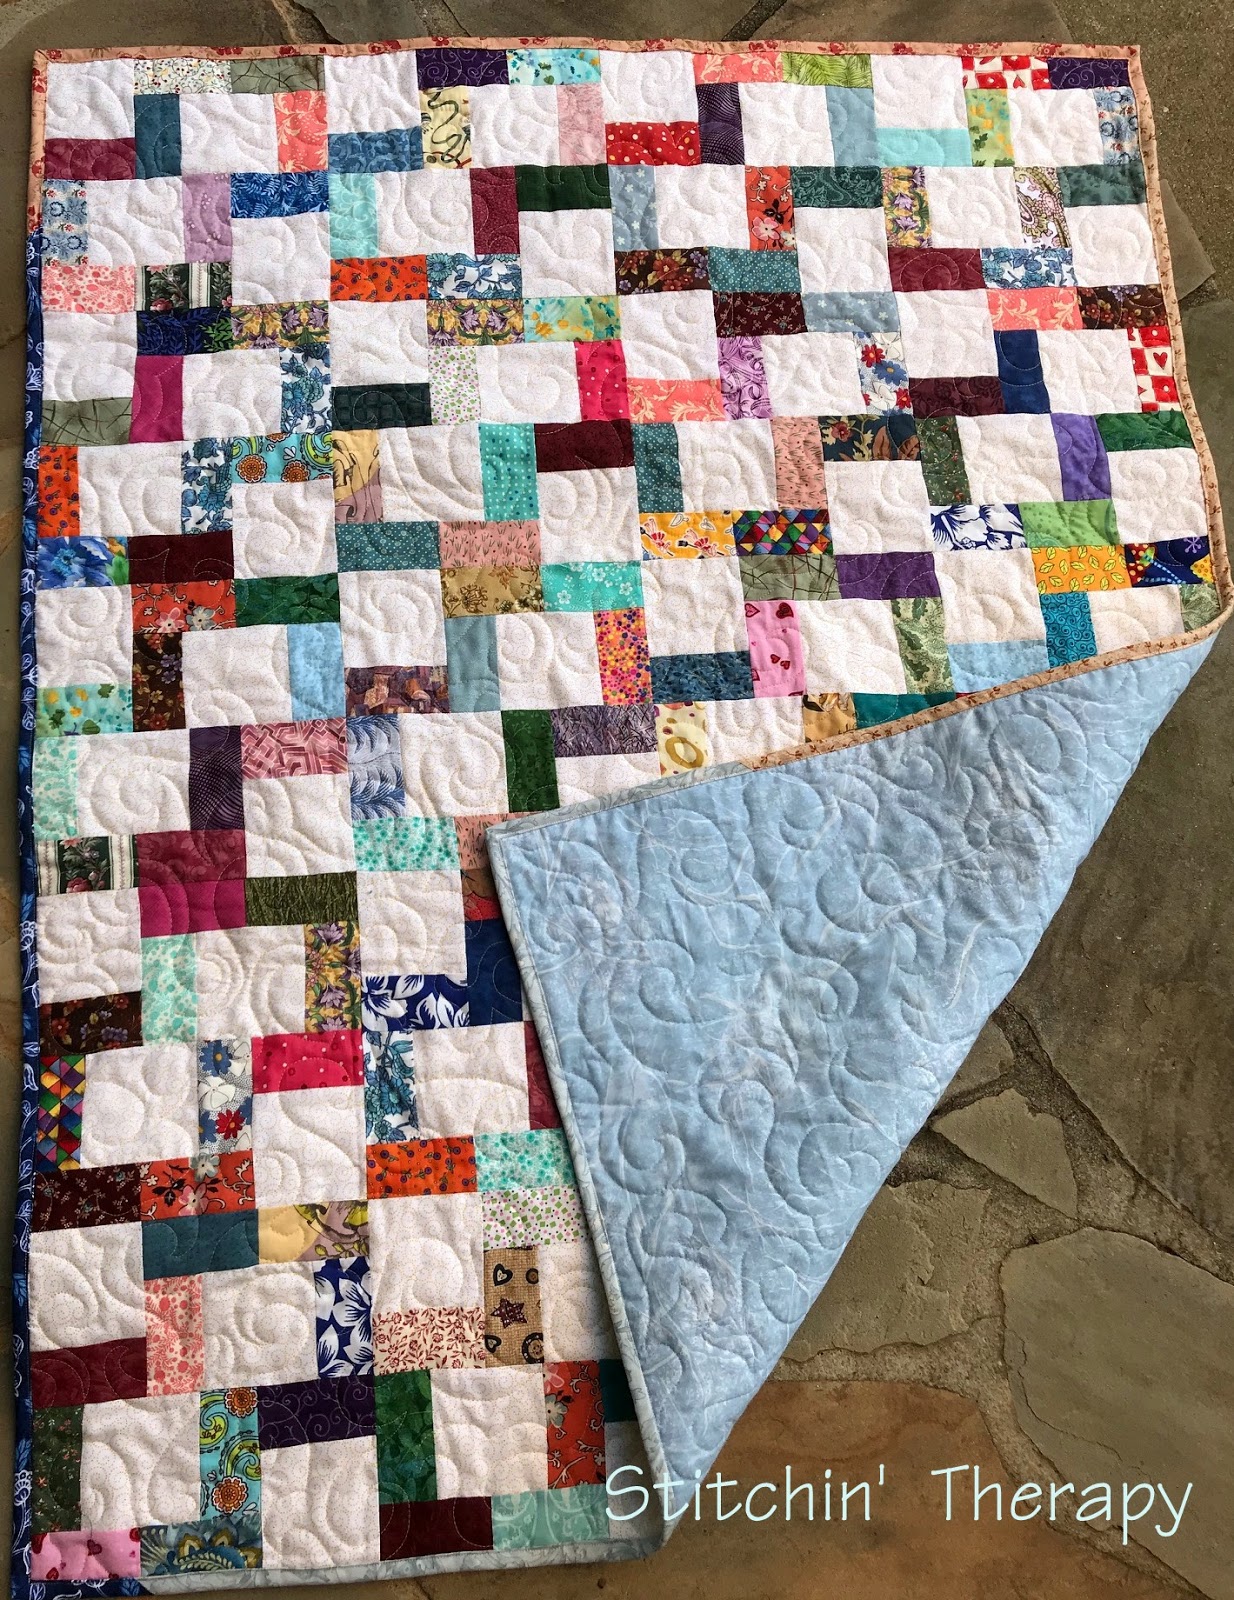


    I had enough of the light blue backing to piece for this.  I used a light cream thread for quilting.  Quilting motif is  a meander swirl with a hook.   Here's the diagram.

free quilting diagrams for the surfers point quilt


  The motif is from Quilting is my Therapy....but the link is broken which means I can't give you a direct link to it.  My quilting is similar...not exactly like it, but it was my inspiration.   Size is 36'' by 54''.   Binding scrappy style with 4 different fabrics used.


    This one was pulled out of the closet...or the lost top vault!  I do not even remember when I pieced it.  Some wonky stars blocks were mixed together with odd spacing.  My squares are 3'' finished, and almost all of them fall into the dark value category.  I think that is why it has or was hidden away.  Just a mixed up hodge podge of fabrics. 


  Simple meandering/stippling for the quilting .  I used a teal color Aurifil as it seemed to blend rather than stand out.   Except on the stars.....I only quilted them in the center square.  I just did a gentle curve around the center square and a curl in the center using light cream Aurifil thread. 


   Here's an edge in the corner....binding is not scrappy here.  Although it may appear to be, it is one fabric with colored stripes alternating between purple and teal.  Seemed to just fit the need.  It was a fabric that was hard to use and had been around way too long. 


   And that's the ending to August.
   I have the lattice block quilt pinned now and waiting to be quilted.  I haven't had an inspiration for the quilting motif on it yet.  So I will go back thru my motif journal and see what hits me. 
  Happy stitching. 

Sunday, January 22, 2017

Rainy weekend

    Much rain for the weekend equals lots of stitching time.    No time like the present to start machine quilting on the next in line.
  This is the back side of the pineapple blossom quilt.  Note the plain muslin backing.  While I love the beautiful wide backing fabrics we have available, I do not like the cost.  When I catch some on sale I buy, but not every quilt will get the pricey fabric.   This piece was the last of my bolt of 90'' wide bleached muslin and was just enough.  I switched to 90'' wide as a general rule for purchase---with the 50% off coupon--- because I found I was wasting so much fabric from the 108''-114'' wide fabrics.  I  make smaller quilts/throw size, and I don't need the extra width for  backing for a long arm machine either.  I will purchase wider fabric backings as needed, just not for the giveaway and donation quilts.


   Back to the quilt....here's from the front....swirls and curls all over.   This has always been my go to pattern.  It blends everything together and is not too dense, so it keeps the quilt soft.  And with all these floral prints, detail quilting would not be noticed.  I have the border in a neutral to do.......that can have a few feathers on it maybe.  This corner ---with a bad match---has the label on back.


    I made the label and stitched it directly to the backing before I pinned the quilt.    Then on with the quilting, right thru the label.    It is harder than ever for me to grip a needle, so I was seeking a simple solution for adding the label securely.  This  worked out well for this one.

Happy stitching.

Thursday, October 30, 2014

From the Archives: Free Motion Quilting the swirls

    I had to dig through the older--much older posts---to find this one to answer questions this week.   This is still my "go to design" for free motion quilting.   It takes practice to get a pleasing shape, but it is worth the effort.   So, from December 2011, here is FMQ Swirls.

  More comments and questions on the swirls.  From an email this week....... Nicki wrote.... "I just wanted to show you a pic of my first attempt at free motion swirls. WOW, it looked a lot better on paper than it does on the fabric... :)  I still have stippling in my head when I'm doing this so this is going to take practice, practice, practice. The back side had TONS of those little "eyelashes" all over it. I'm not sure what to do to correct those......."
   She prompted me to really give some details on this FMQ of swirls.  First, eye-lashing is usually from moving the fabric too fast.  The bobbin thread is pulled too tight and thus pulls the top thread to the back and  the curves have "eyelashes".   How to correct this:  Slow down.  Slow down your machine speed and slow down the movement of the hands and the fabric.  You don't have to creep or crawl along, but just going wide open, pedal to the metal is not working here.  An explanation from Leah Day at 365 Days of Quilting ---she controls her speed of the machine by using a light touch and "feathering" her pedal.  At some points she speeds up and at others she goes slower. 
   A slower and steady movement of the fabric equals better control.  Practice is the only way to achieve this....no pain, no gain....practice.  I use music when I FMQ to keep a steady rhythm.
   Start on paper.  Try to copy this design to practice. This is a design from Wendy at Ivory Spring.....she's a amazing fmq expert!  Pay attention to your hand movements, and note where you naturally pause and when you move faster.  That's the hint for how to stitch the pattern.  Like driving----slow in the curves, and more speed on the straight way!
   I'm not the total guru, but I think I've figured this pattern out.   You will still find that my stitches are not always perfect, but I try to be consistent.  Sometimes I don't get a perfect curl, just keep going because it's a big quilt.  And the quilt police or detectives are shot  poked with a long needle   escorted out the door  on sight!


  Here's my Step by step guide:
  1. Begin with a curl that is at least a 3/4 circle  that almost closes.
  2.  Pause to create a good point before you circle back.
  3.  Gradually increase your width and spacing as you curl back around to create the first swirl.  Note that your return curve should bring you back in line or close to the tip or point of the curl---like the large swirl at the bottom of the page.   
  4.  Then create a curl in the opposite direction.
 The deeper  tighter center in the curls really look the best.

That will give you a  fleur-di-lis effect that is the basis of this open FMQ  design.  I enlarged my photo to really show this part of the pattern. (And you can see the curls are not perfect!)  The spacing on here looks huge, but really the area between stitching is 3/4" to an inch at the widest section of the swirl. 
    Add swirls--single and in pairs--in different directions.  Throw in an "s-curl"  for interest and to change direction.  I use  the curved line that looks like a scallop  to move to a new area.  I had worked myself into a corner and needed a way out----so a curved line moved me out into the open.   


Tuesday, March 25, 2014

In production mode

 The last two days, I have been in production mode.  Several almost finished projects are destined for the finish category.
    So what sparked this burst?  Inspiration for a new project!  I won't let myself begin a new adventure until I clear out the unfinished business. Remember my Rule of 3.  It is part of my way to keep those UFOs under control. So with three lined up, I am out of control!  Time to toughen up and finish some things.
   OH....and my new bobbin thread arrived!  Aurifil 60 wt. bobbin thread was a new item on Fabric.com that I saw this weekend.  A quilter can never have enough bobbin thread.


 So production mode began and now.......
   I have the three lined up.  Each with bindings cut, labels printed, and ready to have borders added.  I also cut the hanging sleeve for the two wall hangings.  With the assembly line set up, I can sew on one without stopping to cut or hunt for binding fabric or whatever.   So for the rest of the week I will be tackling these three while I dream /plan / envision the next one.


One of the three is Mid-Winter Dreams.....I was working on this string quilt during our super cold days  in January and finally decided on the quilting.    
   Sometimes the quilting motif  holds me up.  I often wait until the fabric tells me what to quilt or a good idea hits.  In this case, the main quilt was so busy with the floral prints, I knew it would be an allover stipple or swirl.    I settled on the  big swirls for the center, and a smaller vine swirl for the contrasting narrow border. That left the outer border.  I selected a feathered swirl for that.  I thought it would be a good example for classes to show how one motif can be used in multiple ways.      


  And my inspiration.....next project.....triggered  by this pin on Pinterest.    It is a strata quilt based on value---of course, you knew that was coming!   Originally inspiration from Maaike Bakker's book Strip Pieced Quilts----which I do not have, and it is long out of production.  But luckily, Leanne offers great tutorial on her blog.  You can find it here.   I plan on using leftover strips from my bin for the first one and then begin accumulating enough strips for one done in batiks.  I mean, why plan one when you can plan two.....right?    So if I am quiet for a few days, you know I am stitching.
Happy stitching.

Saturday, March 30, 2013

A different one for me

  What fun this baby quilt turned out to be.   I love the pinwheels.  And I used every bit of the scrap of rose and pink print that I had to finish off the border.


  I only had enough scrap for 7  squares of that print, which worked just perfect between strips of white to make a border.   The multi-color print became the binding, as it was the only fabric of which I had enough yardage.

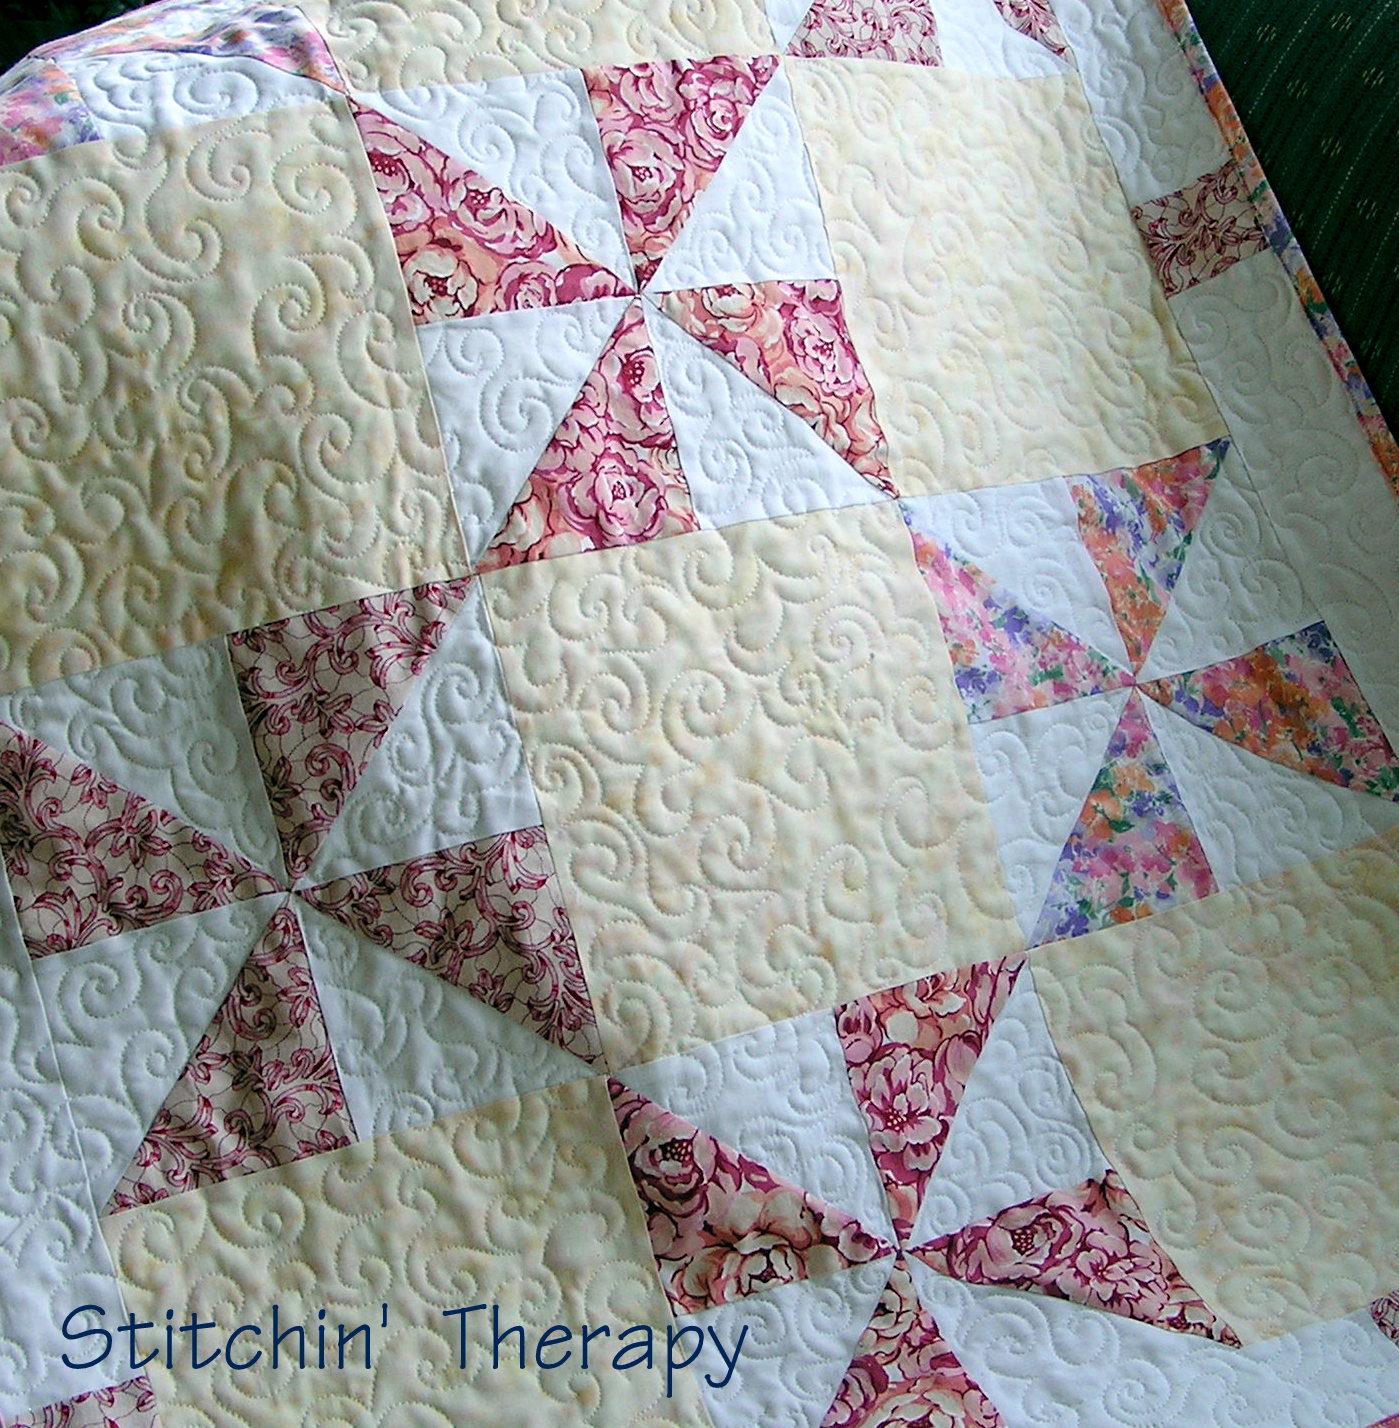
   I quilted  swirls and jester's hat in an all over pattern using white thread.   The over all look is so different for me to do.....this is soft and girly.  A perfect little Quilted Blessing.


Did you find any eggs yet?  Sir Old Man has been playing Easter Bunny this weekend.    See what I found when I opened the drawer by my sewing machine?   I found one last night on my pillow.  I believe there is one more yet to discover.  I better keep looking.......happy stitching.

Saturday, November 3, 2012

The third try

   Boy, these went together quickly, and I ended up with 3 before I knew it.
 I'm sending these off to Erin for her storm quilt project.  She offers a quick tutorial on this form of a disappearing 4 patch.


   Interruptions.....This is the third time to try and put together this post.  So let's zip to it and get it done.

   This quilt  is a gift for a friend's husband who is retiring.  Lots of batiks in the Turning Twenty Again pattern.  Sir Old Man critiqued it and said, "Bigger".        I obeyed this time and added a border strip of long pieces about 5 inches wide.  Now it measures  64" by 82".


  This is the one I was working on earlier with the feathered swirls.   I just did an all over / any which direction you want method.  After all this practice, I think I really do have this motif figured out.  


   I love the texture you get with the swirls on the batiks.

   Mike is the original "Mr. Mom" husband.  He cleans, he cooks, he fixes things, he works on cars, and is so nice to top it off.   So after all his Mr. Mom chores are done, and he has done some fun stuff, he will be able to put up his feet and nap under this.    Enjoy your well deserved life event, Mike.


   One more in my stack to quilt.  Time to get busy with some more piecing.  Happy stitching.   

Saturday, October 27, 2012

Quilting up a storm

'Frankenstorm': Worse than sum of its nasty parts

I'm sorry....I did not mean to cause a storm when I pinned those quilts!!!
But I have been doing some quilting.  I'm on the second one and when I showed Sir Old Man the pattern of stitches, he thought my quilting looked like the "perfect storm" that is traveling up the East Coast!    

Want to see.....   I am using the feathered swirl on this quilt.    LOL....I do think he is right!   The swirl is the eye of the storm and the feathered plumes are the storm bands.  Think I should rename this motif?
I am using a gray color of Isacord thread.   


  Not a great shot, but you can get an idea  of the size of motif I am stitching.  I did not want dense quilting on this as it is a gift.   The quilt pattern is a Turning Twenty Again done in batiks.  The blue square is 4"....I think.  The pin is a good reference too for the size.  
  
  If you are in the storm's path, stay safe.  Me...oh, I'll be strapped down safely at the machine.
Happy stitching.  
      

Thursday, October 11, 2012

October Free Motion Quilting Challenge

   Doodle time.....Teri Lucas is the challenege expert this month at SewCalGal .  We had to do a paper doodle, beginning with our name and outlining, and then fill in the area.  I did the paper doodle, and moved on to fabric....experimenting with different colors and threads as she suggested.  I did not have silk fabric to experiment with, but did try some silk thread for part of this.
  The silk, for the name and outline, is very nice to stitch with.  I do not care for heavier threads--quilting weight 30 or 40--- the green thread on the left area.  It lays on top of the fabric almost and requires a slower speed for stitching.   Slower speed  leads to less than nice stitches.  It is not for me.
 I still dislike doing geometric type stitching.  'nuf said on that.

   But what I liked about this lesson was the last part that Teri shared.


   You can see part of her tutorial on the right in this photo.  She showed conch shells made from swirls!   I began doodling and drawing to understand how these babies developed.  By the fourth one I kind of had it figured out.....but my pebbles just look like a funny string of beads.
   The swirl needs to spiral in at least twice to get the shell look.  That seemed to be the key for me.  Then it is lots of close lines that connect to two parts of the spiral together.


    First attempt in fabric is not bad....I needed another round to the swirl I think.  I got to the end and got a little bit lost and was not sure where to go.    The fabric I used was a cotton sateen and the thread was isacord for the light grey.


  I switched to aurifil thread in the gold and practiced  the feathered swirls to finish off this  piece. This lesson  came together  for me when I added a few plumes off the side of the conch shell!  I really like the effect.

  Somethings you need to experiment with, play around, see what you like, etc.  We all know this, but do we take the time and make the effort to experiment.  I admit that I don't.  Yet I am really glad I did this time!
  If you haven't done the challenge yet,  click here  to give it a try.

  The sewing room looks like a hurricane came through!  Strings run amok.  Tiny pieces litter the floor like the leaves that are begining to fall.  And a pile of blocks to be trimmed show I have made progress.  I look forward to getting somewhere on this one.....soon.
Happy stitching.  

Tuesday, October 2, 2012

A Winter View

   When I first saw this pattern in a magazine several years ago, I was struck by the  strong graphic effect of the trees against the white.  It is not my usual style of quilt, but the cardinals were the deciding element for me.    I claimed the cardinal as my symbol of hope a few years ago, and  put one on every quilt I make.


  Originally I had planned to add some applique in the outer border.  I thought twigs and berries.  But when I laid the first part of the applique on the quilt,  I quickly changed my thought.  I felt the applique only drew attention away and changed the graphic effect.   Instead I added a couple more cardinals to the branches.

  The actual construction was simple enough....it was getting the tree branch angles sections lined up that drove me crazy at first.  I had to trim down a couple of them, making the branch section a tiny bit narrower than intended.  I just added a narrow filler strip of white on the ends to get the correct width for the row.  And you would never have known, would you.


   And swirls----swirling snow, wintery winds---soften the stark white background.  Some swirls for free motion quilting that is not too dense, yet creates movement and texture.   Actually, the white background is a mix of several white on white fabrics.  I finally used up my stash of those and had to finish off with solid white.


   In 2010, we had a huge snow storm.  The bright red cardinals are always so stunning to see perched on the branches of our wild cherry tree.    So I am calling this quilt, A Winter View.


       And that's the saga of my  tree quilt.   I heard from several of you who are planning or working on this one.   So before the snow flies and the cold winds blow, get going!  I look forward to seeing them.

Update note:   This pattern is from 2009, I believe.  It is available in a newly released book called Quilting in Black and White 

   I am finishing up a slight detour from the strings....yet it includes a few strings too.  I needed a little table topper for the season change.
Happy stitching.

Wednesday, September 12, 2012

September's FMQ Challenge

   We are at it again....this month is a lesson from Paula Reid...over at  SewCalGal   for the FMQ challenge.   Be sure to read and  watch her short video on the stuff and fluff method for quilting on a domestic machine.  She also used  Batt Scotters to move the quilt around.....remember the sponge tip, the same idea.  Paula provided an 8" motif  for a block for us  to do....featuring feathers.  Once again I am up for the battle!
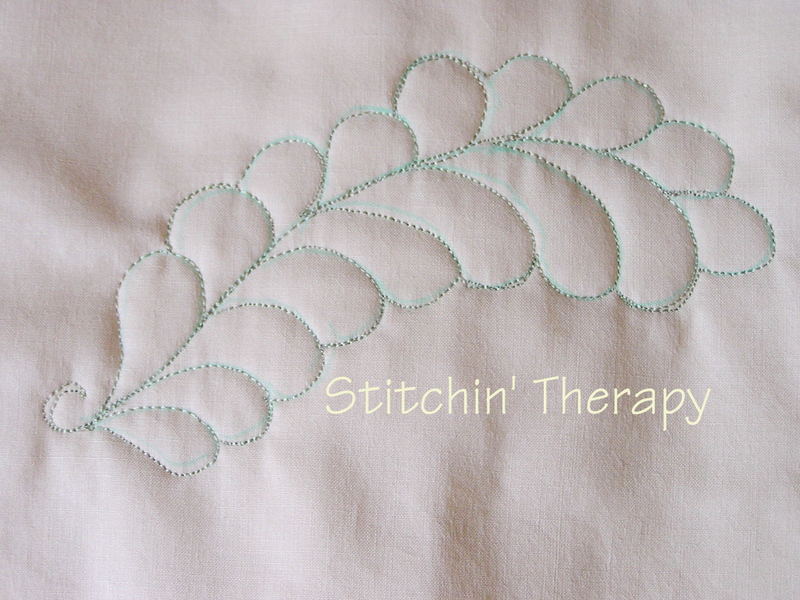
   This time it was a little easier to do....some practice, and  better understanding of how to make a feather look right.    I did a quick review  and drew off a short feather to start my practice.  Then I traced the given motif onto fabric.   I used a light box and sewline pencil to trace the motif.  I stitched in light green thread to match the lead I used.  :)
Note:  I do not use, will not use one of those disappearing or wash out blue markers.   One ruined quilt taught me years ago that I don't like them.  My preference...use at your own risk!  

 I had a couple of spots where the thread did not cooperate and left a lump on top.... I admit to owning / creating the wobbly stitches and all the goofs.   The back-tracking stitching is getting easier.  It is still not pretty, and I am not sure it will ever be.
   How easy this looks, how difficult it is for me.  I think I have come to the conclusion that following drawn lines is just not my thing.  I managed to get lost a couple of times, too.   It makes me feel hemmed in like I am being forced into a corner.  I feel the need to sing the song "I got to be me".....or at least sing it in my head and not out loud.

 So I removed my battle gear.....took a break.  I need to think this through.  I need to practice more to do this well,  yet will I use this motif or medallion technique?   Most of my quilts are so full of multi-print fabrics and not solid fabrics---- that this close or dense quilting is not going to be seen.   I remember reading that it takes about 50 to 100 hours of practice to gain enough expertise to claim accomplishment in a new task.  I only have about 6 to 8 hours of practice sewing on a drawn line.  I am not sure I want more.  :(
   More practice I decided.   This time  I just decided to follow my own path.   If you have followed me  for any time, you know I make up my own rules sometimes and go my own way usually.  I can't say if it is an age thing, or just my personality......my free spirited side,   maybe.  So, not to be undone, but to feel I have improved this month and gained more experience.....I went in another direction.

         I am comfortable doing swirls and I had printed out a page from LuAnn's sketchbook that I wanted to try.  Feathered Swirls from LuAnn at May Your Bobbin Always Be full   is  a free hand design, not drawn.   I did several pages on paper....drawing for practice.  Easy to adapt this style to spaced or dense quilting.   So I began on another piece of fabric and tried to figure this one out.    I do like this one, a lot.  I get the feathery feel without having to do a complete spine and feather.   I haven't quite got the rhythm of the design in my head----figuring out which direction to swirl and how it will fill in, but it will come.  I can see this working great to fill in a background or in a border.
  This  challenge for me is more about improving my technique, and figuring out what works for me.  I would rarely use a traced motif in the type of quilts I make, but I like knowing how to transfer the design and how to follow the lines----even if I don't do it.  And finding a design from LuAnn is just the icing on my cake for this month's challenge.
  Happy stitching.....on your challenge, or latest project.  
Related Posts Plugin for WordPress, Blogger...