Showing posts with label thread. Show all posts

Monday, May 28, 2018

Another bowl....just thread

    I remembered a package of corded piping that I had from a yard sale years ago.  I thought it might work for a "naked bowl".....just thread and piping cord.   Also this is a round one....much harder to get a good start on than an oval.  Or maybe I am just a bit uncoordinated.    The piping cord is smaller than the clothesline used on the previous bowl.  This is probably 1/4''.  The package did not have the size noted. 
 I started with a light blue thread but found it difficult to see where I was stitching with so little contrast.  I switched out to a darker color.  It is actually a turquoise blue.


  Since this project was just an experiment, I wanted to try to make the handle like I had seen on Pinterest.  I was getting to the end of the 15 yards in the package and wasn't sure about the size or spacing.  So I decided to get creative and do a single handle.  More of a grab handle than a pick it up handle.  LOL.....it worked and wasn't really hard.


   The knot for finishing is just that......a plain knot left to fuzz up.  I did some extra stitching just above the knot to anchor it.   I need to develop a better ending  technique.  Guess that means I need more cording and practice. 

  I plan on using this one in the great room for when I work on the Featherweight.  It is a nice generous size about 7'' across and about 4 1/2'' high.   Since there was no fabric used to wrap around the cording, the project went together quickly.  I would say about 1 1/2 hours start to finish.  Just round and round.

   We are soggy here....rain and more.  At least it is not the heat some are having.  The tropical storm is expected to brush by us and bring lots more.  I will have to wade thru the parking lot tomorrow for my doctor's appointment, I guess.  We have already had over 4 '' rain this past week.  Now you see why I made another bowl:)

 Blogger is on the fritz right now.....comments are not going to our inbox for replies.  So I may not reply to comments.  If you have questions for now, use my email link for answers.  Thanks.  Happy stitching.

Saturday, June 4, 2016

My surprise

  Sir Old Man finished up this project for me.  Let's just say that I cried the first time I saw it.


Beautiful wood is curly maple for the drawers and the accent corners and top are cherry.  The frame is made of maple.  The wood was fumed in his home built fuming tent. The finish is natural not a stain. 


A side view to show the stacked design of the cabinet drawers.  No sides, just exposed beautiful wood.  The accent trim is actually the runners for the drawer guides.    Note the wheels instead of feet for ease of movement.


Rolled into the sewing room we did a little OT to fill it   


  It's my thread cabinet now.  Easy access to my favorite threads,  and accessories for Hot Legs--Tiara--- are in the top drawer.
  The bottom drawer will hold those extra large spools/cones that I have stashed in a couple of spots.  And I have room to spare for now.  One day I hope to fill it up!
Note those drawer pulls...,,..custom ordered for the detail.  I closed my eyes to the price, said yes.  Just because this beautiful piece deserved  a special touch.


  I plan on using this next to Hot Legs to replace one of the side tables.  That will give me easy access to threads and it will be in full view too.    Thank you, Sir Old Man....you are a keeper!


  Thank you to everyone for your support and encouragement.  You can't know how much each one means to me.  Every time I have a crying spell, along comes a note from somewhere around the world to raise my spirits.  Each one gives me joy , and that is a good thing.    

Tuesday, October 20, 2015

It was a knot

  When I was quilting the Plume Crazy quilt last week, I hit a section where the quilting went haywire.  But it seemed to improve with cleaning and de-fuzzing everything.  So yesterday, I went to finish up a small project----my test sample of the plumes.  I turned it into a table mat.


  I began to outline the plumes and move on to some McTavishing style texture.   Almost immediately, I hit an area and the stitches went bad again.  I thought it was because I hit a seam or such.  Anyway, I cleaned the bobbin and went to rethread the top.  I made sure to "floss" the thread in the tension disk---that is the term for making sure the thread is seated between the tension disks on top.

  I needed more thread length to reach the needle and used my thumb and forefinger to open the tension disk to pull the thread through.  And out popped a knot of thread!  It was not huge.  It was a small knot of thread with about 1/4'' tail.  Now where did that come from?  I should have grabbed the camera, but I was so surprised to find that extra bit in the tension disk!  That bit of knotted thread caused those poor stitches last week.

  So lesson learned....blow out the upper tension disk on those sit down machines for free motion quilting.   I use Aurifil thread, and never thought to find a pesky knot included!


By the way, my friend loved the quilt, and almost started some teary stuff.  I threatened to take the quilt back if she did!  So extra hugs all around and we were both smiling.


  The design wall is clear....time to move on.   Here's the next test block....I will share my tests, and changes next time.

Happy stitching.


Friday, September 11, 2015

Friday Finds

The Thread Director:     The Thread Director... I needed one of these!  Some threads are straight wound and they do not feed properly on my machine.  This little gadget changes the direction of the thread feed.  It attaches via the spool winder to hold those odd spools---especially decorative threads---so they do not tangle and break.  I haven't used it yet, but I do have plans for some thread painting and this will be required for some of my threads.  This was spotted at Red Rock threads.


   Do you use small design boards in your project?  They are great for holding units for the blocks, carting the parts/pieces to the ironing board and then to the machine.  I have a couple I use....just foam core covered with batting.  After running across  a very good tutorial at Bee in My Bonnet blog for mini design boards, I decided I could improve my boards.

  I use old yard signs.  This one is the plastic type of corrugated sign.  I cut mine to 12'' by 16'', along with a layer of batting and muslin about  1 1/2'' larger on all sides.    Grab the glue stick......


I use the glue stick for a temporary hold.  Run the glue stick along the edge of the board and fold the fabric over.  Press down with finger tips.


Remember the colorful duct tape?  I found a good use for it here.  Pull off a piece long enough for the side.  Lay the covered board face down onto the tape.  Put the tape around the edge and press down onto the back covering the edge of the fabric.   I trimmed the ends of the tape so that they were flush with the end.


  Done!  A small work surface that easily moves from sewing table to ironing board....safely.

 At Bee in my Bonnet blog, you can see how she finished her edges with fabric for a very cute look.


From Amity Quilter


   A few weeks ago, I saw this on a blog I follow.  I loved the quilt tale about the quilt and its repair.  What is more simple than patches on a patchwork quilt.  See the story at Amity Quilter.  While you are there, check out her hand quilting and machine quilting, too.


Download this beautiful project today! Add 4 new blocks and 32 new fabrics to your QDW, EQ6 or EQ7!
From DoyouEQ

 Season alert!!!  So it begins....
 Free block patterns are available for down load at DoyouEQ.   I  don't do much paper piecing.....but these would convert to applique a la machine quite easily.   So if you do EQ , grab this freebie.


While you are at EQ, check out this tutorial  in the Tool Tip section.   
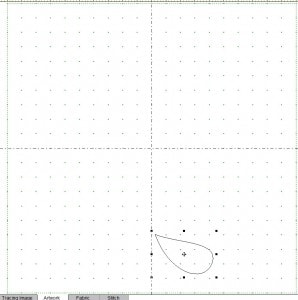
 It is a lesson in the EQ Stitch section.....how to draw ovals, hearts, and plumes.  Yes, plumes like for feathers.   I completed the lesson and learned a couple of new things.   Next week I hope to have a small finished project to share because of this.


As always, please visit the original source for pinning.  I hope you found a little inspiration and fun.


Before I close...In remembrance of those we lost.


Happy stitching.

Thursday, October 11, 2012

October Free Motion Quilting Challenge

   Doodle time.....Teri Lucas is the challenege expert this month at SewCalGal .  We had to do a paper doodle, beginning with our name and outlining, and then fill in the area.  I did the paper doodle, and moved on to fabric....experimenting with different colors and threads as she suggested.  I did not have silk fabric to experiment with, but did try some silk thread for part of this.
  The silk, for the name and outline, is very nice to stitch with.  I do not care for heavier threads--quilting weight 30 or 40--- the green thread on the left area.  It lays on top of the fabric almost and requires a slower speed for stitching.   Slower speed  leads to less than nice stitches.  It is not for me.
 I still dislike doing geometric type stitching.  'nuf said on that.

   But what I liked about this lesson was the last part that Teri shared.


   You can see part of her tutorial on the right in this photo.  She showed conch shells made from swirls!   I began doodling and drawing to understand how these babies developed.  By the fourth one I kind of had it figured out.....but my pebbles just look like a funny string of beads.
   The swirl needs to spiral in at least twice to get the shell look.  That seemed to be the key for me.  Then it is lots of close lines that connect to two parts of the spiral together.


    First attempt in fabric is not bad....I needed another round to the swirl I think.  I got to the end and got a little bit lost and was not sure where to go.    The fabric I used was a cotton sateen and the thread was isacord for the light grey.


  I switched to aurifil thread in the gold and practiced  the feathered swirls to finish off this  piece. This lesson  came together  for me when I added a few plumes off the side of the conch shell!  I really like the effect.

  Somethings you need to experiment with, play around, see what you like, etc.  We all know this, but do we take the time and make the effort to experiment.  I admit that I don't.  Yet I am really glad I did this time!
  If you haven't done the challenge yet,  click here  to give it a try.

  The sewing room looks like a hurricane came through!  Strings run amok.  Tiny pieces litter the floor like the leaves that are begining to fall.  And a pile of blocks to be trimmed show I have made progress.  I look forward to getting somewhere on this one.....soon.
Happy stitching.  

Friday, September 21, 2012

Thread sale and such


Aurifil Quilting Thread 50wt Light Robbins Egg

  At Fabric.com  there is a weekend sale on threads and notions!  I am a long time customer and have always had excellent service from them.
The Aurifil 50 wt. thread is on special  $9.33  per 1300 meter spool......too good to pass up for me.  Since I raved on about this thread in my last post, I wanted to pass this sale on to all.
Shipping is free with a $35 order, and be sure to check out the clearance fabric while you visit.  And now back to our regularly scheduled post.......
   I should be finished with the quilting today on the trees quilt.  And a few more string blocks are ready to be trimmed.  I have about 2 dozen done so far....and lots more strings and strips to go.

   Kathy at Tamarack Shack  had a really good  post on quilt photography.....she always has the neatest backgrounds and great photos.  I keep saying I want better photos, but I think what I really want are interesting photo shots.  So, this weekend I hope to drag a few quilts outdoors and see what I can do with her suggestions.
Happy first day of Autumn--tomorrow ---and happy thread shopping and happy stitching.  
Related Posts Plugin for WordPress, Blogger...