Showing posts with label florals. Show all posts

Saturday, May 30, 2020

Divide and Conquer

  It was last year when I purchased several pre-printed panels.   I made a small wall hanging as a daily reminder to me to have a grateful heart.    It resides on the pantry door and I see it often during the day.


  A couple of months later I put together another small wall hanging to use as a gift.   I used an accent color to frame the main part,  and added butterflies for an accent.
  That left a larger section to divide up or use together.  I knew I wanted to add a narrow frame around the next batch and blend with the 2'' squares of floral fabrics.


    The larger section got cut up after all.  I wanted to frame the two main portions for an added pop of color.  I had just a small bit of this purple for the 1'' border.    I love how it makes the purple in the printed sections stand out.
   I played around with  very irregular/asymmetrical blended sections.  I tried to keep the darkest to the corners so as not to detract from the center.   It worked to create the depth I was hoping for to give a more artsy feel.
  Garden of Praise is a wall hanging that is 33'' by 36''.


Today all were finished!  With the sun out  and no rain drops to spoil the photo taking process, we ventured out to the deck.    I wanted to have a photo comparison of the finished projects.

   
    Those large pre-printed panels can be intimidating.  They have inherently uneven blocks or sections, or the printing may be crooked.  You need coordinating fabrics to blend with the printed sections, and so on.   
   So this series for me became a Divide and Conquer idea.  Even though I used the same watercolor technique to enlarge each portion I cut out---the divide part--I conquered the designs by altering the type of layout.


   The two on the left are symmetrical  with the blended portion moving around the top one, and in the lower one just accented in opposing corners. 

  The two on the right are the ones just finished.  The larger one I discussed all ready.  The small one...is just that a small left over that just didn't fit into the other ones.  I couldn't let it go to waste, so using the leftover bits from the larger one, I made a small table top mat as a Blessing! 


      I still have the insanity during the pandemic quilt to quilt.  My hands and wrists need a few days to rest and recover before I tackle that.

   And one last look at the 4 in the series of divide and conquer.
  Happy stitching. 

Monday, February 24, 2020

Not quite a Blooming 9 patch

  I found parts for a Blooming 9 patch that was started about 4 years ago.  Once i put them up on the design wall, I knew it was more than I could tackle.  The size of the top with 8 or 9 fabrics would be far too large and too heavy for me to try to quilt on the Tiara.  I may pass them on to someone else or just do a basic 9 patch.  For now they are in a box.

    Instead I thought what about trying this technique as a 4 patch and in a smaller size strip.  So, a little figuring and cutting and I determined I could come up with a small wall hanging at least.  I pulled 5 fabrics and played around with the idea.

  I laid a section out on a display board to see what was happening.   It is not easy to determine how things will play together until the blocks are made.   I was mainly working with a stash of strips I had already cut at 2''. 
   I thought my center fabric on the right was dark enough, but once things were laid out....I was wrong.   I thought the contrast  was too "mushy" rather than blending.  Luckily it is only a few blocks to remake.


  I had extra strips cut that I had not used, so I pulled the darkest piece to replace the original center fabric.  Now this is only 4 fabrics.....the center and the outer fabric being the same.    I like the second arrangement better.   I think I like the strong contrast this time.    So for now, I will work on getting this assembled.  It is one of those on point designs I hate to sew together.....another good reason to keep it on the small side. 


  And a new mystery project from Carole at From my Carolina Home.  She just posted the second clue.    She included a tutorial in this clue for a different way to make some 2 patch units.  Her first post talks about the fabric selection and sizes and she has a good chart for every size project to make from this.  So, check out The Twist!  I haven't started yet, but I plan on making a smaller project from this mystery.
  Happy stitching.


Friday, November 8, 2019

From panels to tops

   Working away and making a huge mess in the sewing room.  I will have to take a few days next week to get things back in order.

 
  First up......from Panel to top is the seasonal throw.  The color is not good on the outer border....it is all in gray tones.  It reminds me of looking out thru a window with stained glass around it.  I have the red dot backing cut, washed and pressed.  Ready for pinning to quilt.  The binding is cut and ready to stitch together. 
   It may have taken a couple of design tries to get this one figured out....but I feel it was worth it. 

  In between putting this one together I worked on more of the wonky courthouse step blocks.....I have strips everywhere. That's the part that I need to clean up before going further.


  Second panel to top.....this is a small wall hanging.   When the inspiration hit for this one 2 days ago,  nothing would do until I started.  I mean I could not concentrate on anything else.
 With all the crazy madness going on in the world I find it too easy to fall into the  habit of being bitter and angry.  I am here, I am alive.  I am able to do things, and I can think for myself.   I need to focus on all the good things I am....all the things to be grateful for.   I want to begin each day with a grateful heart.


The center was part of a pre-printed panel I got in North Carolina.  Surrounding this sentiment with my floral squares was natural.  Combining two things I love.....words and flowers. 
  Right now it is pinned to the design wall.  I will decide how to finish it off once I get the seasonal top quilted. 


       This morning was the day......for shopping for new chairs.  The air cylinder took it final gasp on my sewing room chair, and Sir Old Man had been practically sitting on the floor in his office chair.   I tried researching them on line and realized, I needed to sit in the chair.  I needed a higher one for the sewing room.  If I sit higher and have the correct 90 degree angle for my arms, I do not get a back ache. 
   so after sitting in almost every chair in the office store, we found one.  Just one, and of course it was the pricey $$$ one too.  With a name like Tempurpedic of course it is.  Lol.  I sit high now :)


  It was so nice to be out and see the trees with some color.  Freeze warnings tonight so the leaves will disappear quickly now.  I had to pull out my wrist supports again.  I am grateful to have them  when the inflammation gets bad.  Of course, I have been over doing it.  I will take the weekend off.  Stay warm and happy stitching.   

Saturday, September 14, 2019

Shades of Summer

  We took a quick trip to NC this week to have a day visit with Sir Old Man's cousin.  A wonderful visit and lunch and some slightly cooler temps there.  Di and I talked quilts and machines, and the guys talked.....who know what they talked about.  It was fun. 

   That day motivated me to come back and  finish my last quilt.  It only needed the binding and label attached.   Label was simple and printed on June Taylor fusible fabric.  Leftover floral fabric added for the frame and turned under before stitching to the back.   Before you ask.....yes, even labels are now machine stitched.  The neuropathy in my fingers is not better and holding a needle for more than a stitch or two is a thing of the past.  So I sometimes do this for the label.  Or else I use a corner folded triangle that is stitched on with the binding. 


  A closer view of the block and some quilting I used.  The block is the one I call the lattice block.  You can also see the leaf motif I quilted along with the wavy line I stitched thru the diagonal trellis piece.   To tell the truth.....the wavy line is great, looks great, and was easy to stitch.  Unless you are looking closely at the leaf motif, you can't really discern it.  So to anyone wanting to quilt one like this with busy prints, wavy lines are good:)


   I wanted some good outside photos of this one.....but it was to blooming hot.  The air was like a hot blanket, so carrying a quilt around was not much of an option.  I settled for a quick one of it tucked into a tree branch, and then folded and thrown over the chair on the porch.


   Inside the tile floor was a cool and inviting spot for a photo. The dimensional effect shows well when the quilt is spread flat.  I just love the overall garden effect. 

  A scrappy binding for the finish and pulls everything together. 


  Shades of Summer finishes up summer of 2019.
Finished size is 60'' by 70''. 

   Weather forecast is for more seasonal temps this next week after 17 days of no rain and mainly highs in the 90s.  A welcome relief and I am looking forward to being outside more. 
  We need to take a quick trip next week to Foam and Fabric  to see about some items for Sir Old Man's latest project....a bench  with upholstered seat.  I have to wander/walk/stroll past lots of cotton bolts to get to that section.  Sounds like a rewarding trip to me :)
Happy stitching. 

Tuesday, July 30, 2019

Sewing on the lattice

    We sure enjoyed the cooler days last week.    Heat has returned but it is not severe.   Plus we have had very intermittent internet and phone this week.   Finally a repairman showed yesterday who couldn't fix it,  and didn't know what to do with our problem. He thought maybe they could get a guy out next week....huh? And that  lead to a strong verbal demand by me---while Sir Old Man melted into the floor--- but a second guy called and showed within the hour!   The fix was easy when he got to the main box.   So we are back up and running with service.   I hate  being the squeaky wheel sometimes, but you have to stand your ground.   

 On to the sewing room.....
   I finished up the lattice blocks from all the large 5'' squares I had cut.  I fiddled with them on the design wall, and realized the more I moved them the worse it was.  LOL....isn't that the way it goes.  So I decided to just put them up as I completed the sewing and trimming.  As long as neighboring blocks were not alike, it stayed where it landed. 
   I webbed together the top 4 rows and sewed them together.  Time to press.


  I still have 8 or so rows to  go on the design wall.  I will probably divide it into 2 sections so it is easier to handle. 

  In between sessions, I pulled out my floral string bin.....it is overly full with all the extra pieces from this last project.  I will be making some small string blocks next. 


   Our neighbor has been making deliveries to our front porch nightly.....as he is sharing his garden goodness!  I make him apple bread in the fall and he brings me tomatoes and cucumbers!  Fair enough I say.  I plan on making another Tomato Pie tonight for dinner  from his bounty.   The link is to an adapted Paula Deen recipe.  I only altered the crust and made a quick one with Bisquick and half n' half. 
  And now to the ironing station....I have seams to press.
Happy stitching. 

Wednesday, July 17, 2019

Lattice blocks and link

   I have 2 bins of fabrics to sort thru still, but not yet!    There are about 30 more blocks already cut and ready to sew.
   I wanted to make sure I liked the batik blocks mixed in with the floral fabrics.   I began filling the design wall.
 Yes, I like the combos.   And I have something to gaze upon instead of a blank wall.


Once I have a few more blocks sewn and up on the wall, then I will worry about shifting things and the layout.  I'm not sure if I will let things fall where they may, or lump colors or values.  Time will tell, I guess.


  I had a couple of emails about the pattern.  The original pattern I tore out of McCall's Quilting in 2007, called Trading Patches.
   Anyway, I did some hunting on line and finally found an archive link....here
  It is not the original article but a resized throw.  The details are the same.

I started  with a 5'' square, slice on the diagonal and add a 1 1/2'' strip to those diagonal cuts.  Block is squared up to 5''.
I mix up the matching when paining the lattice strip to the square of fabric.  Meaning some dark squares get medium to dark strips added, and others get light ones.  The same for the lighter squares.

  I also ran across another variation while searching.  But I did not save the link.....the 5'' squares were cut on the diagonal as this pattern.   But, different halves of the square were sewn to either side of the lattice strip.  A little busier variation but the same technique.

  A new subdivision is going in nearby.  The old golf course was sold and the developers are blasting....blasting with dynamite thru granite.  I don't know why they want  or need to dig so deep, but our nerves are on edge with the vibrations and shaking.  Yesterday, we thought it was an earthquake.   Hate the growth and such out here.  We thought we moved far enough out of town.  Guess not.
  I'll be found in the sewing room avoiding the heat and noise.....happy stitching.

Monday, June 24, 2019

Blog Banner---From my archives

Rather than fending and answering a couple dozen emails, I thought it would be easier to re-post this from 2017.    I responded to a post by Kerry on the Quiltville Studio Group on FB and she mentioned my blog.  She had been inspired to make a beautiful version of Scrappy Trips in floral fabrics by my banner.  Others had questions....so here is a post that could answer many of them.
From July 2017.......

Insight:   Things occur and happen to direct you along the road 
you are suppose to take.  There are signs we can chose to ignore, 
but with advanced age I have learned to be more 
receptive to directions.  At least sometimes. 

   All of this to say......this has been a week for emails and questions....not just requests for patterns.  Questions are a good thing.  Questions ask for help, provide direction, point up details I have forgotten, and they let me know what readers/followers want to know.   So after 3 questions about the quilt shown in the blog banner, I think I needed to provide details.  A hunt thru past posts revealed a big lack of details.  I have no idea what happened about that.


   Trippin'  Thru the Flowers is from 2014.  I began working on this as a Let's Book It project in April/May 2014.  The pattern is from Bonnie Hunter at Quiltville.    She calls it Scrappy Trips.   It is a Trip Around the World variation.....many small trips in fact.  My version is based on value rather than one color.   So.....chains of value radiate around the center square creating diamond bands of value.   Doesn't that sound rich?

  Value......not color.  Value is the lightness or darkness of the fabric.   And the secret to a quilt with the changes in value like this is variety.  You can't have enough floral prints to chose from :)   
 Three things I use to work with value in a water color (or a scrap quilt) are
  •  a value viewer (ruby beholder), 
  • a design wall, 
  • and a camera.   
Learn to sort your fabrics into correct value groups.   I use a ruby beholder viewer.  Additional tip....... Visit Exuberant Color for some good lessons... variety of value  ,  a lesson on value .  I learned great lessons from Wanda's blog, and there is no reason to create my version when she is a master at this.  

Design wall.....big, small, permanent or portable, it is so important.  I can stand back from a design layout about 8-10 feet and see how the values are working together.  In this design I wanted to  see distinct lines of dark and light.  I needed areas of medium value fabrics to blend to the dark and to the light fabrics.  

A camera....if all else fails, take a photo.  Look at it on the computer and amazingly, I can see where problems lie that need to be fixed.  Added tip....turn the photo into a black and white version and you will see instant photo based on value!


Back to the quilt............  
This is how the Scrappy Trips is put together.  4 blocks come together to make up the small trip around the world unit that you see.   If you read thru Bonnie's pattern, you will know that it takes 6 strips for each block unit.    So I had to make several variations for the variety in the full quilt.
   I laid out the strips according to value from dark to light before sewing them together.  It was important to be sure the dark and light fabrics were distinct and not too "mushy".   The lowest block on the left is just a little bit too mushy.  Compare it to the upper corner block that is diagonal to it.  Much stronger light in the center creates the radiating diamond.     So yes, I did have to do some planning--not too much--- to be sure I had light center units forming as well as dark center units.  

 And now a little further along.
   I got better as I went along....selecting fabrics to put together to blend and to have contrast.  
  In the pattern instructions, after you make sub-cuts you unpick a seam to join the rows.  The strongest dark or lightest light fabric was needed to run thru the center to get the pattern.  


   So many Scrappy Trips became Trippin' Thru the Flowers.   And  then became my blog banner.......as it speaks dearly of the floral fabrics I love.   The blended values  remind me of shadows  in the garden in the evenings.  Movement can be strong and still gentle and that is what this quilt says to me.  
Happy stitching.

UPDATE:  After a few more comments and emails I realized there was a beginning section not detailed.   So I am adding a few more details here.    This is one of the stratas I used.    The strata is 6 fabric strips about 13'' by 2''  that are sewn together darkest to lightest in this example.  The blend might run  from very dark to light medium, or  dark to medium to light.  It will depend on your fabric selections.  
  When the strata is sewn into the tube and the sub-cuts are made,  The darkest fabric should be the bottom left corner of your layout.    Again, the technique for sewing is found at Quiltville under the free tab.  It is the fabric choice that makes this version different.  

Monday, May 13, 2019

Jewel Box Star

   The binding is finally on the Jewel Box Star.   This one began in  July 2018,  as the annual leader and ender project from Bonnie Hunter.  

   I used all floral fabrics for the block pattern.  I had to plan that out before I really began.  Since then I have been working on the units and sections between other things, until I had a small size top. 

  I really don't need another large bed quilt, so a smaller throw size was made.


 I knew I wanted a nice applique border on this to carry the flower theme out to the border.  The center would be busy enough and a "quieter" border sounded good. 

   I added applique vines and flowers to opposing corners of the top.   I wasn't really thinking about the quilting when I decided to do that.  I just liked the visual effect.


   The center of the quilt was quilted with a medium meander stitch.  For the  solid border I wanted quilting that would show texture and stand out.  I debated on several ideas, but found the perfect solution in my quilting motif notebook.  It's called leaf meander and worked just right. 

   I used a flange binding here too.  I repeated the inner border fabric for the flange, and used all floral prints for the visible part of the binding.  I think I stitched 5 different ones together for this. 


  While the open areas of the border were easy to fill in with the leaves, around the applique took a bit of time and patience.  The inner section around the applique was densely quilted with pebbling and small stippling, and the outer areas with the leaf motif. 


   Another great fabric for the back.  Also purchased from the QuiltedTwins website.  It was listed as a tan but had a distinct greenish tint....I thought it was more a pale sage with a tonal print design of swirls and blooms. 


   And this leader/ender project is done. 


   Happy stitching. 

Thursday, August 9, 2018

Looking for floral fabrics?

   I had emails asking about my floral fabric collection/stash.   I have been collecting a long, long time, so many fabrics I have are not available.  While floral prints are not the rage, there are some available.  I am going to steal a few photos of fabrics to give you an idea.


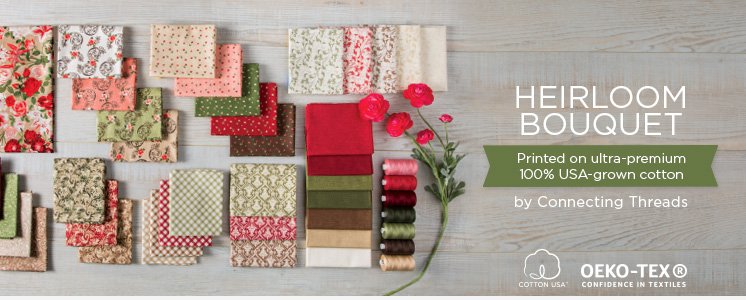
From Connecting Threads:


  While this collection looks promising, really there are only 3 or 4 fabrics that I could collect for a water color quilt project. 

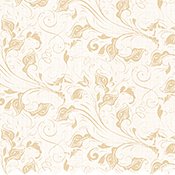
1.  A good swirl with light background.
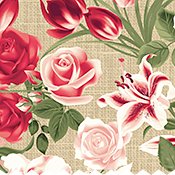
2. Large floral with some  greenish background .   This        should work.
 3 and 4 are the same print.  Both have a light background.  The green one will be a good one to bridge from a medium value area to light.  The creamy one will be a good light value with little contrast. 

If you click on the link to the website you can view the rest of the collection.  Remember I avoid anything that is dotted or looks dotted from a distance, and I avoid red backgrounds  and tonals too. 

Botanical Blooms collection looked good at first glance....until I clicked on a larger view.  Too many dots and tonals.  I did see one print, but no yardage available for it. 


From the QuiltedTwins.com.....

Botanical Society Medium Allover by Fabri-Quilt Discount Cotton Quilting Fabric by the Yard
This is a wonderful print from Fabri-Quilt.  Large and small flowers with background that will blend well.  I think I need to order more of this as I use it a lot.  And it is only $4.99!


May 22, 2018 - Fabric-4183.jpg
  An old fashioned style print that is a good dark.....dark background with small colorful blooms works well in everything.   Maybe an older Cranston print, but it still works.   There are several others here, and I love the good prices :)
   As I run across good fabrics, I will try to share the links.   Thanks for the questions. 

  No sewing this week....baking, and other stuff, but tomorrow looks clear.  Could be just me and the machine.  Happy stitching.

Tuesday, August 7, 2018

My glass is half full aka The Distant View


   A finish finally on the floral log cabin quilt.  Big sigh.   I was beginning to think it would be a couple more months to pull this one off.   Yet, my wrist felt better after  a week of rest and I finished up adding the binding.
  I began working and planning this quilt in March.....this post.... has the block recipe/cutting and measurements that I used.
Then in this post in April I was beginning the layout and talked about second guessing myself in the fabric choices.


  Along the way, I did work on another quilt or two, and one had to get quilted.

   Fast forward to August and here we are!   She is done...quilted and bound.
Floral log half cabin blocks are set on point.  By paying attention to  the placement of the values of the fabric, the last round in the log cabin becomes the "trellis" that we are viewing the garden through.
 

      Placing the lightest value fabric at the top creates that dimensional effect of the garden in the distance.


    The setting triangles are a deep green with a faint tonal print.  I like the way it sets off the blocks and makes things pop.
While I quilted swirls thru the blocks, I stitched feathers in the setting triangles that make the border.

   To carry the florals to the edge, I debated on a floral binding.  Instead I decided on a flange binding using the floral as the faux piping.  I love how it turned out.


  I had printed up a label a few weeks ago, calling this  A Distant View.
You can see the binding flange here.

  Anyway, as I was sewing on the binding, my mind wandered.  I thought about  the trick this block creates and fools the eye to think we are viewing the distance.  And it came to me that altering our position or stance creates a different view.

Insight:   We can look backward, or forward.  Hindsight gives us wisdom sometimes.  Looking forward gives us options, choices we can make.


  So I decided this quilt should have a nickname.  And noted it on the label.  My glass is half full......my choice as I move forward.   The last 2 years have drained my glass, yet I will not let it keep me down.  My life, my choice.


   The Crepe Myrtles in the back are almost finished with their glorious blooms.  One low hanging branch  over the deck needs to be trimmed back, but before we do that, a photo or two.

    My Glass is Half Full aka A Distant View is 55'' by 66'' .  Machine pieced and quilted with swirls and feathers.  Binding is a 2 fabric  flange binding.  I have used this several times before as it is easy for me since I only machine stitch now.  Tutorial can be found at Missouri Star Quilts.


  I'm going to relax a day or two and just enjoy this finish.  Then I will jump in and pin to quilt the garlic knots top.   Enjoy your week, and stitch on.

Happy stitching.

Wednesday, July 18, 2018

New leader and ender

   New leader and ender project was announced by the Scrap Queen, a la Bonnie Hunter.  She based it on an antique quilt she discovered .  It is called Jewel Box Stars.     Link is to her PDF.

   I have made a couple of jewel box quilts, and like the block a lot, so I have begun setting up a basket for  my leader and enders.  A small basket that can sit by my machine for the pieces, and a larger basket for finished units.
   Guess  you can see....my fabric selections are not  just anything, but floral scraps.  I saw a version someone shared on FB on the forum  that was done in florals.  I was hooked from that point on.

  The whole point of a leader/ender project  is to work on it between other things.  By breaking down the block into units---like HSTs and 4 patches---- you can stitch one or two up at the end of a row of blocks that you are joining  for a top.  The aim to keep a unit under the needle at all times rather than cut thread and move on to the next row, etc. 
Example would be between my string blocks I would join 2 strips that will be cut into 2 patches for my 4 patch units.  Do another string block, stitch a pair of HSTs to make a unit, then another string block, and so on.   It does require some planning and matching of fabrics for pairs.....go busy work while watching TV.  Or just as a change of pace when you have a few minutes before dinner. 

 This is one of my favorite leader and ender projects.   Charming Bricks, the larger wall hanging, was done as a leader and ender in 2015.  It is based on a pattern published in 2007 in McCall's Quilting.  Here's the post with details

  I also did a full size gifted quilt, and a door banner using the same technique/idea of the bricks. 
  So periodically, you can expect me to rave on about the L/E units as they begin to accumulate.  I won't be over-achieving on this one but rather electing to enjoy the progress. 
Happy stitching.
Related Posts Plugin for WordPress, Blogger...