Thursday, September 29, 2011

Bargello plan and sewing the strata


   I spent some time with EQ7 and developed a plan for the bargello.  The first row is  "half-drop" pattern and the second row is "pieced block  pattern", and the third returns to "half-drop" pattern.  So working from left to right, each row drops 1/2 from the previous row. 
   Then I played with the width sizes of each row.  One thing I discovered was to step away from the computer screen about 6 feet.  It made a big  difference in seeing the pattern.  I colored it in a couple of different ways---time consuming! One colorway has the wave coming from the top left, and the other has the wave moving up from the bottom.  I am still deciding which I will use.
  Sewing the strata:
 First make a swatch card, or some type of guide that shows your color plan layout.  I  can't stress this enough.  If you can't get to the linked card, email me and I will send you the pdf.  It is that important.
  Because some of my fabrics were from fat quarters, I go ahead and cut the full width of fabric cuts in half.  It is really easier to work with the shorter lengths, but you will have some waste.    I leave my palette pinned to the design wall and only remove 3 at a time.  It is over whelming to me to have 18 different fabrics on the table and keep them in the correct order.  Three at a time works for my old brain.  And if I am interrupted or take a break, three is not too confusing. 
  Sew the group of 3 together in order. ( I chain piece like I would when I make 9 patch units.)  Then set them aside, and remove the next 3 fabrics  and sew in order.  Repeat until you have all fabrics joined in groups.  Your table will look like this---that's why you need the swatch card as your guide.
Then join the groups of three together in order according to the swatch card.  And you will get a strata that is in order.  Press all seams away from the #1 fabric.  I press on the back first and then flip the strata over and press from the front, too.  I am notorious for tucks at the seam line, but I try to avoid them.
    At this point, most of my time has been spent picking fabrics and  planning the color placement.  Cutting takes maybe 30 minutes so far, and the sewing time is probably about an hour to make 3 sets of strips sewn into the strata.  Pretty quick, huh?  The second part goes quickly too, just more pressing that tends to slow you down.    
   One other tip or hint in deciding the color placement.  The fabrics placed  in  #1 through  about #5 will flow across the center the quilt only, while the other places will show up at the bottom and the top creating multiple waves.  That's why I wanted the very dark fabrics spread out and not together. 


I'll sew the rest of the stratas and be done for today.  Off for a couple of days, but next week I'll have something more to show.  Happy stitching.


Tuesday, September 27, 2011

No match sewing

    I only had about 11 inches of width left over from
 the quilt strata.  But I sliced it up anyway.
    The strata is made up of 4" strips of fabric---sewn in the order you decided on.  Use a swatch card....very important to use and refer to.
 All seams are pressed in the same direction---towards the bottom.  Take care when pressing not to stretch or curve the seam line. 
Then the strata is sewn into a tube by sewing the last fabric to the first. 
 Then you slice up the strata tube into different widths. I will give you a general list of sizes later, but I will be  playing around with my own first.
For this example because it was so small, I cut 1", 1 1/2", and 2" strips.

 
This one is sewn together with the color moving upward instead of down.   No reason, I just thought I would see what happened. 
  What I wanted to show was how the pattern develops and that there are no matching seams on the rows.  Each row is cut from the fabric strata made with 4" strips that is sewn into a tube before cutting.  When the rows are joined, the fabric matches itself at the midpoint---not at the seam line.   Look at the brown.  Each row that was added moved up to the midpoint of the previous brown.  No seams to match! Yes, I like that very much, and that is why this technique goes so fast.   
The second thing to notice  is the width of each row is not the same.  The skinnier the cut, the faster the pattern moves (up or down).  The wider cuts slow it down.  Several narrow cuts sewn right together make the pattern move quickly, and produces lots of movement. 


     When I did my first one a few years ago , I followed the directions exactly by the book, and it was more linear, straight line.  I think there were 3 or 4 different width cuts for it and they were spread out across the quilt so that the color line was fairly even with only a slight wave.  I'm hoping to get a lot more movement in the color line with skinny strips grouped together---so it resembles a bargello.   More on that when I get there. 
   I've got all the fabrics cut into 4" strips.  Ready to sew my strata.  Happy stitching.

Monday, September 26, 2011

Bargello style color plan

   The inflammation is better after a week off and  I am ready to go on the bargello quilt, using  a totally new color scheme.  I tried and tried to come up with enough fabrics for the original plan, but I just couldn't pull it together. So rather than go buy more fabric, hard to believe I said that, I switched to what I have lots of...........
Blues, purples, and a bit of teal.  This colorway is really more me, and will work well in the house too.
  This is the layout I plan to use.  And it is about the 10th variation I tried---it's not set in concrete till I start sewing!    Every time I walked into the sewing room, I switched something around.  First time, I had the  color run mixed and going from light to dark.  That appeared too jumpy for me.  I put in fabrics, took out fabrics, so  on and so on.  
  I finally decided to separate the colors, creating distinctly dark areas and light areas.  To make the run blend from one color to the next, I needed a "bridge fabric" at certain points.  A bridge fabric is one that has both colors in it.  The third fabric has both the teal green and purple in it---bridge fabric.  The fabric in the center with the bright gold has purple and a bluish tone that bridges to the leaf print  on blackish background. 

     This is the same photo only in black and white......you can really see how the bridge fabrics blend well in value with those fabrics next to them.  Plus, I am happy with the dark areas and light areas.  I think it should give me the flow I am hoping to create with this bargello style.   
   Of course, I could be very wrong in that....it is very hard to get your mind around the pattern until it is sewn.   The color bands hopefully will create a wave of color, getting thinner and then wider, as it moves up or down the quilt.   The cutting and sewing are the easiest part of this technique, and very much by the book. The book being, Quick Trip Quilts by Eleanor Burns.  Great photos and detailed instruction included, so I highly recommend this book to all.  It covers Trip around the World as well as the Quick Quarter Trip. 
  I'm going to cut and sew up the leftovers from Rhapsody in B to show how easy it is to put together...with out  worrying about matching seams. 
Happy stitching.

Friday, September 23, 2011

More color and a quilt tale

   How about creating a palette from your own photo?  Here's the place for that.  Upload your photo and click.  See your palette.  This is probably the closest to my usual method of working from a "kick off fabric".  I could just take a photo of the fabric and upload it to see what happens.
  Then over at Color Lovers you can explore color palettes submitted by others or create your own.    Who knew you had help at your finger tips?  Thanks to Lynne and Ann Marie for sending me these links....and keeping me up to date. 
   These sites are tools to help us as quilters work with color.  Unfortunately, they don't offer fabric swatches, only solid color chips.  If you are stuck on selecting a color scheme to work with, browse one of these sites for inspiration.   If you are not sure your color scheme works, browse for a color scheme that is similar and does work together.  That's why I say they are a tool, and not a solution to fabric choices.  Experiment with the color choices given by finding fabric in your stash that "reads" the same as the color chip offered.
   One more thing about my fabrics needed.  For a bargello style throw, I need at least 15 fabrics, and 18 would be better.  Some of fabrics I pulled out are not large pieces and I may not have enough of the fabric for the cuts I need.  So, I may need to repeat a couple of the fabrics to come up with the total.
     So how did I come up with 15 or 18?   I will be making 4" wide cuts for strips to sew together as my strata.  The strips will finish at 3 1/2".   15 strips will create a 52 1/2" long quilt, and 18 strips will create a quilt 63" long----before borders.  So the number of strips you begin with will determine the length of your bargello.  If you want a large quilt ---bed length---think 24 strips at least. 

 A Quilt Tale
   Have you ever notice how some things come back to you or return to their place of origin.....I call them  full circle events.   The beautiful hand quilting frame made by my FIL  in the early 90's has returned to its  rightful place.  It is being used at The History Museum in Fountain Inn, SC---which is where he lived before going into the nursing home.
   After much begging by me, Dad made the frame from a pattern kit I purchased.  I had it set up in our old house and quilted several quilts on it.  That was  before my fingers gave out and  I learned machine quilting.  When we moved, it was stored in our garage. 
    I had given the frame to Suzanne a while back, as she does beautiful, amazing, wonderful  hand quilting.  The frame deserved to be used.  I knew she would put it to good use.  Through the course of events,  she began helping and volunteering her talent and knowledge for the museum.
  The quilting frame is hidden by the wagon wheel quilt, which she made...but it is there.   I am so happy to see it set up and being used.  Suzanne--doing the quilting-- shared this photo  with me.  The quilt is being quilted by Suzanne and volunteers this weekend at the museum opening and will hang in the entry.    
     Moral of this quilt tale:   Like each small piece of a quilt, we are part of the circle of life.  Pay it forward; you never know how it will return to you.    Thank you, Dad, and thank you, Suzanne. 
Happy stitching.

Wednesday, September 21, 2011

Looking for a color palette?

   I still have that stack of fabrics sitting on my table that I pulled out last month.  I have played around with them in off moments trying to decide if I like the blend of colors.   My kick off fabric is the tomato red with the blue/teal  and tan leaves.


  I often use this method to choose a color scheme....find a focus fabric that I like and pull colors from it to expand the fabric palette.  It was the method taught in one of the first quilting classes I took years, and years ago.  The instructor said that the designer had already done the work for us in the fabric.  So if you like the fabric/color/pattern, you have your palette.    Sounds easy, right.....unless you are me and prefer the "kitchen sink" style of anything goes! 
  And then.........I ran across Design Seeds  through Madame Samm at Sew We Quilt.  And  I found these photos have very similar palettes that they developed.


   Color confidence!  Similar controlled palettes of color that evoke different moods and feelings.  I love the worn hues one.  There are lots of palettes based on food, flowers, pets, scenes.  Just name it.  Great inspiration.  For a quilter who needs color confidence or direction, this could be a great tool.
  So if I use this palette of fabrics for a bargello.....how many more do I need?  I need to let it brew a bit in my brain, while I give my hands a rest.  The arthritis flared big time this week with the change in the weather.  I'll just get the sewing room back in order and maybe plan a smaller project or two.
Happy stitching.

Tuesday, September 20, 2011

Bargello done!


Calling this one Rhapsody in B.....for bargello, Brandi and Brent.  It's quite cloudy today, but the photos still turned out pretty good. 
    
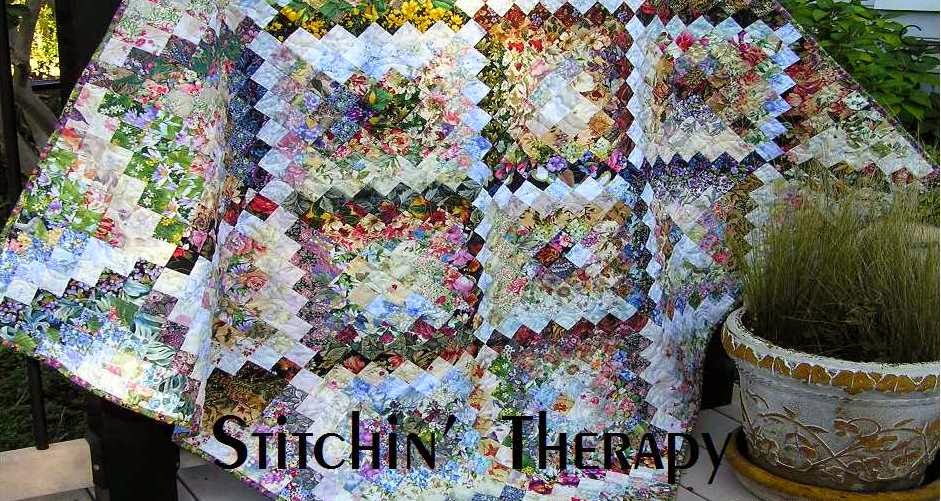
 This photo shows the pattern well.....it is a bargello style variation of the quick quarter trip  that Eleanor Burns uses for her Trip Around the World.  You are working with rectangles rather than squares, and that translates to no exact matching seams!  Each row just drops 1/2 of the rectangle in the previous row.  The width cuts vary from 3 1/2" to 1 1/2".   I am doing another one of these very soon!   Stay tuned and I will blog the process.
  Overall size is 62" by 73".  I used 11 fabrics, repeating 4 of them, so that I had a strata of 14 bands.


Sir Old Man  was helping me decide on the borders.  I had the first narrow brown strip on already, but  had
a red strip next, and it just didn't work.  His suggestion of the gold was just right!
One other thing to note in this photo is the color placement.  I did repeat 4 of the fabrics in the overall fabric scheme.  When placing the fabrics in order for sewing, decide what fabrics you want to go across the quilt---like the main red, brown, and dark batik combo here.  Where you place them in the sewing order will determine whether they are in the center or mainly in the corners.  Originally  these 3 fabrics were in the lower left and I wanted them to carry across the center area.  I ended up adding rows to the left hand side to raise their position on the quilt.  This is probably clear as mud.....but it is important in the design. 


 I free motion quilted it with meandering loops in the center and swirls in the wide border---using gold thread.  Sorry, it's the best photo I got.   I didn't have isacord in gold, but I tried Poly X 40.  It worked well with no breaks, so now I have another option for quilting thread.   
  I am  ready for a break.....or a cup of coffee.....or maybe some chocolate reward!
   Happy stitching.  

Sunday, September 18, 2011

A collection of ...

Sewing items!  A few days ago Cheree shared her photos of silk threads in her sewing room.  She inspired me to shared my favorite sewing things.
I started accumulating these items a long time ago,
and even have a few from my grandmother's sewing box.  And this lovely old cabinet, was purchased about 10 years ago and is filled with my favorite things.  It is really too full, but here are a few peeks inside. 

I love the little Kewpie doll.  She has jointed arms and is "dressed" with a piece of old tatted lace.  All types of needles in packages with the neatest graphics.  Old thimbles with advertising on them mixed with crochet hooks and measuring tapes, and you can almost see my grandmother's darning egg in the right hand cubby. 


One of my favorite pieces is the high top shoe pin cushion.  It is paper mache and it really great shape.
I love the old advertising needle case packs, too.  Oh, and the teeny tiny thimbles that looks black  was my grandmother's, too.  Doreen sent me several of the items here, and some were family bits, and other things discovered  at yard sales and such.
  The overflow had to go into a smaller cabinet in my sewing room.  I love the spools of silk thread too.....so colorful and vibrant.


And what's this?
  One last thing is the small wooden box from my mother-in-law.  The top is so beautiful with the intricate design.  It is  marked W and W   Wheeler and Wilson Sewing Machines.  I have never researched the name, just enjoyed the design.  Inside......she had a very large collection of scissors.
 Note:  Correction made to name.....Thanks Mary,  for directing me to ebay.  It's the accessory box for the Wheeler Wilson Treadle machine! 
  I have stopped searching for old sewing items....guess you can see why.  But then, every so often, one comes my way.  So any one else out there with a notions collection?  
   Almost finished with quilting the bargello style quilt.  I'm so excited because it turned out great.  Pix soon.
Happy stitching.  

Related Posts Plugin for WordPress, Blogger...