Tuesday, October 15, 2013

Home again

  We left last week to deliver and install the rebuilt screen doors to Michigan.  A beautiful drive and trip up...with no mishaps.  Friday was to be a full workday of sewing and installing doors....but it was a disaster instead.  Luckily I had had my first cup of coffee before Deana discovered the basement was in 2 inches of water!  Sir Old Man to the rescue.  Trusty hammer in hand, he unstuck the valve in the water heater and stopped the gushing flow of water.  Then the reality set in.  Water everywhere........
  Let me digress here in this tale......Sir Old Man and I had lunched with friends before leaving and heard their saga of coming home from a 2 month trip to discover a similar mess from a leaking toilet.  They have been living with the clean up and repairs for over 6 weeks now.  So when we planned this trip, I insisted we have someone in the house daily.   Little did I know, my fears were to be faced in Michigan!   Exactly what is it with this de ja vu I have been having lately?
   So a few dozen calls, and the insurance company got Serve Pro out within a couple of hours to begin the clean up.  While Sir Old Man  and Trey moving mountains of boxes and things to the living room, to the dining room, to the upstairs bedroom, to the garage.....you get the idea......I got to corral the furkins.   These three are a handful!   I also spent the time making some "comfort food" at Trey's request.  In our home that means Country Fried Steak, mashed potatoes, and green beans, with cherry Crunch for dessert.  We survived the day, all were exhausted, and progress was made for the clean up.


On Saturday, we did get some planned work in.  The beautiful re-built screen doors were installed.  This is the front....isn't it beautiful.  And I love the new blue color.  It just pops.

   I spent the day doing a bit more cooking to get through the weekend, so I did not get to sewing on the roman shades.  I brought them home to do.  That's my project for this next week.

  Once I get my household routine back, I have some binding to add to a finished quilt.....Finally!!


Hoot Pincushion by Lesley ChaissonAnd to finish up.... I ran across this  cute pin cushion that just fits the season.  I put it on my Pinterest page for the link.   I love the wonky eyes.....kind of like I still feel after the long trip!  

  Happy to be home.....happy stitching.

Sunday, October 6, 2013

Sharing quilt show pix

  I am making progress....I got one quilt for Habitat for Humanity quilted.   And a couple of rows of quilting on the diagonal floral....it is looking good!    No photos of my work yet.  Instead I thought I would share a couple of things I saw at our guild quilt show yesterday.
 

   This is a string quilt from men's shirting....a la Bonnie Hunter pattern...made by Margaret.  I thought she did a great job with the value selection and usage.   A simple pattern that makes a really striking design.....just a perfect cuddle up with me quilt.


  This is Edna's Lemonade Challenge quilt......the tan fabric is the "ugly" fabric she got.  I love the changes she made from the original design that she worked from.  The coxcomb block spirals and enlarges to met the wonderful applique.  I was excited by her offset layout with the opposing features.   Lots of good inspiration here!


  I was using my phone for the photos, so they are not so great this time......but this one was so intriguing.  Love the play of color, and neat design elements that got thrown into this one.  It was from a design class Janet took....I have got to get some details on this one.  I see flying geese blocks, tiny pinwheels, strips and rectangles.....lots of things going on.  She said it was "outside her box", but I think it is great!


   And my sentimental favorite was made by Ilse.  A seven sisters block quilt with a wonderful applique design border.   This is from a class she took from our guild's founder, Mary, who died last year.  It caused me to pause and just remember.  And then I was so thankful for Mary's guidance and teaching.  Her influence is still strong in our quilting family around here.   I am glad the tradition continues.


   We are prepping for a few travel days to deliver those rebuilt and refinished screen doors to daughter and son-in-law.  So don't panic if  it is quiet around here for a while..... I will get rolling again when we return.  Until then happy stitching!

Saturday, September 28, 2013

Value and design Part 2

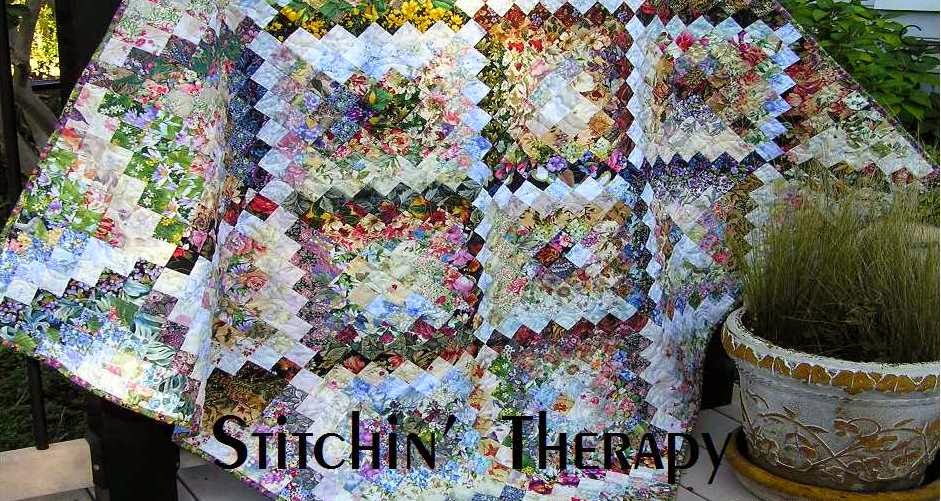
    Value and design go hand in hand for me.  I think that the Trip around the World design is one that lets you use both to get fabulous looks.  My quilt, the World is a Garden, is probably my all time favorite using only floral fabrics.
  I used the Eleanor Burns method for this, and about 14 or 15 different floral fabrics.  Actually, one of the strata has 2 different fabrics used, as I did not have enough of just one.  I just found a very closely matching print and mixed it in.


   Anyway, my point here is to show the value change from very dark---black background does it---to light.
   As the background value changes, the overall value of the fabric changes, too.  That is why I look for fabrics with black or dark green background, tan/ beige, and cream/ white backgrounds.  It makes the transition from one fabric to the next easier.
   Note, too, the different scale of the prints.  Some are large with little background showing, while others are smaller with background that does show.  You need both for good transition.


   Evening Serenade was done with batiks and tonal fabrics using the same method to create a bargello look.   This time I really concentrated on the value since I did not have a lot of print in the fabric to do the work for me.  This little wall hanging lead me to try several bargello designs recently.


    And finally, Sir Old Man's retirement quilt.  The blending was much harder with this one, as he picked out the fabrics!  But we got that central "glow" that he wanted by concentrating the lights, then the accent color, and blending the tans and browns.
   Note here:   I laid out the fabrics in a run, and took photo.  Then I viewed it on the computer and turned the photo to black and white to have a better look at the value.  Just don't ask how many times I did that!

   And that's the archives trip........as recently I have tried bargellos, coins, and quarter log cabins using floral fabrics and value.

  Insight:   Good design principles work, you just need to use them!


On the up side......the back is better.   Happy stitching.

Thursday, September 26, 2013

Quilts from the archives


   After making 3 or 4 wall hangings using the 2" square technique for watercolor, my mind began wondering what else could I do with the blending of fabrics.  Did it translate to strips or other configurations?  My first venture was a simple one....using strips to create a strata, or set of strips usually  in a defined arrangement.
   I pulled out a couple of older quilts...waited for the sun to go behind the clouds and took a couple of photos of these quilts from my early stage of working with value.
  This is Misty Window using the strata technique.  I kept the color palette in the blue, green, purple range.


  I included floral prints and  tonal prints--mainly.  The glow comes from the light values clustered in the center.  The block values darken toward the edges.


 Then I moved on to a simple much loved block....the court house steps.  This is a variation of the traditional log cabin block, and it uses lots of strips and makes tons of scraps, too.  Summer Garden 2006 was made before I began blogging! Yet the same design principle again......light blocks clustered in the center.  And the blocks are set on point.  Setting the blocks on point improves the interest and seems to let the blocks blend better.


   Here's a close up this quilt.  Maybe you can pick out the actual block.  You can see how very, very busy each block is.  All the better to fool the eye, my dear!
Large setting  triangles of medium to dark fabrics were used on the outer edges.


   And playing with value continued with batiks.   I was quite taken with the cobblestone blocks that Wanda at  Exuberant Color was using a couple of years ago.   I played around with the blocks to use up every scrap of those precious batiks.
    By arranging the units according to value, I created a background setting for applique in Heads Up.   I decided where the light source was--upper right--and let the overall value of each cobblestone darken as I worked to the opposite corner.  A blended border strip was added to extend the size.

  So I had answered my question....using value to blend fabrics, create a light source, and add interest applies to many more techniques and blocks.  
  What else could I try?  Part 2 in a couple of days.   Happy stitching.

Tuesday, September 24, 2013

Still here

Yes, it has been quiet around here as I re-coup a bit of energy and let the back heal.  I managed to get the two tops pinned and ready for quilting.  One is under the needle....only about 1/3 done, as my stitching time is quite short, maybe 15 minutes at a time.  So, I haven't really begun anything new.  I think I just pushed way to hard the last couple of months.  So I am just taking a break.
   I have had a few questions from new followers---welcome!---and I thought I would give some general response to them, too.

  Do you use watercolor kits?
  No, I have a very large stash of floral fabrics.  The problem I see with the kits is the limited  variety in the selection of squares they send.  One fat quarter of a good floral print will give you 80 or 90 squares to work with. By a "good floral print" I mean one that is on either a light beige or tan background and the floral print is spread out and full of color.    The photo on the right is an assortment of the type of prints I am referring to.  The value range is from very light to quite dark.  You need them all!

   See the full tutorial here.  Two methods of design and construction....find the one you like and try it.


  Persistence is the key to this technique....and using a value viewer / ruby beholder.  Practice blending fabrics.  You want a smooth transition from one to the next.
That is probably the second most asked question I get.....how do I create the glow?    Value!
 Once you get the hang of it, you can put value to work for you in just about any quilt you make.  Value gives you the sparkle by using the contrast of light and dark.  
 I  will share a few examples in the next couple of days....just to give you some inspiration.

Happy stitching.

Sunday, September 15, 2013

On the diagonal

What a difference a cool front makes!  The weather was just perfect yesterday, so Sir Old Man and I tackled the large front bed that looked like a jungle.  Both of us are glad it is now weed free and things are chopped back....at least for a while.


  The postman made a delivery yesterday too.   Three doll quilts from SandyO of the HGTV Message Board.  Sandy is a Mrs. Claus from Michigan  :)   Thank you, Sandy.


  I love the soft colors and simple arrangement of these little blocks.  She used 2 1/2" charm squares to make all three of these.   Look close and you can probably see how she created the diagonal design.

Hint:  Each little charm square is bordered on 2 adjoining sides with a  solid color fabric.  That unit is turned and rotated to create the diagonal layout design.  This is a good /quick /easy pattern to take note of for the future, and would be a great design done with 5" or 6" charms.

 Thanks so much for being a Mrs. Claus.


 My diagonal Faux Braid is now a flimsy.......ready for the borders.   I have been rambling on about this for a while, so I thought I would share a glimpse of what I got accomplished finally.
    Just sewing in short periods of time, it went together really quick.  If I had been running on full power, poof.....it would be completed in a couple of days.


 I picked out a periwinkle  color fabric for the inner border and a light tonal print for the outer border.  So sewing  this is my task for this week.  I am having a hard time sitting to sew due to back spasms, so I won't stress myself with a big to-do list.   I think it may be a good time to do some baking instead.

Happy stitching.
    

Tuesday, September 10, 2013

Double Sliced Layer Cake....doll quilt!

   Linda, a Mrs. Claus of MS, sent this adorable doll quilt.  She is also known as "Warm Buns" on the HGTV Message board.  In her sweet note this Mrs. Claus included instructions for making this cute pattern.  She says it is the "Double Sliced Layer Cake" method  that she adapted to 5" squares for the doll quilt.

   I want to share her basic instructions, so get those scraps ready.


Begin with 12  5" squares.  You can see she used different prints of blue, red,  pink, purple, and yellow.

First cut:  1 1/2" strip off of one side of the 5 " square.  (Stack 4 and cut. Set aside in order).
Sew:   Reverse (or mix them up) the order of the slice by flipping the stack over.  Now sew a 1 1/2" strip to a 3 1/2" piece.  Press.
Turn half way around with the narrow strip at the top.
Second Cut:  Cut the unit you created in half.
Mix them up again.... to keep from having duplicate fabric in the same unit.
Second Sew:  Join two of the units together.  Be sure to have one narrow strip at the top and the other piece should have the narrow strip at the bottom.   That means you don't have to worry about matching !
Each of these blocks should be 41/2" square.  Press.

Design time.....lay out the 12 blocks you created by flipping and turning them to avoid seams to match.
Refer to Linda's doll quilt and you can see how she rotated the blocks to achieve this.

Thanks so much, Linda, for being a Mrs. Claus and for sharing your info with us all.

  Note:   I did a quick search and found the full size instructions at Missouri Star Quilt Company using the Layer Cake  pre-cuts.  So buy a layer cake, or raid your stash, and make a scrappy throw.
Happy stitching.

Related Posts Plugin for WordPress, Blogger...