Sunday, January 4, 2015

Bucket List almost

  When I was young and quite idealistic, I envisioned being a writer.  I loved to read, I loved the words marching across the page.  The words created  images of people that were interesting, doing exciting things.  Exotic places came to life.  Imagined events became real.  Yep, that is what I wanted to do.
   By the time I entered college, reality dropped into visit.  I entered and won a few contests, yet no one chased me down handed me the dream.  I did not really have that gnawing push to go knocking on doors either.  The great American novel was not in my future.  Chasing news stories that I was not really interested in lost the fanciful appeal.  So that journalistic dream  bit the dust.
  Yet, over the weekend I had a little tinge of that old desire.

   In my email on Saturday was a post by Cathy Geier where she was sharing my review of her new book.  Click here for that post.   I had quite a giggle over it.  I find it fun and up-lifting to have others like what I say.  So I hunted down her blog where she shared the review and left a comment.  She replied that she added it to her blog because Amazon would pick up the latest post to add to her author's page.
   I am quite sure you can figure out what I did.  My fingers instantaneously typed in Amazon, and searched for her page.  More giggles and a little squeal because  there it was!   My blog entry posted on Amazon.....and I didn't have to write the great American novel after all.  Ok, I know it is not a real bucket list item, but at this age, I will take it as a nice substitute...like Tinker Bell just flew over my head and scattered golden buckets of fairy dust on my world.  
Amazing, how little it takes to brighten my day! So, thanks, Cathy....that was fun.  I am off to pull out some fabric as I plan a landscape quilt.
Happy stitching.

Borders....updated archived post

  While I was working on cleaning up the blog yesterday, I noticed the "all-time" button on the stats section.  I was quite surprised to see this post from January 2010, as one of the most read.   I actually sounded like I knew what I was talking about, too.  It is worth the repeat, with a little updating and added photos.

Borders..how wide do I go?

This year I have had emails asking  how to determine the size or width of the border on a quilt.  I have researched it over the years and even have a couple of books on borders.  A lot of inspiration and how to info, but not a lot of help in planning the width or how to decide.   Finally I researched  the principals of design in art, since quilting is my visual art form.   There are 6 main topics here:  unity, variety, balance, contrast, proportion and pattern/rhythm.  From  these I figured out "my formula" that pleases my eye.

First:  I like to use a narrow sashing--usually 1 inch--to stop the  block pattern and for contrast.  Often in my quilts it is black or a strong accent color to bring out a color in the body of the quilt.   Also for unity the narrowest border should be closest to the center of the quilt.  For my watercolor quilts because they are much smaller in size, I will usually use an inset  "piping style" piece that ends up 1/2 inch. 
The inset piping piece is cut 1 1/2 inches and folded in half wrong sides together.  It is sewn to the body of the quilt top with the raw edges matched and the folded edge toward the center.  The folded edge is not sewn down.  It gives the effect like a  mat on a framed picture.     This photo shows a cream inset piping and  a very narrow dark red sashing and then a dark border. The contrast stops the eye and the color of the piping puts the eye back in the center.   This was a round robin poster project from last year.  Four different quilters created  1/4 of the center, using a variety of techniques. 

Another example of the inset strip used to separate the center 
from the border that creates a mat effect to this watercolor
wall hanging.   Not only did this strip separate the center from
the border, it pushes the focal area back and draws you into 
the center.


 A larger quilt can benefit from an inset strip, too.   This bargello quilt was not quite large enough.  So before the actual border went on, I wanted to lengthen the quilt size.  To the top and bottom I added leftover parts of the bargello strata and framed them with an inset strip.  Then a second inset strip went around the entire center.  Finally the border was added.  


Second:  The  width of the  border should be at least one-half to two-thirds the size of the quilt block used in the quilt.  This proportion keeps the eye on the center of the quilt which is the most important.   The overall finished width of the border should not be larger than one quilt block.

The photo on the left shows a scrap quilt I love, but the border is too narrow overall.  Its just not one of my most successful quilts.  The quilt uses 2 blocks, a snowball block and 9 patch variation.   Both were 6 inch blocks.  The first border (the zig-zag area) is 3 1/2 inches and I used a 3 inch final border of floral fabric.  My thinking was the border would be almost equal  to the block size, and I should not make the outer any larger.  Wrong!  When I look at it now, it seems unfinished, out of proportion, off-balance.  Because I did not stop the design with a sashing, the out border needed to be larger than the inner one. Just one more thing to keep in mind.


  Potpourri is a more recent quilt made using the Faux Braid pattern.  
The blocks are 9 inch half log cabin blocks.  A 1 1/2" inner strip and
then the 5  outer border  create a good finish.  It's pleasing to my eye
so that means the proportion is about right.   
  Another thing to notice about the border......using a light color border lets the
center design float across the quilt.  A darker border would add weight to
the overall look and create a framed effect...see the bargello above with a dark border.  


Third:  There are always exceptions to the above because each quilt tells its own story and has its own rhythm.    If  I was adding applique (or a type of pieced border)  to the quilt, the outer border  should probably  be wider to keep the overall appearance in balance.   

   And if you are in doubt......skip the border!  Add another row or two of
blocks and then bind it.   

So, my general rule/formula is a border about 2/3 the size of the block used, and be prepared to rip it out or add to it if needed!  When I find the absolute for border width, believe me, I will write the book.  
Until then....happy stitching.

Thursday, January 1, 2015

Review and I resolve....

A few resolutions for the new year....maybe I can keep a few of these.  And maybe you can find one that fits you.
I resolve.....

  • To look forward, and watch where I step.
  • To love others.
  • To buy fabric that I don't really need.
  • To appreciate others and say Thank You more often.
  • To start projects that I really want to make.
  • To sew as much as I have time for.....no, make that to sew a lot!
  • To eat chocolate in any form, at any time, to heck with the calories.
  • To admit my mistakes.
  • To make others smile.....as I laugh at myself.
  • To be a goofball or a slug, depending on my mood.
  • To keep my promises.
  • To just say "No" when I don't want to do something...I am old enough to not need an excuse.
  • To enjoy the good moments and cry through the bad ones.
  • To read a few good books, bake bread, and buy more fabric and thread.
  • To change the batteries in my computer mouse before it dies.
  • To believe I can make a difference.
  • To know when to keep my mouth shut.  Okay, maybe this one is already broken.
  • To make quilts!
    I will call 2014 the Year of the Feather....I improved so much.  I put feathers in almost everything.  Here are a few high points.  
   The border of the Whopper quilt, aka The Buzz Saw, was filled with endless feathers.  Frosty Morn has feathers in the diagonal bands. And Mid-Winter Dreams got feathers in the border.  


   When Evening Comes is a repeat of the pattern used in Frosty Morn.  No feathers but a stylized vine of leaves was used in the light diagonal area.  
I absolutely love this pattern, and will make another one I am sure.


    A Nickle Saved was a Let's Book It project.  Charms squares...5" size equals a nickle to me....and lots of 1" strips make a quick quilt to share as a donation quilt.


My favorite small project was Charming Bricks.   It was another Let's Book It project, inspired by the smaller version done as a table topper.  And I seem to have lost the photo of the small one.  
   A lot of photos were "misplaced" on the computer this spring when Wonder Geek and Sir Old Man rebuilt my computer.  I know the photos are there somewhere....I just can't seem to find them.  A small price to pay for a better working computer.  


   The two cascade projects......one of light and one of dark blooms....come in second favorite.  I enjoyed playing around with the design on these.  Creating the wavy design was not as easy as I expected.  


   How do I pick a favorite?  At least I can say this one ranks up there high on the list.  Tripping Through the Flowers is my banner header now.   Small Trip Around the World blocks were done in floral fabrics.  This one is really me.  


  Next year....no, this year will have more floral quilts and projects.  And scraps.....where do they come from?  Ah, yes, from those quilts I make!  You can't have one without the other, it seems.  So I plan on making a ton of slabs to get the strips and strings under control.  Then I will set them aside for a while.  A couple of things need to be quilted and then on to new projects......  
a log cabin, and  an Irish Chain are planned.  There is also  the new Free Motion Challenge to participate in at Quiltshopgal----formerly  SewCalGal.  Monthly Linky parties, and all kinds of prizes too.  I plan on following and learning...no prize needed for me.  Inspiration is always a plus in my book.
   So it is 2015......how did that happen?    I put up the new calendar and that always amazes me.  Seeing that new number is mind numbing sometimes.  So I leave you with this thought.....
   Time should not be measured in years, but by the footprints (and quilts) we leave behind.  As long as I am walking, time is mine!  Happy stitching.

Wednesday, December 31, 2014

Booking It...again

  Let's Book It over at Vrooman's quilts has kept me going this year.  So why miss out on a good thing?  Thanks, Sharon, for having the insight to enable so many of us to make those projects!
  From August....a finish.
I showed this a few days ago, but here it is again.  I called it A Nickle Saved because of the 5"squares that it used up.

Sonja's Windows  For the New Year, a new Let's Book It project.  I offered a PDF version of the pattern yesterday.  So far I have sent about a dozen off, but several commenters are "no-reply" bloggers.  That means I have no way to reply and send a pattern.  so either link your email or send me a personal email.
   I thought I would share a few tips to make the Sonja's Windows pattern.

Once the "slabs" of strips are made, you need to square them up to 14" by the pattern.  (Of course, you could make them smaller---like 12".)  But for this one, I think bigger is better.  I do not have a 15" square ruler.....so I rigged this up.


   By taping together two different rulers, I created something that would be stable and not shift while cutting.  I used my 12 1/2" square taped to a longer 6" ruler.   I used a wide blue painter's tape for this.   Then I used the narrow 1/4" masking tape to mark the correct edge measurement.  That is a help for these older eyes of mine.
  Secondly, I made the first cuts to size by trimming the long straight edges first before trimming the top and bottom---across the strips.
 
 Pin the corners before you sew  two slabs together.  Remember that one slab is running vertical strips and the other one is running horizontal strips.


  Then cut diagonally from corner to corner ---both ways.  You end up with 4 blocks that are 9".  The edges are bias, so don't cut until you are ready to add the narrow strips to stabilize the blocks.


    This is the first batch of blocks with the added strip in a goldish tan. Actually, I am using a couple of different fabrics of the tan.  Also, you might note that some of my strings/strips are pieced.....I needed to do that to get enough length for some pieces.
  More slabs to make....more strips to piece....a couple of quilts to make.
Happy stitching....while Booking It!


Tuesday, December 30, 2014

String/strip busting pattern

Sonja's Windows  Time for some string/strip busting around here.  My string bins are overflowing with cut off pieces and leftover strips.  I refuse to move them to larger bins, so it is time to do something about them.   I have them sorted---mostly---by color family.  I pulled out the idea file and found this oldie but goodie.
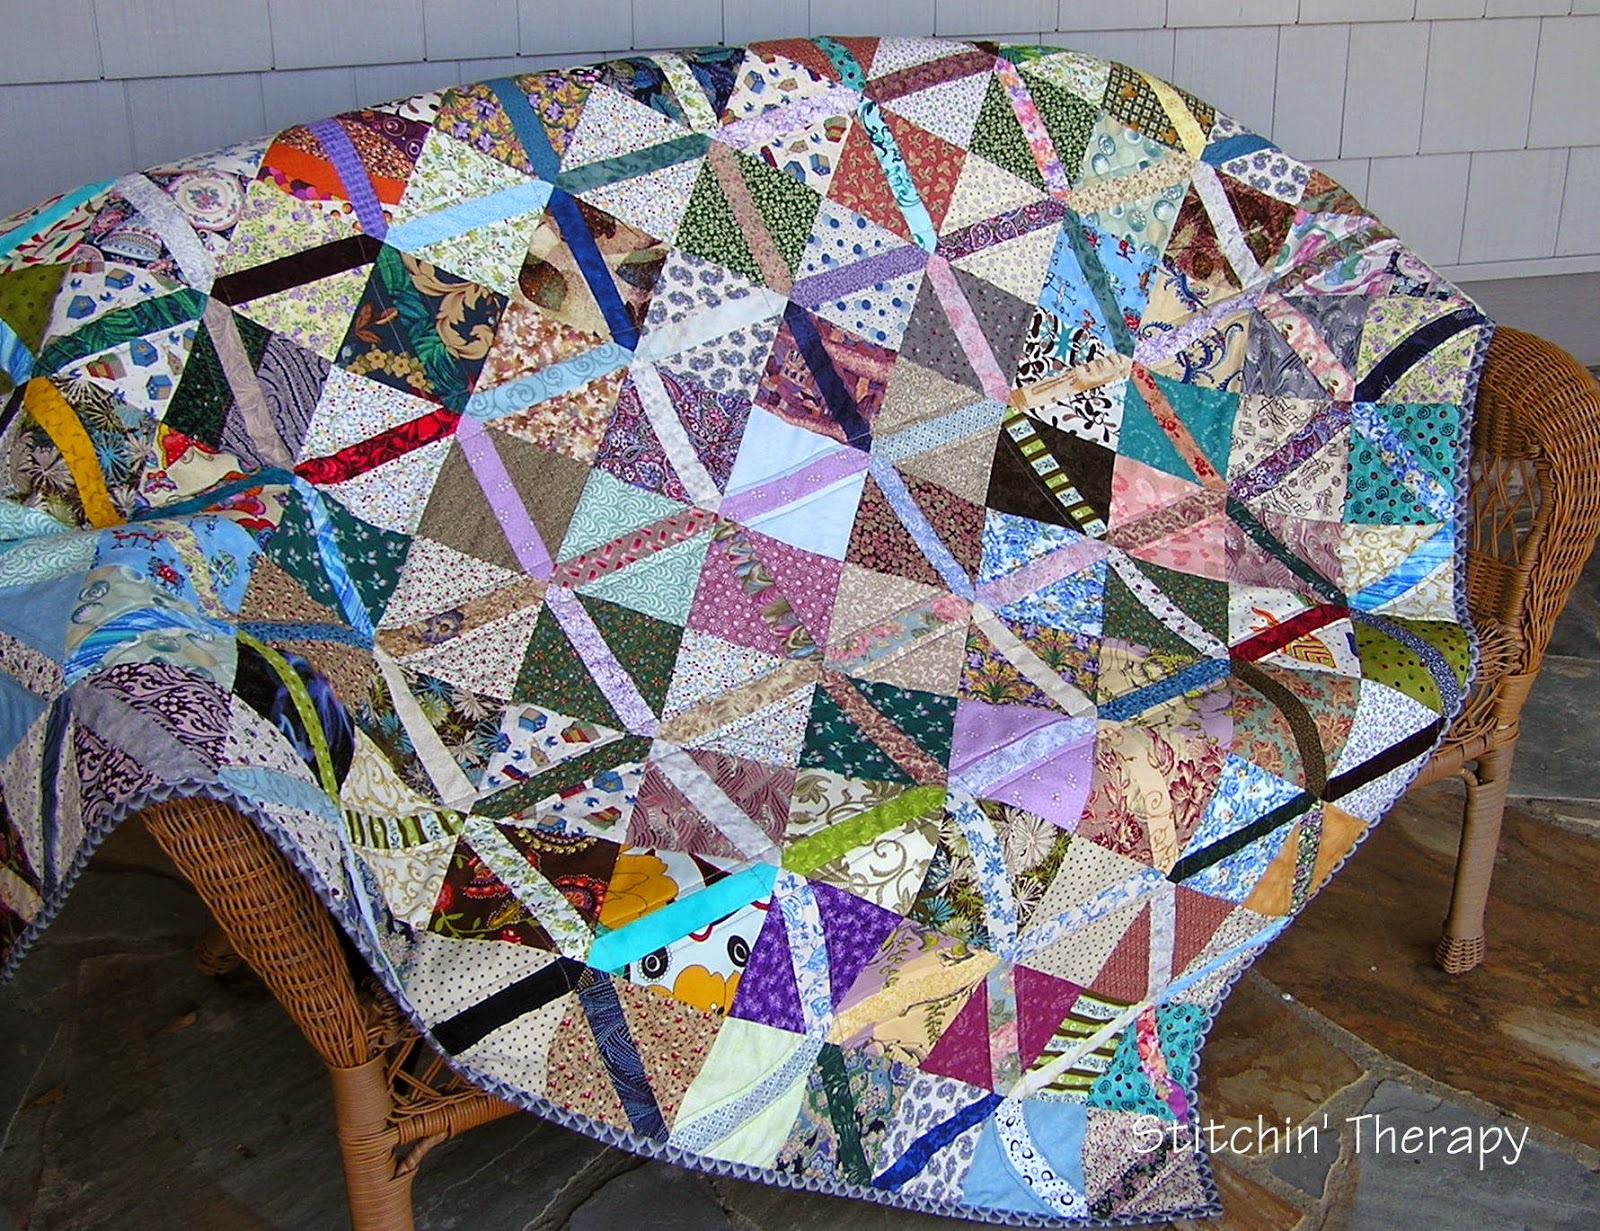
   This is called Sonja's Windows. And I blatantly stole the photo!    It is from America Loves Scrap Quilts 2009.  The quilt shown is by Candace Hassen.  She was a guest speaker at guild last year, and I really liked this one.   It should be good for using up some strips and strings.
  You begin with a 14" slab of straight strings and strips.  I am playing around with color family slabs......so that hopefully, one diagonal section  will be of a color family.  Then I think I will mix up the colors in  some other slabs for the other half section.   What is nifty about this pattern.....from 2 slabs  you will get 4 blocks!  More about that later when I get to that part.
   I call this mindless sewing....just the hum of the machine, one string after another until it is wide enough.  My mind wanders and relaxes, while I digest the holidays and anything else that creeps in to my brain.  I am not ready to tackle anything complicated or planned.  I want the cobwebs to float away and be refreshed for the new year in a few days.
   So if you want to join me for a little slab sewing, I have the full pattern in a pdf file......I will be naughty and share, if asked.   That is if the quilt police don't catch me.   Happy stitching.  

NOTE:   Be sure you have your email response turned on.  I can not email you the PDF if you are a no reply blogger!  You will need to send me a direct email otherwise.

Saturday, December 27, 2014

Wood shop and a finish

 
From the wood shop:
Some progress on the bed.....

It is time for a "dry fit" to ensure that all the pieces are cut to the right length.   This is the food board section.  This part is much like checking the pieces of a block that are cut.....you want to make sure you did not over look something before piecing begins.  
    And the next photo is a detail of one of the legs.  I love the slight taper and the extra routed detail.  


   Sir Old Man informed me he needs a few more boards to finish up the head board slats.  So it will be a trip to the wood store...lol.  Translated that means.....you can go get more fabric, if I can get more wood!  Sounds like a fair deal to me.  
   So while there is progress, there is a long way to go.  Sanding, and fuming, more sanding, finally assembly and then the finish goes on.  I think there is more sanding involved with that too.   Like making a quilt, there are steps and details involved that no one ever sees or thinks about.  I am enjoying watching the process.

   
  I began this project as a stash buster and a Let's Book It project back in August!  Click here for that post.    I have been working on it  off and on, between other things since then.  I used up my stash of 5 " squares and decided to call it done.

   Naming this one was easy....5" squares are nickles, so A Nickle Saved it is.   I decided to just use straight line quilting on either side of the dividing strip, just to keep it simple.

  This pattern is simple, and effective one to keep in mind for those large scraps.  I like mixing it all up, but it would be great with batiks, or solids with mixed lattice strips.   
    I still have a couple more quilts ready to machine quilt before I jump into new projects......but I do have plans for 2015.  It will be time to make more scraps.
Happy stitching.  

Sunday, December 21, 2014

Four Days before.....

  With sincere apologies to the real poets of the world......
Four days before Christmas, I had just checked my list.
 Gifts were bought and cookies were made.
Today I'll do laundry, so clean clothes will abound.
I was just sitting down, and there arose such a clatter.
I jumped from my chair to see what was the matter.
The racket was loud, vibrating, a clank.
Sir Old Man came a running, as he yelled "Shut her down".
 Out came the pliers, a screwdriver, and such.
Oh,  there's the flashlight, and the vacuum we need.
Up came the lid, off went the back.
The lint was a flying, while looking
for something  that had to be stuck.
Not the basket, nor belt, no mouse could be seen.
Not a sock, or a goblin making it scream.
Unbolt the front and what did he see.
The fan was dismounted, come loose it would seem.
A screw that was loose had created the scene.
Mrs. Claus feels exhausted, quite shaken you know.
Wet clothes on some hangers are nothing to show.
Sir Old Man is so handy, always ready to work.....
Disaster  averted, all is well...I was such a jerk!
Insight:  Before a holiday, expect an appliance to break or malfunction.  It is part of the cycle of life.  And your temper tantrums do not help.


 So on a merrier note....... my favorite little hang up for Christmas.  He always makes me smile.  And after today, a little cheer will cover me quite well.  My lists are long for the next few days, so I will return next weekend.

  May you find some peace and solace during this season with friends and family.  Hug them, and love them.  Hold on to them tightly and cherish each moment.  The gift of yourself is the one that counts.  And a little fabric never hurts :)


Related Posts Plugin for WordPress, Blogger...