Monday, February 14, 2011

Higher Hope

The scrappy braid has been hanging around since
January, waiting to be finished.  It is now bound --with lots of left over strips---and labeled, as
Higher Hope.   It was so beautiful outside this morning, I just threw the quilt over the bench on the porch for a quick photo.  Click here for a full photo. from an earlier post.   This one is staying here....I have claimed it.  I love how the bands of color float on the black background.   It ends pointing up to my higher hope, a good reminder of where my mind needs to rest.   


     I am part of the meal team at church and one of our members is doing a free seminar for us.  She is known as the Clever Coupon Chick.  So while I was printing up the label for the quilt, I decided to do a quick graphic for a  mug rug for her.  I just printed it on Printed Treasures and cut it out to feature. 

One final thing..... Insight Clean your machine....inside and out.  I removed the bottom cover of my machine and yuck!  No wonder it was running heavy and would skip once in a while.  Lots and lots of lint and batting fuzz.  Russ helped me get it all out and then oiled the wicks for me.  She runs and sounds so much better. 
Happy stitching.

Friday, February 11, 2011

Journal Quilt 7

    Believe me, this journal quilt is not what I had envisioned from my sketch.  This one got away from me, and became a force to itself, or rather an expression of what I have been fighting for a few weeks.  The edges are crooked, the lines skewed and shadows shifted..... and it is hard to look at for long.  So if you leave without going further, I will understand. 
    I intended to create a heart broken into puzzle pieces that were scattered and cast shadows.  But when I pulled out the black and white fabrics again, the floor moved and the room spun.  I put it away.  I decided to try again the next day, and to make it easier I just cut out hearts.  When I placed them on the red background, vertigo exploded once again.   I got the hearts fused that day, but put it away again. 
   It's a week later and the vertigo is still here.  (Yes, I have doctor appointments set up to get checked.)  And the journal project was still there too.  Yesterday, after a bad bout, I decided to tackle the project again......so what you see is Vertigo.    Don't laugh.....okay, do laugh.  It looks better in the photo than real life.  How is that possible?    I think there is a life lesson here....I'll let you know when I figure it out.   Now that this is out of my system, I promise a better journal technique next time. 
  Till then, happy stitching. 

Thursday, February 10, 2011

Details to the window box

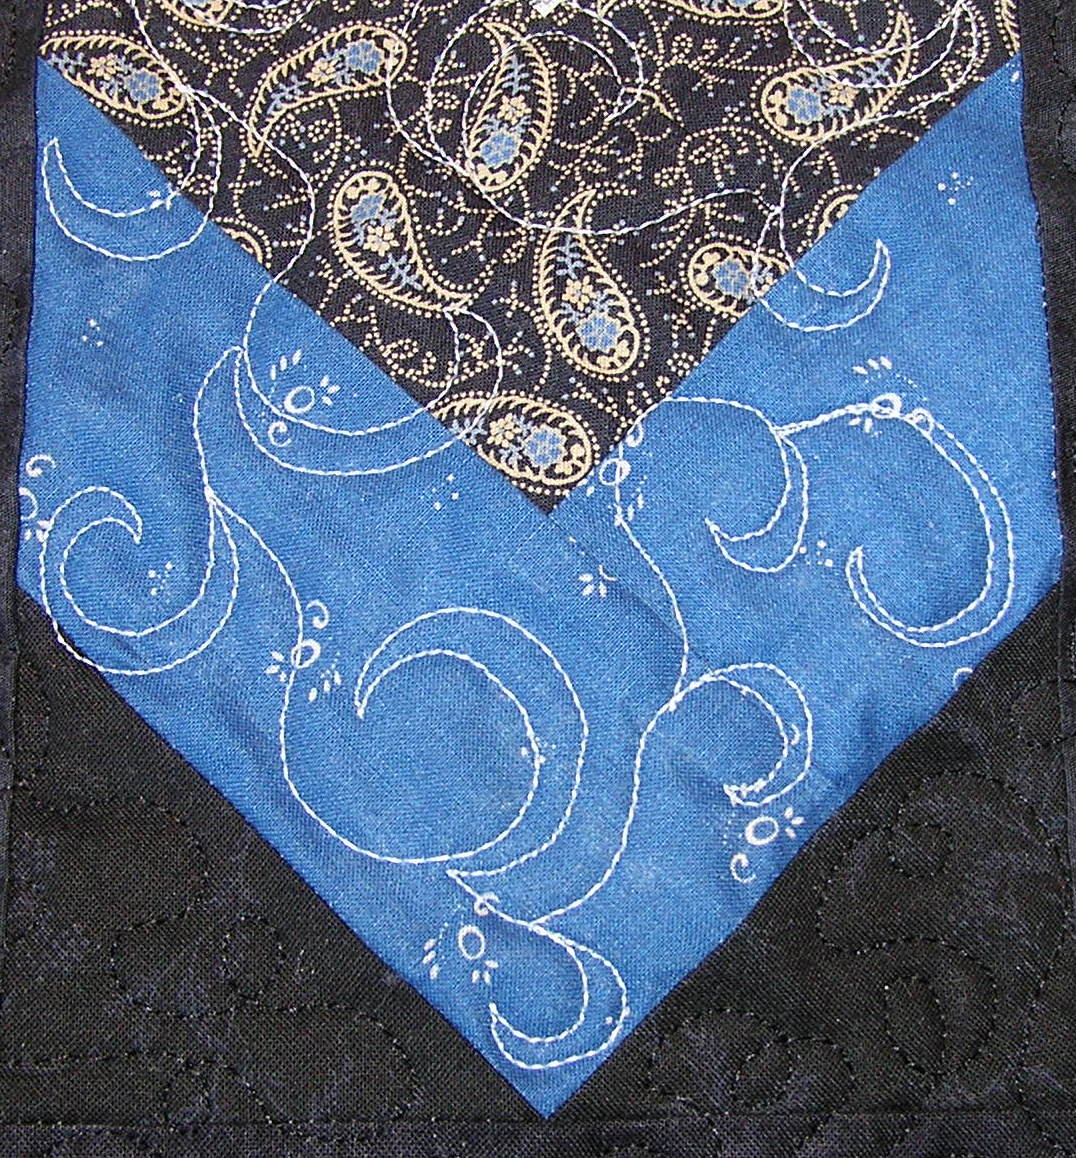
The quilting is done on the braid.  Here is a photo of the loose meandering swirl that I used.   Now just to get it bound and labeled.  

Back to the window box:   The seams are sewn and now for the details.  I auditioned fabric for the window sash and the shadow on the window frame, and came up with a couple of  rusty  brown fabrics that worked.  I put fusible on the backs and cut a few narrow strips.
  Now to find some leaves, small blossoms to fuse in areas where there is a hard line that needs to be softened.  The overall point is to fool the eye and make it appear natural.  Remember nature abhors straight lines.  While digging through the stash I found a perfect feature "to perch " on the a vine by the window sill.  Look close and you can also spot a couple of blossoms and leaves that were fused and stitched on too,  to soften a hard line.   

A new favorite:  Stitching while watching recorded shows of American Pickers on History Channel.  These guys are a hoot, but I adored Dani--and all her tats.  She keeps them going...girls rule!

Tuesday, February 8, 2011

Another blended floral


Sorry for the confusion to those of you who were looking for this post....Yesterday I hit post instead of save before I got the photos together  ;( 

Summer Garden 2006 is an early quilt and  was done using strips of florals in the courthouse steps pattern set on point. I love the muted effect.  The basic layout was based on value---- all light blocks in the center;  a set of blocks that were light on one side and medium on the other; and a last set of blocks that were medium on one side and dark on the other.  Set on point the blocks blend from light in the center of the quilt to dark on the outside.  I have absolutely no idea how many different fabrics I used for this....so don't ask me to even guess!  
    So why not try something similar and use a different block?
   With that thought in mind, I experimented with EQ7 and decided I liked the results using the quarter log cabin block.  The overall layout I played around with is  very abstract light and dark areas, rather than arranged from one value to the other like the above photo.  I am not going to lock myself into a specific design right now, but rather I want to let the fabrics flow and do their own thing---creating light and shadows.
     And to throw another wrench into the works, I thought why not mix up the width of the strips within the block.  After all, I had a stash of 2" strips and 2 1/2" strips and a few 3" strips, too.  What would happen then?   On the computer the blending looked good.....even with different size strips.
    Next  I did a little math before I began this experiment.  I needed to determine what size block I was going to get if I mixed up the widths.  I came up with a basic combination of 2 strips at 2 " and 2 strips at 2 1/2" would work up at 7"--which would finish off at 6 1/2".   Another combination that would work was a 3" corner block and 3 strips at 2", or 1 strip at 3" and 3 at 2".   Enough math!  There were combinations that would work, and I would rather sew than add.  Besides, I could always add another round to make them larger later on.   I made a quick chart of combos that would work out and got to stitching a few sample blocks---based on value not color.

This first block--on the left-- is light to light- medium.  The corner square is 2", then 2 rounds of 2 1/2", and final is 2". 

On the right is a different combo of medium  to dark-medium and the rounds are a 2" corner, 2" round,  and then 2 rounds of 2 1/2". 


So I think this part of the experiment worked.   And these 2 photos are good ones to study for the type of florals I like to use for this.    But it would work wonderful in batiks too!
   Now, to make more blocks, in lots of combinations of value.
   So grab your strips and happy stitching.

Monday, February 7, 2011

Skeleton leaves --when I am old

   When I was playing around with thread painting a couple of weeks ago,  I did a few leaves or at least outlines of leaves.  Inpiration came when I picked up a leaf on the porch---about half of it showed only the fine web of veins.  A leaf skeleton.    I went back and heavily  stitched the outline and veins in to create skeletons of the leaves.     Once  the leaves were cut out and the solvy stabilizer was washed away, the effect was  just what I wanted. 
    I found a couple of left over 9 patch blocks to use for the background.  Boring by themselves, so  I slashed  them and mixed with a purple.  Then when I put the red leaf on the purple, all I could think about was the poem When I am old.....I shall wear a red hat with a purple dress.   LOL.  Skeleton leaves are old ones, on their last legs, so why not let them celebrate one more time. 
So  Skeleton leaves---when I am old   is  the next Journal Quilt #6 .  Techniques used....thread painting, leftover blocks, slashed, raw edge binding, and a giggle!
Happy stitching,

Saturday, February 5, 2011

Revised window box

     On to the revised version.....I kept looking at what I had on the design wall and felt it was just too dark at the top.  It felt weighty and was very much like one I did before.  So off it came.   I wanted to create the image of old stone work along the top with the vine growing up one side.   I also reworked the flowers, and removed the pieces for the window box.  Russ suggested I do more of an offset design this time...hence the extra row on the right.  I think I might accent the offset with borders of different sizes too.  I can decide that later. 
   So far I am pleased with the result---just a few more tweaks in spots.    Then  to get all the pieces fused in place---before they fall off the grid.  Once the seams are sewn, I have plans to add details to the windows and such. 
  The blended braid is about half quilted---2 projects going at one  time and the sewing room is a disaster.   I need to clean up all the 2" squares so I can get back to quilting.
Happy stitching,

Wednesday, February 2, 2011

Water color window box


I'm just getting a start on this window box for a wall hanging.  So I thought I would share the process along the way.
     I tacked up a huge section of the gridded interfacing and began with the window panes.  I am just using squares of 2 fabrics for the window panes.   Then I moved to the frame around the panes and the flower box.  Across the top of the panes and down the center,  I used 2 different fabrics of the same value and color.
  I decided on the approximate spot for the flower box, and used about 8 squares of a swirled fabric for it.   I blended from the flower box up to  and over the panes  with lots of colors and size patterns.    Last I have begun at the upper corners---very dark here--and will blend  across and down the sides. 
   It really helps to stop and take a photo to see what works and what doesn't.  Right off, I can see now that on the left, I lightened too quickly from the flower box.  That area I will rework to get rid of the hard line.  Second spot....right window pane bottom, the golden tan square has got to go.


  I am not exactly sure where I am going with this, or how large it will be.  I am taking  inspiration from a couple of photos of  English windows.  I will just see where it ends up.


Happy stitching.


Related Posts Plugin for WordPress, Blogger...