Showing posts with label block pattern. Show all posts

Tuesday, August 11, 2020

Mixed bag

  I am continuing to piece...no pinning or quilting for now due to the pain in wrist and hands.  When the grip is weak, it is better to just do random piecing.  So I have a small mixed bag of blocks for projects to share.


  The Easy Breezy leader and ender project from Bonnie Hunter has a few blocks completed.  The small tray on the left has a good stack of sorted paired parts for blocks.I am clipping the finished ones into stacks of 10,,,,so 11 done so far.


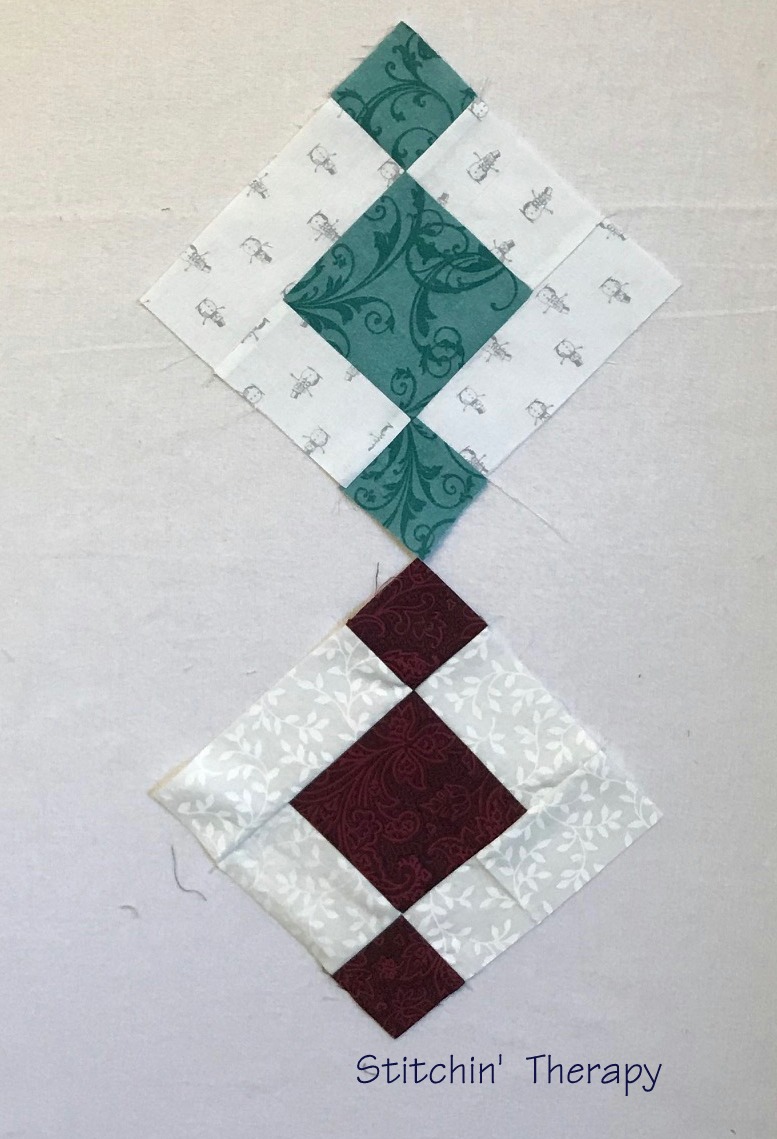
  Bricks and Stepping Stones is a pattern also from Bonnie under the Free patterns here.  This is really an unfinished leader and ender project from years back.
  I am using floral 2'' squares for the small four patch units.  Then these are set in the corner of more solid / tonal fabrics.
Bonnie's original pattern is set a bit differently into long rectangle blocks.  This is just another variation.


    What I am really trying to piece....5'' spool blocks....and the leader and ender units go in between sections of this one.   A few blocks / triangles got a bit wonky, but they can just join the fray.    I have about 30 of these  to date.

   I have a written list of sizes for cutting the different parts for all three of these different blocks.   So obviously the same fabric will appear in spots in each of them probably.
  From one 2'' fabric strip  I might cut a 5'' strip and 4 squares for the spool block, and also 3 1/2'' pieces for the Easy Breezy block.
  Then I can sit and sort and put together fabrics I like for latter piecing.

   On the home front.....I got out of the house over the weekend when we ran a few errands.  A quick stop at Big Lots with masks--ugh--for a new small electric chopper.  I found the 3 cup size which is a bit bigger than the one that died.  I should be able to use this for chopping leftover roast for enchiladas!  Good thing :)
   Not so good to see was the massive amount of construction and changes taking place around here. They clear cut land and trees to put up homes and apartments, then will eventually plant pencil twigs to replace the old growth.  Sigh.   Then we saw another couple of acres cleared for a new grocery store.  Fine, if they keep the shelves stocked.  I guess it is the growing population moving here that is keeping our shelves slightly bare.
  And lastly.....bad storm a few days ago, and I remember hearing an extremely loud crack and flash.  This morning Sir Old Man spotted the tallest pine in the back leaning, dying, and split at the base.  Lightning hit.  He is calling Lupe to take care of it.  Oh, and the earthquake.  LOL....yes, there was an earthquake of 5.1 in NC yesterday morning.  It was felt here, but no damage seen here.  More shaking on Monday morning, very light.  I am thankful for that. 
  Off to do some therapy sewing.  Happy stitching.

Monday, May 25, 2020

Catching up

  Time to catch up.....I know it has been a month since I posted and several emails from readers reminded me to wake up. 
 
  We had a very nice Spring and Sir Old man worked tirelessly in the yard completing projects from my list for him.  We had 2 truck loads of mulch spread over the beds to give them a refresh.  the crew also planted a couple of new trees we got for Earth Day from the power company and Clemson. 
  Sir Old Man finally added the birdhouse he built for the Bluebirds.  And can you believe it is already occupied!  It has been fun to watch them darting in and out or sunning on the roof.  he is inspired now to build another one for the front yard. 
   We spent one Saturday morning adding some edging plants to the back bed.  It was one trip/venture I made away from home....to the garden center nearby to select some herbs and ground covers for the back.  And yea, we ran into a quilting buddy.  Waving to Yvonne!


   I was working on the insanity during the pandemic quilt last time  I posted.  It is assembled and ready to quilt.  Thanks to Sir Old Man learning to pin a quilt!  Without his help I would not have gotten both of these ready to quilt. 
  The top one is  another wall hanging build around some more pre-printed panel parts.   Small sections  of watercolor florals frame the parts I put together.  Fusing onto interfacing and simple stitching, I can handle right now. 
  Note to self....you are now out of both batting and interfacing.  Need to order both.

 Both of these are smaller so I am hoping I can manage the quilting. 

  We have had over 7 inches of rain in the last week.....stormy days and such.  All add to the aches in the hands and wrists.  So for simple stitching time.....personal therapy session.... I have been doing some scrap  and crumb piecing. 


   I have a small basket of bits and pieces by the machine.  It is easy to grab a pair and build a section like the center part here.  I needed a leader/ender project while stitching the fused floral units for the wall hanging. 
  I decided to use the light print with and rosy vine on it for a constant thru out.  I have quite a bit of the light, which I am sure I was saving for something that will never happen, and this seemed a good time to use it!
   Beyond freely stitching and a light press for now, there is no real plan.  I have about a dozen together , so many more to grow.    I will square them up to a common size on a less painful day. 

    Our world is beginning to open up a bit.  Sir Old Man has been doing all the shopping, and keeping me home.  I am allowed to ride along when he gets gas or goes to the dairy.  There are times you need to see that the world still exists.  I went to the podiatrist last week but had to wait in the car until they could slip me into a room and then right back out.  I was notified that another of my doctors retired......I am assigned to a new one for next month.  Oh, joy....lol. 


   So while I chose to not blame anyone for what has happened, I do recognize the take aways  during this time. 
   Never forget how much freedom means. 
   Never freely give up your rights to be free. 
  Forever and always be thankful that we are free, and live in a wonderful country that lets us be free.     Free to love others, free to be ourselves, free to walk among the world.
   And today we remember those who died for our right to be free.   And once again I share a favorite wall hanging entitled Remembrance. 
  Happy Memorial Day.
  Happy stitching.

Thursday, March 5, 2020

Recipe for the blended 4 patch

   I have been sewing a row or two at a time on the blended 4 patch.  I have two sections done....2 opposing corners, and the center band is in the works. 
    I have trouble calling it a blooming 4 patch as it does not explode like the 9 patch does.  This version is a little quieter :)  For those who asked how I was putting this together, here is my formula or recipe.

    This is a mock up done in EQ7.     I used 4 colors for this layout with the center color also as the outer color.  The basic technique is the same no matter how many fabrics you use.  There is one round of squares in the fabric, then a round of 4 patch units in the fabric from the previous round and the fabric of the next round.  So the 4 patch units are the bridge to blend the 2 fabrics.  Clear as mud?     


   I worked with 2'' strips because I have tons of them.  If you are using 2 1/2'' or etc. strips you need to do the math for sizes of large squares to cut.  The large squares need to equal the size of the 4 patch units.

Working from the center out, these are the rounds of units needed.

Fabric A---center.  This layout begins with 2 large squares.
A/B --------6 of the 4 patch units
B------------10  large squares
B/C--------- 14 of the 4 patch units
C ----------- 18 large squares
C/D--------- 22 of the 4 patch units
D----------- 26 large squares
D/A-------- 30 of the 4 patch units
A---------- 30 setting triangles plus 4 corner triangles.  *

*  I cut the setting triangles from a 3'' strip of fabric to avoid the bias on the edges.  The finishing corner triangles were cut from squares.  

Note:  For some of the large squares I did a cheat technique.  Because I was working with 2'' strips, I sewed 2 rectangles of 2'' by 3 1/2'' together to form squares if I did not have yardage to cut the wider width.  

I found that I got about 10 sub-cuts for the 4 patch units from each WOF strip.
From the wider 3 1/2'' strip I got about 11 each of the large squares.  Again....all this depends on your strip size that you are using.  

The layout...unfortunately...is on point.  So you sew those dang rows on the diagonal.  A tip from a comment by Left Handed Quilter helped a lot as I was sewing the rows.  I am sharing it, as maybe it will help others.  
Those dang diagonals keep me on my toes, too! Sometimes I sew (oversized) setting triangles to all of the end blocks first. I do one "side" at a time - with them all oriented the same way - and then put them back on the wall. When I'm done - I take them down - one row at a time - stacked in order - to sew. It works for me - LOL - ;))
This would be great in batiks or tonal prints.  Don't be biased by my florals! 

The size illustrated above is ending up 34'' by 38'' I think.  I do plan on a small border as I want a wall quilt over the sofa.  Fabric requirements for this size...
About 3/4 yard of each of the 4 fabrics. 

I have counted and recounted squares and numbers until I am a bit loopy.  I can't guarantee no mistakes,  but if one is found, let me know so I can stand corrected. 

Now I am off to sew the last two rows together.  Hoping the weekend to get the sections joined.  Happy stitching. 

Wednesday, July 17, 2019

Lattice blocks and link

   I have 2 bins of fabrics to sort thru still, but not yet!    There are about 30 more blocks already cut and ready to sew.
   I wanted to make sure I liked the batik blocks mixed in with the floral fabrics.   I began filling the design wall.
 Yes, I like the combos.   And I have something to gaze upon instead of a blank wall.


Once I have a few more blocks sewn and up on the wall, then I will worry about shifting things and the layout.  I'm not sure if I will let things fall where they may, or lump colors or values.  Time will tell, I guess.


  I had a couple of emails about the pattern.  The original pattern I tore out of McCall's Quilting in 2007, called Trading Patches.
   Anyway, I did some hunting on line and finally found an archive link....here
  It is not the original article but a resized throw.  The details are the same.

I started  with a 5'' square, slice on the diagonal and add a 1 1/2'' strip to those diagonal cuts.  Block is squared up to 5''.
I mix up the matching when paining the lattice strip to the square of fabric.  Meaning some dark squares get medium to dark strips added, and others get light ones.  The same for the lighter squares.

  I also ran across another variation while searching.  But I did not save the link.....the 5'' squares were cut on the diagonal as this pattern.   But, different halves of the square were sewn to either side of the lattice strip.  A little busier variation but the same technique.

  A new subdivision is going in nearby.  The old golf course was sold and the developers are blasting....blasting with dynamite thru granite.  I don't know why they want  or need to dig so deep, but our nerves are on edge with the vibrations and shaking.  Yesterday, we thought it was an earthquake.   Hate the growth and such out here.  We thought we moved far enough out of town.  Guess not.
  I'll be found in the sewing room avoiding the heat and noise.....happy stitching.

Tuesday, May 21, 2019

On my own

    I am on my own for a week or so.  It actually feels strange.  Up at 5:30 am to see Sir Old Man off, I napped a lot during the day.

  Sir Old Man landed safely last night.  This is out the window at 11 pm.  Snow, big mountains, still daylight......where is he?


  He had the opportunity to join a mission group from church.  Well, actually, I saw the notice and nagged until he went to the information meeting.    LOL.....it was meant to be. 


   This should give it away.   He is in Fairbanks, Alaska.  The team will be doing maintenance and repair of the buildings, and such at Camp Li- Wa. 
   For him, it is full circle as the Camp is now affiliated with the mission at Victory Camp.  His parents served as missionaries in Alaska--he was 6 weeks old when they moved up---- and helped clear the land and build the first buildings at Victory Camp. 


      So I get to "retreat" here at home....on my own.  I caught Bonnie's quilt cam over the weekend and thought the tulip blocks were so cute.  I like the idea of a small wall hanging or table runner, so I am working on a few to see how it goes.  I am not organized enough to use these as a leader/ender......too many small units to get mixed up.  I will say that if I wanted a quilt of them, I would be making larger blocks.  These are 6 1/2'' unfinished.   I think Pat Sloan showed the same pattern in a larger size recently.  Larger is easier on my fingers. 


  Weather finally cleared....and turned into summer.  I mean 90 degrees in May?   But it stopped raining and we had a couple of nicer days.  So I took a couple shots of the Jewel Box Star outside. 


   I have a couple of movies lined up on Prime, the Featherweight to get set up, meals in the freezer or a salad,  and I will be ready to stitch thru the week. 
Happy stitching. 

Tuesday, April 2, 2019

FMQ on Bead blocks

 
   Slowly regaining my strength,  it  took me about 5 sessions this past week to get the Chandelier Bead top quilted. 

  I wanted the colors of the "beads"  to be the focus so I decided not to do an overall quilting pattern.  Lots of texture came up with swirls in all the "negative" space around the beads in the block. 


   In case you don't remember this block from a few months ago, this is the post and snapshot of the block I worked up in EQ7. 


      The border is in a teal blue tonal pattern.....I switched to medium gray thread so I could see what I was stitching.  I debated on feathers but in the end went with the butterfly wings motif.  It is 3 plumes in a clump and out line stitched to create a group that resembles  a butterfly wing.  Here's a better post and detail on this motif.     It's one I snagged from LuAnn Kessi's blog  and use it often. 


   Time to get this one trimmed up and the binding on.  I will get better photos when it is done.  I love the backing fabric....a crackled blue pattern that reminds me of ice.  It shows off the texture  from the quilting well.

    We had a nice weekend weather wise and awoke to cold this morning.  There were threats from the weatherman about snow flurries this morning, but I believe they lied to us.  LOL....what else is new.   This has been the craziest winter to spring season we have had in a long time.   


  More quilting to come as I have the Jewel Box Stars in floral prints ready to go.  That will be my April challenge to myself.  Happy stitching. 

Saturday, March 23, 2019

Missing March

  After a call last night from a friend, I realized I had been missing for  a month.  I found a draft of this post I began the first of the month with just a photo of a test block.  No words, just the block photo.
   I vaguely remember trying to figure out something I saw or that someone asked me about, yet the rest is blank.    I think it was a response to a question after the last post in Feb. about the Scrappy Rails  layout using squares instead of the rectangles.  So, yes, it can be done with the same or similar design effect.


  The winter weather has factored a lot into my energy level, along with pain level.  We went thru almost 3 full weeks of rain, more rain, and then more and a series of low pressure systems that rocked my world.  I had ordered backing fabric for 2 quilt tops to work on this month.  But before they arrived, I had an attack of sciatica nerve inflammation.  That is to say from the small of the back and hip area, over the buttocks, and down the leg.
  One morning I could not even roll out of bed and I was locked into this pain for 2 weeks.  If I found a position I could tolerate, I did not move.  You can guess how little I moved. 
  Let me preface this with some background.  Much like MS, the Pernicious Anemia I have is a demyelinating nerve disease.     Thousands of miles of nerves are sheathed with myelin in our bodies, for protection and aid in conduction of nerve impulses.  Trust me....things go haywire without this protection.
 
   Anyway....I went onto OTC ibuprofen alternating with Tylenol and dug out the physical therapy stretches  for sciatic nerve.  The stretches are simple, and easy, but very painful at first.  Several days passed before I could do more than 2 or 3 at a time.   The weather cleared and I woke up one morning and could walk!
  I can't really say what did the trick, but for the first time in 12 days I walked down the hall to the sewing room!  I took it easy for a few days to be sure I wasn't dreaming, but made plans to get something done this month.   The weather predicted 9 straight days of warmer temps and sunny days.  I could go for that.


    I had 2 quilts to pin and ready for quilting.  So that was my focus for a couple of days.  They are stacked by Hot Legs....soon I hope.
   It was also time to change out a couple of wall hangings for something  little more spring time.  I found this one from 2012, made while participating in an early version of Project Quilting.  I don't remember the challenge, but know this was based on a photo of a Pasque flower I took in Alaska.  The colors make we happy so I hung it in the office for some springtime color.

   I spotted some fabric while browsing on line.....held myself back for a day.  Then gave in and ordered it.  No sooner than it arrived and I cut into it, did the second round of my March  madness happen. 
  And that's a story for the next post.    Because today I need some machine time.  Therapy for me.  Happy stitching.

Wednesday, February 20, 2019

Adding applique

  It's cold, with a little sleet here....so soup is on and it is warm inside.  I worked on the border applique yesterday.   First part of one corner done.....I need to make more stem pieces today.   And cut more leaves.  I am not going all the way around but plan on at least 2 corners with trailing stems.  I'll do as much as I like or as much as my achy fingers will allow.


  New idea brewing......
I took the time to play around in EQ7 after seeing a different use for small pieces.  The quilt is done in a log cabin setting using small rail fence units.    This link is to my Pinterest save, and the original quilt is from American Patchwork and Quilting.


Scrappy rails in 16 patch block

    I was fascinated by the idea of using the 2 patch rail fence to create units for a log cabin setting.  This would be an awesome leader ender project for scraps.  A perfect donation quilt too. 


  Basically you are making a log cabin style  block of 16 units of the 2 patch rails.  Each small 2 patch rail is alternated in direction--horizontal or vertical.    Each block requires 6 light units, and 10 dark units arranged as shown. 

  I have a lot of 2'' strips....so my cutting would be 2'' by 3 1/2'' log.  16 of these would give me a block that finishes at 12''. 
  If you work with 1 1/2'' strips, then cut 1 1/2'' by 2 1/2'' logs.  The block would finish at 8''. 
   If you elect to sew longer strips together and then cut, use Bonnie Hunter's tips to get variety.  She sews shorter lengths together, say 12'' and then cuts them into her desired size. 

   Happy stitching. 

Tuesday, December 11, 2018

Updating that Block!

  Today was just busy and I never got past answering emails to update yesterday's post.      There were so many good comments and ideas/suggestions for the simple block---Chandelier Bead---adapted from an uneven 9 patch.  If you are like me, you never get back to read all the comments and might just miss something good:)

  So I wanted to highlight and share a few.
  From Carole at My Carolina Home came the idea to use these blocks for QOV or Carolina Hurricane Quilt.  Great idea....red, white and blue:)

From Sharon at Vroomans Quilts is the idea to use this block for the RSC19 ---Rainbow Scrap Challenge.  She's the master of using scraps for special quilts.

Gene Black said he tried a mock up in EQ with dark background and it looked good!  See his version here.

Several agreed with the idea of Christmas fabrics would be pretty.  And a really cool idea from Miss Pat was to make a sample block like for the RSC, and attach a note of measurement/sizes for reference.  Then she doesn't have to try and remember where it came from.

So here's hoping you find some inspiration from the ideas and create your own special one.
Happy stitching.

Monday, December 10, 2018

More of those blocks

 
  Don't say that "S" word around this part of the country......I heard the stores sold out of milk, bread,  and eggs in a few hours.  It's a southern thing to panic when you hear the weatherman say that. 
  Luckily we were on the lower edge of it all and got plenty of rain, mist, and then the sleet came.  All night I could her it pinging on the windows.  I am sure there was some heavy snowflakes mixed it, but we ended up with a thick crust of probably 2 1/2''.  Today it has hovered above freezing and a lot of melting has occurred, but the word is the roads are a slushy mess.  We will wait it out tomorrow as there will be a lot of re-freezing tonight.


  I worked on some blocks that had been cut out already.  I talked about these last week.  Strung together on-point and they resemble beads on a chain, or baubles on a chandelier.  Hence, I am referring to them as Chandelier  Bead block like I found on Pinterest. 

  So I am just playing around with these for now using a white or cream background. 
I wonder what light colored squares would look like on a darker background....just a thought.


  And because I know I will get questions......
   My block is from EQ7, the Uneven 9 Patch Block.  I simply removed 2 opposing corner squares, increasing the bottom and top background strip to the correct length. 
  The size I am using will give a 6 1/2'' unfinished block. 

Recipe  for block:
 Cut from color fabric
    Center square is 3 1/2'' by 3 1/2''
    Two corner squares are 2'' by 2''

Background:  Cut from white/cream
   two strips 2'' by 3 1/2''
   two strips 2'' by 5''

  You can easily make these larger, begin with the center square and do the math:)
I think they would be good in Christmas fabrics even. 
Happy stitching.

Thursday, November 29, 2018

Wrapping up the month and a new block

   Things have settled down and I actually have been sewing a little bit.  Over the last week I have had several emails checking on me---thank you---and a couple of emails sharing projects.


   Lesley had emailed me  back in the spring this year about the heart design I had used in the strip pieced watercolor tutorial. 
  She followed the tutorial and  used 6'' blocks.  This is her design in progress. She wanted it a bit larger, so she added more blocks.


   And the photo of the finished quilt on the bed!  I think she did a wonderful job and turned this design into her own.


  Then I heard from Nirosha, who is from Sri Lanke, and is interested in making a water color quilt too.  She said she was not sure she could do it with her basic skills.  She included photos of a quilt she made from dresses she never wore.
   I don't think she needs to worry about her skills, as that piecing looks very good to me :)   And a second photo shows the lovely floral print on the back.  I hope she saves the scraps for a watercolor project.  Her eye for design is impressive and I like that she is self motivated to try.


And in my sewing room.......

  I have begun joining the parts of the leader and ender Jewel Box Star together.  And today I hope to sew them together  in rows.  It is not large, probably 36'' by 48''.  Small for me, but with borders it will be a good throw. 


   And then I uncovered these blocks....along with about 12 more sets of strips ready to sew.  This is from about 3 years ago, I know.
  The blocks are about 9'' unfinished, so I may work on getting this very scrappy  Scrappy Trips done. ...or at least turned into a top.


     I was looking for some very easy sewing/cutting  to do, when I ran across this design on Pinterest.     It is being referred to as Chandelier quilt block.   It looks like a string of beads to me.
  I went to EQ7 and found a block called Uneven 9 Patch that worked perfect for me.  I just eliminated the color in two opposing corners.
     I kept the size simple to use up what I already have cuts of....2'' strips/squares, and 31/2'' squares.  Works fine for me, even if it is not the exact size or whatever in the modern pattern.  This version will be scrappy.

   A little sewing, a little baking, those are my plans for the month to end the year.
Happy stitching.

Thursday, May 24, 2018

Summer Light


  A new wall hanging, door banner, or table runner.......this is for a donation to my guild's silent auction for the annual quilt show.  I debated on omitting the border.........but opted for making it  bigger for use as a banner.  I used straight line stitching  for the quilting. 


   The border is a very deep mottled green.  And I thought it needed a pop of color  to set it off. 


 The accent strip is a flange.  It is a 1''  strip that is folded in half.  The raw edges align with the edge of the pieced center.  I stitch it in place first with a long stitch.  Then the border is attached as usual.   That leaves the accent flange loose.  It is nice to create dimension.
  For the color of the flange.....it is a buttery tan.  I like the way it brings out the yellow tones in the piece.


  And as I finish up each project, I have more scraps to deal with.  The extra binding from the banner was cut to make garlic knot block.  Guess I will just make these until I am full!


  The garlic knot blocks were begging to be played with too this weekend.   I joined 4 of them together to hang on the design wall.  I decided that the pieced knots will all go in one direction and create the "neutral knot" in the background.
   I have about 40 blocks made and another 15 or so clipped together to be sewn.  I treat myself to stitching a block together when I only have a short amount of time to sew.  Just for fun:)


  The string star is being pinned today, so it can go under the needle soon.  Happy stitching.

Monday, April 2, 2018

Looking forward to April

    I took some time over the weekend to work on the Boxed Squares.  I just love that beautiful blue backing fabric.  I ended up quilting with a medium size meander in an all over pattern.  It is a motif that blends, and is simple.....giving me time to enjoy the quilting motion and pay attention to the fabric combinations that are in this one.     I completely enjoyed  the two sessions it took for me to complete this.  Now it needs a trim, squaring up, a label, and some binding.
Not a complete finish for the month, but close.    I will take that :)

  That means I can really begin /move on to the floral log cabin on point.   This is my April focus project.


  So here are the first batch....of 14 blocks.   I figure a minimum of 30 blocks for a small lap quilt.  I can play around with the design too....wondering if I might just add dark  or scrappy mixed floral sashing to make it larger?????
Time will tell. 


  Here is the info once again for making the log cabin block that I will set on point.  It is often called half log cabin, or quarter log cabin, or chevron cabin block.  Here is the first post about it. 


For each block  Cut:
3 1/2'' square ---- lightest floral
1 @  2'' x 3 1/2'' --- light floral
1 @  2'' x 5''--- light floral
1 @  2'' x 5'' --- medium floral
1 @  2'' x 6 1/2'' --- medium  floral
1 @  2'' x 6 1/2'' ---- dark medium to dark  floral
1 @  2'' x 8''  ---- dark floral

Unfinished block size is 8''.  Finished block is 7 1/2''.


  Feel free to join in and sew along, pick your own color selection, or theme fabric.  

  I finished up at the dentist this morning.....hoping the swelling does not stick around like last time and turn into a major event.  I hope I can eat some soup later:)   Any tissue damage to me takes an extended period to heal due to the Pernicious Anemia.  And I mean any.....a bruise can take up to 2 weeks to disappear.  Tomorrow I go to the podiatrist....last time it was 4 days before I could wear shoes!   At least the temperature is warmer for a few days so I can wear sandals :)    Happy stitching.  

Saturday, March 10, 2018

Log Cabin block "recipe"

  Before I start a block,  I need a  guide to help me keep things straight.   Just like when I cook or bake, I need a recipe.

    I labeled this quarter log cabin block  with the sizes needed using 2'' strips.  The notation of light to medium to dark refers to the value of the strip to use in that placement.    This block will finish up at 7 1/2''.
And of course you could add another round of logs to this and make the block larger.  But since I plan on setting this on point, the 7 1/2'' block is large enough.

For each block  Cut:
3 1/2'' square ---- lightest floral
1 @  2'' x 3 1/2'' --- light floral
1 @  2'' x 5''--- light floral
1 @  2'' x 5'' --- medium floral
1 @  2'' x 6 1/2'' --- medium  floral
1 @  2'' x 6 1/2'' ---- dark medium to dark  floral
1 @  2'' x 8''  ---- dark floral

   This is an early "Heads Up'' for a couple of other readers who have asked for instructions to sew along.    Linda from Art in Search and I had a plan to work on this block together.  She is still recovering from surgery, so her pace has slowed down like mine. 
  So for other readers who are in a hurry, I put together this "recipe" for cutting.  You might prefer to use scraps, batiks, or selected colors rather than the floral fabrics I will use.  I can't actually predict how other fabric prints will turn out.....but that could be a fun surprise.   
   I will repeat the cutting list, which is the correct sewing order too, when we get ready to begin in about 2 weeks.  For now, I plan on making some cuts for testing.

  I have one quilt pinned and one to go...and of course I need to get the two quilted-----that is why the 2 week delay.  At least that is my plan for now.
Happy stitching. 

Saturday, March 3, 2018

Lesson from a log cabin variation


   I have had this project in mind and on my to do list for a while.  This was seen at a quilt show in 2014----all floral fabrics and of course it called to me.

  I ran across several very similar designs on Pinterest over the last couple of years too.  So I finally sat down to figure out the pattern.  LOL......who knew?  It is a log cabin variation.  And I have done this several times with different value placement.


  Look familiar?   A log cabin block called quarter log cabin, or off-set log cabin.   It is the block that became the Faux Braid.  The divided placement of value--light on one side, and dark on the opposite-- was done by Sharon at Vrooman's Quilts and I had to make one.   This links to her tutorial using jelly roll strips. 


  I made not one, not two, but at least three quilts with this block.  And each one looks different.


 Done all in batiks.


   Done in floral fabrics.
  Actually, I did two in florals....one to keep and this one was donated to an auction.   This one used 2 1/2'' strips.


   Again, the same block using 2'' floral strips in a barn raising layout design.  For this one  I had to adjust the cutting measurements due to the size of strip I was using.


  This is a close up of the block in the inspiration quilt.
 Differences to note:
  • First, the starting square is over-sized for the strips. 
  • Second, the design is arranged on-point.  
  • Third, the value placement radiates from lightest in the starting square to darkest to the last logs added. 
  • The dark logs form a trellis design with a 3-D effect against the light areas.  


  My next step was to go to EQ7 and find a block to draft and color.  Then I can make a test block to measure.  (Imagine this block rotated to look like the above inspiration block.)
  I will actually print out a plain block and mark it up with values and measurement.


   A note on the starting square that is over-sized.  My logs will be 2'' strips, so they will finish at 1 1/2'' in the block.   I want the starting large square to be twice that size.  So for the square to finish in the block at 3'', I will begin with a cut square of 3 1/2''.   If my logs were narrower, I would still double the size for the starting square.

  Insight:   Lesson learned once again......from a basic, classic, simple block many design variations can be created.  

  •   The size of the logs can vary and alter the finished design.
  •   The arrangement/placement of value can change the appearance of the       block.  
  •   The setting placement changes it all.  
   I am not re-inventing the wheel, just breaking it down into simple parts.  The design process is difficult for some quilters and I get many emails about how I figure things out.  So this seemed like a great block to give some insight to my thought process.    
  My next step is to do some math, cut some fabric, and try a test block. It's the only way to  be sure it is what I want.  But for now, I have more rows to join on those boxed squares and backing pieces to join......good rainy day sewing.
Happy stitching.  

Monday, July 31, 2017

Just a little thing....

    A message this morning from Martingale, the book publisher, brought this notice of free patterns offered.    I thought the table runner was too cute, so I had a peek.  I have won and bought books from this site before, but did not remember free patterns.   Just thought I would pass the info on about this little thing.


  It almost felt like a fall morning today as we enjoy an early cup of coffee on the porch.    Good to enjoy it as I know it won't stay around too long.    My brother and Remy were up for the weekend, and the news is their  return flight was canceled due to the tropical storm and they will be stuck in town until Thursday!  Sounds good to me, as Remy owes Sir Old Man some time cutting the grass.


On the design wall........
  A small water color has been on the wall  for a couple of weeks.  I had added a narrow border in soft gray and then was not sure of how I wanted to finish it.


   I began playing and fusing squares to the interfacing to add.   I love doing a "reverse value" layout in the borders.  By that I mean the center has a dark edge or bottom in this case, so the outer border needs to be light and work up to medium.
   I have the sides sewn here....they go from light to medium to dark.   Across the top is dark, and they are fused but not sewn.  You loose a good amount of fabric in the seam allowances.  


   Once I got everything sewn, and attached I had this.


   Or would this be better??
   Up side down gives a different view on the world.  It is almost like a path leading you thru an arbor.    Just another way to ask "what if...."


   Have you heard about the solar eclipse?  Well, here in Greenville, SC we are in the right place for a view of the whole shebang!  And the news is already starting to go crazy with dire predictions of crowds and traffic.  Guess we will heard 3 weeks of this .....all for a four hour event.   It's not like people will be moving in for a long stay.  But I do need to pick up the free eclipse glasses.....so stylish I hear.
Such is the latest here......happy stitching.
Related Posts Plugin for WordPress, Blogger...