Wednesday, December 30, 2015

For 2016---- Enjoy!

   Enjoy......my word for 2016.  Enjoy what you are making, enjoy the process, and enjoy the finish.
   I am giving myself permission to begin a project, and if I am not enjoying it..... Stop, give it away, or toss it.   Recognize that some things may not be worth the effort and not everything turns out as you envision.  Accept it and find something you do enjoy.

   2016......what's ahead.

  • There are a couple of quilts waiting to be quilted.  I enjoy that.   A string donation quilt, and Birds in the Air need backing  before I get them quilted on Hot Legs.


  •  The  Orange Peels needs to be bordered......I decided to forgo the original border idea as it was competing with the design.  I will just keep it simple.  
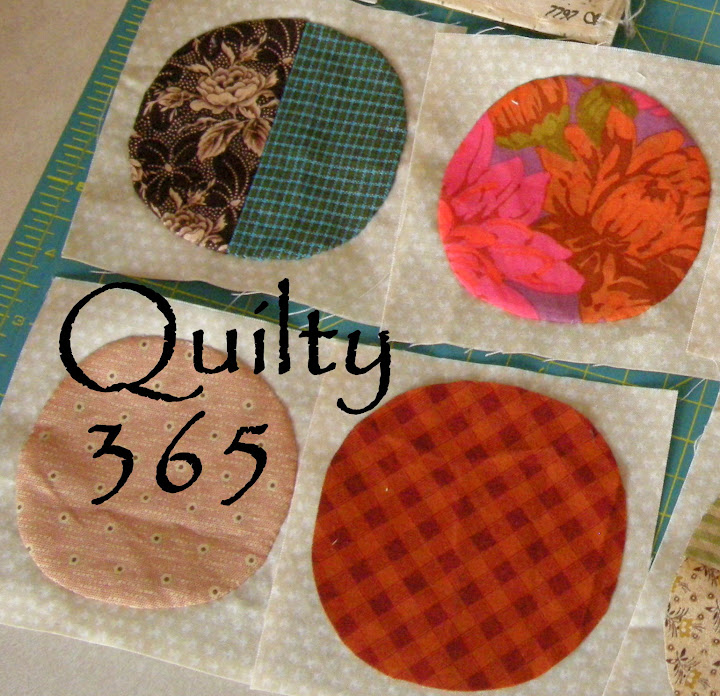
  • Continue making circles for the Quilty 365.  I am throwing in half circles to allow for a staggered layout.  The plus is being able to use smaller scraps for those half circles!
    Dust Off Those Books
  • Enjoy the Let's Book It project.  While I have not picked patterns yet, I will continue with this on going challenge.  I will be looking for a few smaller project ideas after the mega marathon from last year of floral quilts.  I do have one small project set aside that will probably get started in January.
  • Friday Finds.......will continue in some manner for next year.  I have had emails asking if I was stopping since I only did one post in December.  I was surprised how many readers liked the "hunt" for quilts and tips.  

January will bring changes to Blogger.....read here.    For readers of blogs, you will need to have a google account for following. The plus is that followers  can use the reader feature for blogs they do follow.   For bloggers, we may see a drop in followers as those followers without google accounts will be dropped.  I have yet to figure out how to have my posts show regularly  on Facebook, so those following on FB will need to do the google thing.  
   I know many use Feedly and  Bloglovin', and those readers will not be effected......just realize they are mirror sites and you do not get regular traffic from them.  That does not bother me, as I get no profit from my blog.  
   Confused, yet?   Me, too.  Just know, that blogger likes to kick up a fuss in the new year, just to keep us in line!  But us ''die-hards'' are tough and we won't let them stop us.  Just to be prepared, I am going to put in new blades for the rotary cutter.....in case I need to defend my territory.   Quilt on!

Update:  My posts may be missing from your dashboard reader....in that event you will need to re-follow this blog----that blogger/google thing is causing problems I fear.    I have found several blogs that disappeared from my list and had to be added again.   

Monday, December 28, 2015

2015 quilts

  It was the year of floral themed quilts....big and small projects.   Even though I felt like I slowed down, it appears to have been a busy, and successful year of projects.


   I experimented with traditional designs using floral fabrics----in hopes of reducing my stash.  But we all know that the more you use, the more scraps you make.  So that meant some smaller projects, too.  


    Watercolor wall hangings , butterfly wings quilt made of string pieces, a table runner, sewing machine cover,  a few table top quilt projects, and don't forget the mug rugs!   It is these small projects that bring instant gratification to keep me going when I get bogged down with a large project.    
   There were also a couple of scrap quilts from the scrap bin thrown in and 2 of these were donation quilts.  

   Looking back I see that the Let's Book It  challenge at Vrooman's Quilts----thank you, Sharon-----was the biggest motivating factor for this year.  Each month we were encouraged to start a project from our accumulated wish list of projects.....from books, magazines, or on line source.   Each one of the large quilts were inspired by this challenge.  I am so glad I joined in, even if it took a few months to complete them.  It was worth the effort!  So I am glad to say it will continue again next year.   I hope you will consider joining in and making a few things from your someday wish list.  

  My favorite quilt from 2015?    I can easily name it.....Plume Crazy.  (Here's the link to its story. )
  I began it as a scrap project for the Let's Book It in the summer.   I was taking my time and having fun with it.  Then I got the idea for adding plume shapes to the border.   A few days into the border,  I heard from a friend that she had uterine cancer.....and she was scared to death.  Immediately,  I knew this quilt would be her comfort quilt.  
  I cut plumes, sewed,  and prayed.  Plume Crazy went to the hospital with her, and covered her well through recovery at home.  I received hugs, and thanks, and a card.   And on Christmas Eve, another card came expressing how much the quilt meant to her.  She said she made a donation in honor of it to the Woman's Cancer Fund.  It was absolutely the best gift to know that a quilt given would inspire another gift to help others.   There's nothing better than that.


     And the year would not be complete without a mention of Sir Old Man's projects......it was a big year in the workshop.  Revived park benches, a small wood walk for the back garden, restored 18th century cabinet for quilt storage, wood clappers, a small chest, and that big, beautiful, wonderful cherry bed!  It was a most successful year.   He gave me a hint for the next project......a small cabinet to go by the sewing machine!  Giggles, and grin from me......he is adapting a design found in a magazine.  Sounds like  Let's Book It project  has even touched the woodworking shop.   See how our influence spreads?
    I need to spend a little time on next year's plans.  Till next time....happy stitching.  

Saturday, December 26, 2015

Favorites from 2015


Meadow Mist is having a linky party for 2015 posts.  So I pulled out a few favorites to share.


A humble scrap quilt gains the honors as most viewed post.   It was what I called the 2 patch + 4 patch pattern that is a version of the rail fence.


 See the post here.


The post with the most helpful comments was about the plumes for a border.   I received wonderful input and this ended up being a favorite quilt.

The post is here.


Favorite photo of the year. ...Summer Potpourri shimmering in the sunlight. The post is here.     A log cabin quilt made using the quarter log cabin block.


 My favorite tip for the year.....use a clapper to achieve flat seams!  The post is here.  


Linking to Meadow Mist Designs.
Happy stitching.

Tuesday, December 22, 2015

Last minute sewing


   One last minute item to make after a quick trip to the J store.......a pillow case of Star Wars fabric for the newest fan!   I heard it was an exciting day for Remy when he saw the movie, so now he can dream of light sabers.  


  And a few circles for the week for Quilty 365......I think I missed a day or two.  But who is counting?   I am aiming for 300 to make a nice size throw.  While going through fabrics, I kept finding small pieces that were not wide enough for a circle.   What to do when I wanted to include it?  A light bulb went off when I played around with a layout.

  A staggered layout  means I need a half circle at the top and bottom of those rows.  Or a plain strip......so half circle is perfect to use for the smaller pieces I want to include.  Or I may stagger them across the rows.....that remains to be seen.

Anyway, this week I made:

   a red etched flower, chocolate for those critical days, scissors and thread for my passion, a luscious paisley, serene lavender and purple,  a bit of old world lace print,  and a memory of my Dad.

  Dad was a fisherman.....so the shirt print of fish is for him.  Family vacations were often to a fishing camp with the beach nearby.  I remember hunting for seashells on Sanibel Island, and another time waking up one morning to find a small shark in the kitchen floor!   I also remember how mad Mother was about that one!  I don't know what happened to the shark.....I grabbed my flip flops and went to the beach where it was safe.

   And now it is time to pick up the sewing room and wrap the last gift before I can enter the kitchen tomorrow and begin the prepping.  Sir Old Man will be the house boy for the clean up.......it's too dangerous to allow him to stir or cook!  That's okay, I get to be boss and make a mess.  
Wishing you all a Merry Christmas and happy stitching.

Thursday, December 17, 2015

A quick covered design wall

   The orange peels are assembled.....but the border idea was not working, so I won't even show it.  Instead, please notice the  new "cover" for the design wall!

   I ordered 90'' wide white flannel to pin over the old flannel.  It was dirty / dusty and needed to go.  But, as it was stapled down, I chose the easy route to cover it.  Using t-pins, we tucked the extra length under and pinned it to the edges.  A quick recover that can easily be removed and washed.    A very good thing!


  One more re-cycle idea.  I wanted a  box to keep my Quilty 365 circles in.  It needed to be small and have a lid.   I noticed an unused recipe box in the back of the cabinet earlier this week.  I did not really like the graphics.....so I pasted over it.  I had some handmade paper with leaves and such embedded into it that I thought I would try.   I just used tacky glue....modge podge probably would have done a nicer job.  This works for now and I have a safe place to store those finished circles.

 Packages are wrapped, cookies to bake.....and a couple more cards to write.  It's almost time for a nap.  Happy stitching.

Sunday, December 13, 2015

Making cicles

  This was my week in circles........ I was mellow on the blue days.  I loved finding these two blue tonal prints....and having just enough to make a circle.
And of course, there needs to be a cardinal in this mix.

    But where did that red one come from?  It was Thursday.  By 4 pm I was seeing red and spitting nails as my Mom used to say.   It was a klutz day---and my toe still hurts--- and dealing with insurance changes, and then big changes to a gathering I had been looking forward to.  


   I went to the sewing room to "self-express" because my fuming was not helping me.  I saw this red and thought it would be a good reminder of the day.  Instead of  a neat/pretty buttonhole stitch, I used an awkward feather applique stitch on the machine.  


   The log cabin is paying homage to Sir Old Man, who sharpens my scissors, and washes up dishes after a baking marathon.   His  early years where spent in Alaska, so when I spotted this bit of fabric I wanted to honor that time for him.


    I am loving this Quilty 365 because it is a good excuse to prowl thru the stash.   There are small chunks of fabric saved from long ago that I have discovered and plan to include.   I pick out the fabric everyday.....and pin to a background.  Then every couple of days I stitch things down.
   Also, I am cutting out the backing fabric behind each circle applique.  Carefully!  It reduces the extra weight and bulk.


   I did the same thing on the orange peels quilt.  It is time consuming but the end result is so much better.  Anyway, I have three sets of rows joined and 2 more to go.

  Audrey at Quilty Folk is hosting the Quilty365......but she is sans computer right now!  I will link when she gets things back together.   If you are thinking about doing the circle thing, click on over and read about it.
Red Glitter Elf Made Me Do It Box Sign


P.S.  I heard that Mr. Dinks is hanging from the lamp today.
Happy stitching.

Friday, December 11, 2015

Friday Finds.....December

MarveLes Art Studios: sir frosty collage kits available~!:
From MarveLes Art Studio
This is the first year I have not done a lot of  seasonal decor type sewing/quilting.  But....if there was a pattern I want to put on my list it is this one.  Sir Frosty covered in flowers among the birch trees!  I think he is such a cutie.  You can find pattern, kits and great photos of her marvelous designs  here at MarveLes Art Studio. 
    I have always liked the collage technique and did things years ago using it, but never really thought about refining it the way she did.   Do you see the wheels turning in my brain as you read this?  Great inspirations come from all places.


Welcome to www.MinnesotaCharms.com - 5" Charm Packs, Patterns, Books:
   I don't generally buy pre-cuts as I prefer fat Quarters.  So if you want to "charm cut" some FQ  you might use this.    I ran across this chart and thought it was slick to have on hand. It is from Minnesota Charms.

  I also started a new board on Pinterest that is just for charts and formulas.  Now if I can get them all corralled into one spot.......


VROOMANS QUILTS: Let's Book It - November 2015: From Vrooman's Quilts......I really loved Sharon's Let's Book It project for last month.  The basket shape is very untypical  and I like the elongated size.   The design is from the book, If Quilts Could Talk.
   Once again,  the wheels began to turn in my head.  More inspiration!!!   A doable small project that will hopefully come together in the new year.


pinwheel15 Decembers QM Bitty Blocks: Pinwheels  A good reference tutorial
 for Bitty block pinwheels......from Quiltmaker.   
Of course, it works for large blocks....just change the size.  I love that she even shared her mistake at the end.    I need to make a big stack of these for use in borders.  Note to self:  Add to your list!


Red Glitter Elf Made Me Do It Box Sign
  As always, please visit the original source for details, pinning, and saving.

And that's a wrap for 2015 for Friday Finds.  I will continue to hunt 'em down and save for sharing.  So there is no telling what will pop up next year.  I have enjoyed putting these posts together---a little time consuming but fun.  It is usually a surprise to hear about what people like in the Finds.  Happy stitching.

Wednesday, December 9, 2015

That crazy elf!


Red Glitter Elf Made Me Do It Box Sign   I saw this sign last night when we went to dinner and it made me giggle.  Right now my elf---Mr. Dinks--- is visiting Florida and will fly up just in time  to surprise Remy.   My brother is having fun finding vantage points for the elf to nap.   The adults enjoy the wonder in a child's eyes when he spies that crazy figure perched on the cabinet door, or handing on to the door knob.


  A quick finish between assembling the orange peels.  This is snack mat size ----about 12'' by 12''.    I shared another applique earlier in Friday Finds.     I snatched this one there and enlarged it a bit.  It is still smaller than I wanted......next time I will enlarge it some more.   Pieces were fused and machine stitched.  I  cut into some of that new fabric....on the border. Luscious!

  I have reached the row assembly stage on the orange peels......and have an idea for a border.  So I know this one won't get finished this year.  And the floral exploration will carry on next year too, it seems.   Big grin, what else would you expect?
Happy stitching.

Tuesday, December 8, 2015

Mindless sewing makes a top

  Two afternoons of just mindless stitching pairs of strips from the bin created a top....perfect for a donation quilt.  Most were 2 1/2'' with a few 2'' strips thrown in somehow.   The good news is  I reduced the bin
by half and also used up left over 1 1/2'' strips.

  I ended up with a lot of short sections that I cut into
2 1/2'' bands to inset into the mix.  No border planned for this one.....just a mix of scraps for binding.  When I get to quilting,  a medium stipple/meander will do the trick.    Oh....see the edge of the bench in the photo?


  It is another restoration project by Sir Old Man.  This is the bench that was on the front porch---quite grey and weathered.    He took it all apart, repainted and stained the slats.   He also added in one more slat to the area where the back curves into the seat.....much better now!  So wonderful to have a bench for the deck and porch.....thank you!


  I have baking to do, and orange peels to assemble.  What a combination!
Happy stitching.

Sunday, December 6, 2015

Getting the Yang of it?

  I mentioned the Quilty 365 Circle journey last week....see the link on the sidebar.  And I have been making a circle a day, working from my scrap bin so far.  Actually, there is a lot of good stuff in there!  Even so......it can get boring and there is a long road for the year.


  Yesterday's block is at the top.  The bottom block is today's....split into a yin/yang type plume  :)    I wasn't sure that it would work, but it did.

  Contrasting paisley type prints  seemed like a good combo to try this one on.


   To create the yang plume.....I drew the circle and then divided it with the gentle curve to make a plume shape.
  Then I cut the paper piece out and used it to make a stiffer pattern piece out of my extra paint swatch cards!

 Tip:  Those paint cards  are easy to cut, not too thick, and free!  Grab a handful the next time you are at the ''big box'' store to use for applique templates.

  Using the paint card template I drew 2 onto heat and bond light fusible.  Before applying to the fabric back, I cut out the center portion of the fusible about 1/4'' from the drawn line.   Then I fused these to the fabric backs, cut out on the line and fused to the background square.    I slightly over-lapped the inner curve thru the circle.    Then I finished it off with the buttonhole stitch.  

  I really like the effect of this one!  And I will probably do more of this shape, just to keep it interesting.

  I think this year long journey is going to provide a different kind of inspiration.....experimenting with focus, shape, threads, color and contrast.  Hope you will click over and join in soon!

Oh, I almost forgot to mention all the ORANGE  covering the roads around here...flags flying and stickers of tiger paws on so many cars!   Congratulations to the Clemson Tigers for their ACC win last night.  A year of no losses---so amazing.  I know my nephews are dancing with glee :)

Happy stitching.

Wednesday, December 2, 2015

Scraps.........Express yourself

Grab button for http://quiltyfolk.blogspot.com/ This will be an early Friday Find on Wednesday.  Lol, if that didn't confuse you, read on.

  I debated for a couple of days before starting this one...... Quilty 365.  Details are at Quilty Folk and the link up.   It really began in October, so I am a couple of months behind.  Yet....no real rules, just pick a fabric of the day to suggest your mood, events, weather, or because you like it.
   I am laying the blame on Amity Quilter for pointing this year long challenge out.   The 23 circles she showed in the link up are just beautiful.....and I love that she is mixing up her background squares and doing extra special cuts.    Be sure to stop by and see what I mean.

  I have day one on the left done.  On the right, my circle sits on today's fabric.....blue gray design because it is still raining.  I need to get it cut before I start dinner.  And yes, that is interfacing behind the fabric and circle.  I am kind of hooked and addicted to this applique technique after all the orange peels.

   On the back of each square I am marking the date...12/1, 12/2, etc in pencil.  I thought it would be interesting to see how months, and such affect my fabric choices.  And if at all possible, at least for now,  the fabric picks are coming from the leftover scrap box.  Eventually, I know that  I will give in and have to cut a chunk off a special piece I have stashed away.  Part of the need to express myself.


   Speaking of scraps...... I have been staring at this box of leftover strips for way too long.  Finally, I committed to use them up or they hit the trash can.  So a coin quilt is in the making.  Mindless sewing during the month of rush and preparing for the holiday is just what I need.
  I am sewing pairs and then sub-cutting at 6 1/2'' from the strip sets.  Once I have enough sets, I will start to mix things up and create those long bands of coins.

   The house has been cleaned, and the tree is up.  A bit of gift shopping is done.  And just enough time to sew up that circle.  I hope you will check out that link and consider this challenge.  Happy stitching.

Saturday, November 28, 2015

November Let's Book It!

   This is the last report for Let's Book It for this year.   My project has been hanging around for a few months.  OK, more than a few months.  It has been on going since July.   But that's just fine for a Book It project......no finishes are required.

 
  But I did get it to the flimsy stage.  And all the birds are flying in one direction!   I love the softer tones in this one.  It will need a border or two as it is smallish, only 32'' by 44''.  I will think on that through the holidays and see what comes up.  For now it will go on a hanger to free up some design wall space.  


Because those crazy orange peels need some room to grow.   I think I started this one in September and I just keep adding a few every week or so.  Eventually I will call it done, but for now a few more won't hurt.


  I caved in and picked up a few paisleys for my collection.  See I do use things other than florals.   I only got a yard of these three.....


  But I hit the Jackpot on these two!  End of the bolt jackpot means there was less than a yard after my cut.....so I got it all! One was about 3/4 of a yard extra, and the other was about 1/2 yard.  So I was a happy camper.  Fabrics are from Fabric.com

  I plan on using one of these in a Blooming Nine patch after the first of the year.....providing I don't get sidetracked!   So I got 3 yards of both....just to be on the safe side and the jackpot extra is icing on the cake!  And that gives me 5 new fabrics to make orange peels.

   Back to Let's Book It....... Sharon at Vrooman's Quilts  says we need a month off for the busy Christmas season.  So this is the final link for this year.  Drop by and see the cute basket wall hanging she started for the month.  And I hope you will make plans to join in next year and make up a few items in your files of patterns.  
  first it is time to wash up some fabric.....then happy stitching.

Wednesday, November 25, 2015

What is a mug rug?

   I took a cue from Wanda at Exuberant Color and decided to work on mug rugs this week.   With all the rush and food prepping, those small projects can fill in a couple of hours quickly.

This is the first batch that is now ready for pressing and quilting.  Most of these are test blocks  for the plume technique, along with a couple of strings ones.  I am not using binding for them, as I have used the "birthing technique".    I just sew all the way around the rug and turn it right side out thru an opening in the backing.

  Update:   Question from Linda about the birthing technique I use.....
I understand a regular pillow case technique - pull through and then sew up the edge but you are saying you use two pieces of fabric for the back. I don’t get it! 
Are they two full pieces? It’s not like a pillowcase that you slide a pillow in because that wouldn’t be good for a mug rug. I’m confused. I looked at your post in July and I still don’t understand. 
Response:  
Sorry for the confusion.  Instead of leaving the opening on the side of the mug rug to turn, I create an opening on the back.  I cut an oversize piece for the backing....then cut it into two pieces.  I then sew it back together leaving an opening for turning.  My hand stitches are getting worse with the arthritis so a few "poor stitches" on the back are not as noticeable as along the edge.  It is an extra step but worth the effort for a neater edge finish.     Also, I do use narrow binding for the larger snack mats.  I sew to the back and turn binding to the front.  I use a blanket stitch to finish that technique off.    These are what are working for me now.  

  I will be giving some of them to guests at a couple of brunches and lunches during December.  Since these are going to non-quilting friends, I plan on including a hang tag to explain what they are.


So, to my quilting friends and bloggers, here's a page of hang tags!  I found a sample on Pinterest that I worked from.   I think you should be able to save the photo and print as a page. I will probably print on card stock before cutting them out to attach to the mug rug.

  My turkey is thawing and other dishes prepped for tomorrow.  That was all possible to Sir Old Man and his clean up help.......for which I am very grateful.
And now I can enjoy finishing a few mug rugs and enjoy a cup of chocolate.
Happy Thanksgiving and happy stitching. 

Monday, November 23, 2015

Selecting fabrics that blend

  I promised a post on blending fabrics last week. Looking back through older posts, I realized I had started covering this topic back in 2012.  So I have selected part of that post and added a bit more to help with this part of watercolor technique.


  On the right are the "light fabrics".  There is more background color---from white to light tan---showing and the design or print is light or faint looking.  Note the low contrast between the background and the print.   These can be hard to find, so when I do discover them, I buy a lot!
  Update note:  Janet reminded me that often the backside of a fabric will work for a light.  When you have a difficult time finding the right fabric, flip it over and see what the back side looks like.  It could be just what you need!  Thanks, Janet.  


   On the left, are some light medium fabrics.  Again, the background is light, but the print is stronger and has more contrast with the background.  The one on the far left is a great example of a "sprigged" print.  A 2" square of this one can blend into a very light area like a sprig the extends from a branch of a tree.

 The above photo are a collection of medium fabrics.   These are the work horses in watercolor.....they often bridge from a lighter  area to a darker one....as well as being the most used.  The background may range from light to darker cream, or  tan....maybe a light green even.  The design is darker and in good contrast with the background.  Usually there is less background that shows, making them "closer packed".  


And the dark fabrics......give the watercolor depth and life.  The background color is dark.....black, brown, blue, green.....and the design has strong contrast.   The areas of light and dark on the dark background provide the way to blend and merge the squares for a water color.  


  I talk so much about the right fabric, I thought I should also mention the wrong ones.  These are great fabrics, they just don't work well for blending in a watercolor.  Why?   Mainly because  they are one or two color fabrics.  Either they "read" as a solid or a polka dot from a distance.    Step back from the computer and look at them again.   The second fabric---purple paisley---fooled me when I bought it.  I thought it would work, but just does not blend well because the design is so evenly spaced.  So save these fabrics for another project or turn them into backings.                 


  If you have selected the right type of floral and paisley style prints, you still may face the challenge of making them blend.    Remember the real blend comes the value not the color you are using.  I created a collage photo to help show a simple blend from lightest to darkest.  


Top row------ from the lightest to the darkest.  If the lightest fabric is in the central area of the watercolor, you need to move out to the edge getting darker as you go.  

Middle row---- a close up detail of the first 4 fabrics.  The second fabric is a "sprigy" one that has a lot of background showing and introduces a darker stem.   The third fabric picks up on the background color of the second fabric and has more of the darker stems and leaves.  

Bottom row---  the second fabric in this row is what I consider a workhorse fabric.....it does so much!  Generally it is a dense or packed floral pattern with little or no background showing.  It has strong contrast in the pattern with distinct light and dark areas.  So it can go from medium value to dark value in just one square.  
  The last two squares in this row are dark values with the square on the end having more black background showing.  That is the drama factor.  


     This is one of the Cascade wall hangings.  You can see how I used the above blending technique to quickly move from the center of light to the darker edge.    One other thing to note on this is the effect of large/huge blooms....like the red at the top left.  By positioning 2 or 3 squares that have a  large flower in similar color next to each other, you create the appearance of a very large flower.  
And the rest is up to you now to experiment and train your eye. 
  •  Get use to using the value viewer.  
  •  If a square doesn't work, give it a quarter turn or flip it over to see if the value is better. 
  •  Stand back....about 10 feet  before you judge too harshly. 
  •  Take a photo and view it on the computer.....changing it to black and white from color is a great trick I have not mentioned.  You will be surprised at the effect of just viewing the value.  
  • That is also a good tip to use on traditional quilts.  Sometimes we use too many medium values and then wonder why the pattern looks flat or uninspiring.
Whoa....this is long.  So I know I have over whelmed many,  hopefully you got thru it.
Happy stitching!


Friday, November 20, 2015

Friday Finds.....tip and patterns

   It's Friday again....where did the week go?  I get comments about this feature all the time, so it will continue next year.   I may miss a few weeks during the holiday season, but I will try to pull at least one together for December.
 So if you are new here or even new to blogland, these photos and patterns are not mine.  They are things I pulled from around the blog world and pinned to my Pinterest boards.  Follow the bold link to get to the original source, or see he side bar for the link to Pinterest.


How to clean up stray threads in your sewing room without vacuuming! Perfect!!!:    Got stray threads......on the floor, design wall, by your chair?  And no lint remover around.  Make your own thread grabber.  I found this idea at the Seasoned Homemaker.  She calls it "no-vacuum sewing idea".  I call it smart.
There are a lot of neat ideas on this site.
  The photo is all you need.....plus a small foam paint roller and a bristly hair roller.  I am adding bristly rollers to my list for the next trip to the $ store.

Update note:   I found the bristly rollers at the $ store---4 for $1. I did not have the paint roller with foam head.....but I did find a foam craft brush.  It is the perfect size for the small hair roller.  Instead of rolling, I just dabbed at the threads.....worked perfect!


   Here is a downloadable project from All People quilt.  I love the chunky baskets....have I shown this before?   If so, it is worth repeating for the season.
It is small enough to put together in a short time.....only about 33'' by 40''.   A good weekend project that would make a cute gift.


tula-pink-elizabeth-misdirection-quilt:

For flying geese fans------
A free pattern from Tula Pink.   I am not a big fan of the modern prints, but I do like some of her fun designs.   I love this funky quilt.......maybe it reminds me of how my mind feels some days.  It is aptly named, Misdirection.   Click here to download the pattern.     If nothing else, it is a great inspiration for your own design.


As always, please visit the links given for these patterns and ideas.

 Have a great weekend.....sew, or read, or just enjoy your family.   As for me, I am prepping a few dishes for the big Turkey Day meal for the men in my life.  It's how I tell them I love them  :)
Related Posts Plugin for WordPress, Blogger...