Tuesday, June 14, 2011

Stash or Collection?

 
  Our speaker at guild last night commented that she had a stash---fabric to be used--- not a collection---fabric to be passed on--- and  that struck me as a good one to remember.   Especially since I had get DH or Sir Old Man to drag in more shelves for the stash closet.  I promptly filled them up with mini bolts that had been stacked on the floor and those pesky boxes of strips.  The stacks are off the floor for now, but it does make tight quarters in the closet.  I need to put the needle down and get to sewing!   

 
    As I started quilting on  String Me Along---photo before quilting,  I kept thinking that it would be a good design for a table runner.    Very adaptable for size and length by just adding a block and some pieced strips.  And maybe featuring just thread painted motifs from a fabric I "re-discovered" in the stack on the floor.  Guess I've just added a future project to the list!
  I've got to clean house today as Ryan, step-son, is coming to visit a few days and we are heading to Charlotte on Friday;  deliver snacks to church for camp; catch up on laundry; and maybe get a few minutes to quilt, I hope. 
   Happy stitching.....do you have a stash or collection?  Just asking.

Sunday, June 12, 2011

Road trip

We decided to do a day trip to Landrum for a quilt show.  Here are a  few of my favorites.....this was was bright and cheerful.  I liked the use of leftovers for the border, too. 


A different star set on point and mixed with a scrappy chain block.  The colors were great against the warm beige for an old fashion look. 


  This was done in civil war fabrics.....an amazing collection of them.  The piecing was absolutely wonderful on this one.  I am not sure of the pattern, but it appears to be done in hexagon shape.  Just really great quilt.


What an unusual setting for this small quilt---with leaves on 2 sides of the bargello.  It definitely spoke to me.


The cranes in this art quilt were so striking.  It is all machine appliqued with raw edges.  Lots of layers of fabric and great shading.


This was so special......a small quilt of postcards sent to parents from a daughter as she traveled the world.  The quilter's detail was outstanding. 


  One more to share.  Mountains created from bargello strips.....from a Georgia Bonesteel class.  The grand lady of  lap quilting was there as the featured quilter, and co-founder of the Landrum guild.  It was special to get to talk to her as she was a huge influence on me when I began quilting in the early 1980's. 
    We ate a late lunch at The Hare and Hound Pub in town and walked the small downtown area.  Neat shops that we will have to browse on another trip. 
    Home and finally some rain.....so nice to see the bird bath and the falls full again.  The frogs gave us a very loud serenade in the evening.  They were loving it apparently.   So no sewing for a  couple days.....I am ready to begin quilting on the String Me Along. Yay!
Happy stitching.

Friday, June 10, 2011

Cosmos--Journal quilt challenge


It was time for some fun...so a journal quilt it is.  I decided to try the raw edge collage technique that so many use in the journal challenge.  So here is my version.
  I started with  of a sketch of a cosmos, since they are just coming into bloom.  I love the way they stand so tall on those delicate stems with fine leaves.
  I used freezer paper to create pattern templates for the petals.   I like the freezer paper as templates because it allows me to work on the right side of the fabric instead of the reverse.  Working from the back in reverse hurts my brain----so when I can avoid that, I do. 
  I applied Misty Fuse to the batting, which was cut to size--9" by 12".   I began filling in the background with green scraps, working my way down the sides.  The flower pieces were placed to just overlap the background.  Misty Fuse is slightly tacky and hold the loose pieces in place as you work on placement.  Then once the design is all filled in, you fuse it all at once. 
  Then stitch, stitch, stitch.  Since all the edges are loose, I was careful to try and cover as many of them as possible with close stitches.  I did the cosmos first covering the edges with tiny loops and circles.  Then I  added some thread painting for shading and did the center, too.  All of the flower was stitched before adding the backing.  Then the quilting on the background was done after backing.  Binding is fused 1" strips that I stitched down with a decorative loop stitch. 
  New technique, used scraps, did thread painting.....journal quilt done!

Tuesday, June 7, 2011

Making progress

I'm making some progress on all the flower blocks for String Me Along.   I ran out of stitch and tear stabilizer, so I resorted to using blank  newsprint  from an old doodle pad.  Works fine when appliqueing, just dulls the needle faster.   I pinned up a few blocks on the design wall  of the blocks I completed.

Each one seems to have its own personality....I love that.   Sassy, silent, bold, and gentle.  Anyway, this won't be the final layout, but it gives me an idea of the general look.   I am really enjoying working on this one a lot.
   Answer to a question I got  about the applique.  It is by machine using a zig-zag stitch for the leaves and flowers.  I set the width of the stitch to about 1.6 and length to 1.3 --generally.  In certain spots where the flowers are small, I will reduce the length to 1.2 or so and the length down to .9 or so.   All this is technical and really just trial and error to see what works and look best to me.   I am not using a true satin stitch setting because  I didn't want the "ridge" from that close stitch.  On a few of the leaves, I did use a decorative feather stitch.  Veins on the leaves were done using either a tiny zig-zag or a stem stitch.  Experiment with the decorative stitches on your machine to see what you like.   
  Thread-----lots of different ones.  Some Isacord, Sulky, Mettler Polysheen, and YLI soft touch.  It really just depends on what color I have  that matched.  Most of the thread I used on this applique does have a sheen to them, and I like how it looks. 
  I have a couple more blocks to finish up and then I get to re-arrange and layout the final design.  Wow, this really went faster than I thought.  And I still have 3 boxes of scrap strips in 2 " and 2 1/2".......and I think I am tired of them.  So if anyone is interested in an envelope stuffed with my leftovers, send me an email with your address.
Happy stitching.
 

Monday, June 6, 2011

The heat is on

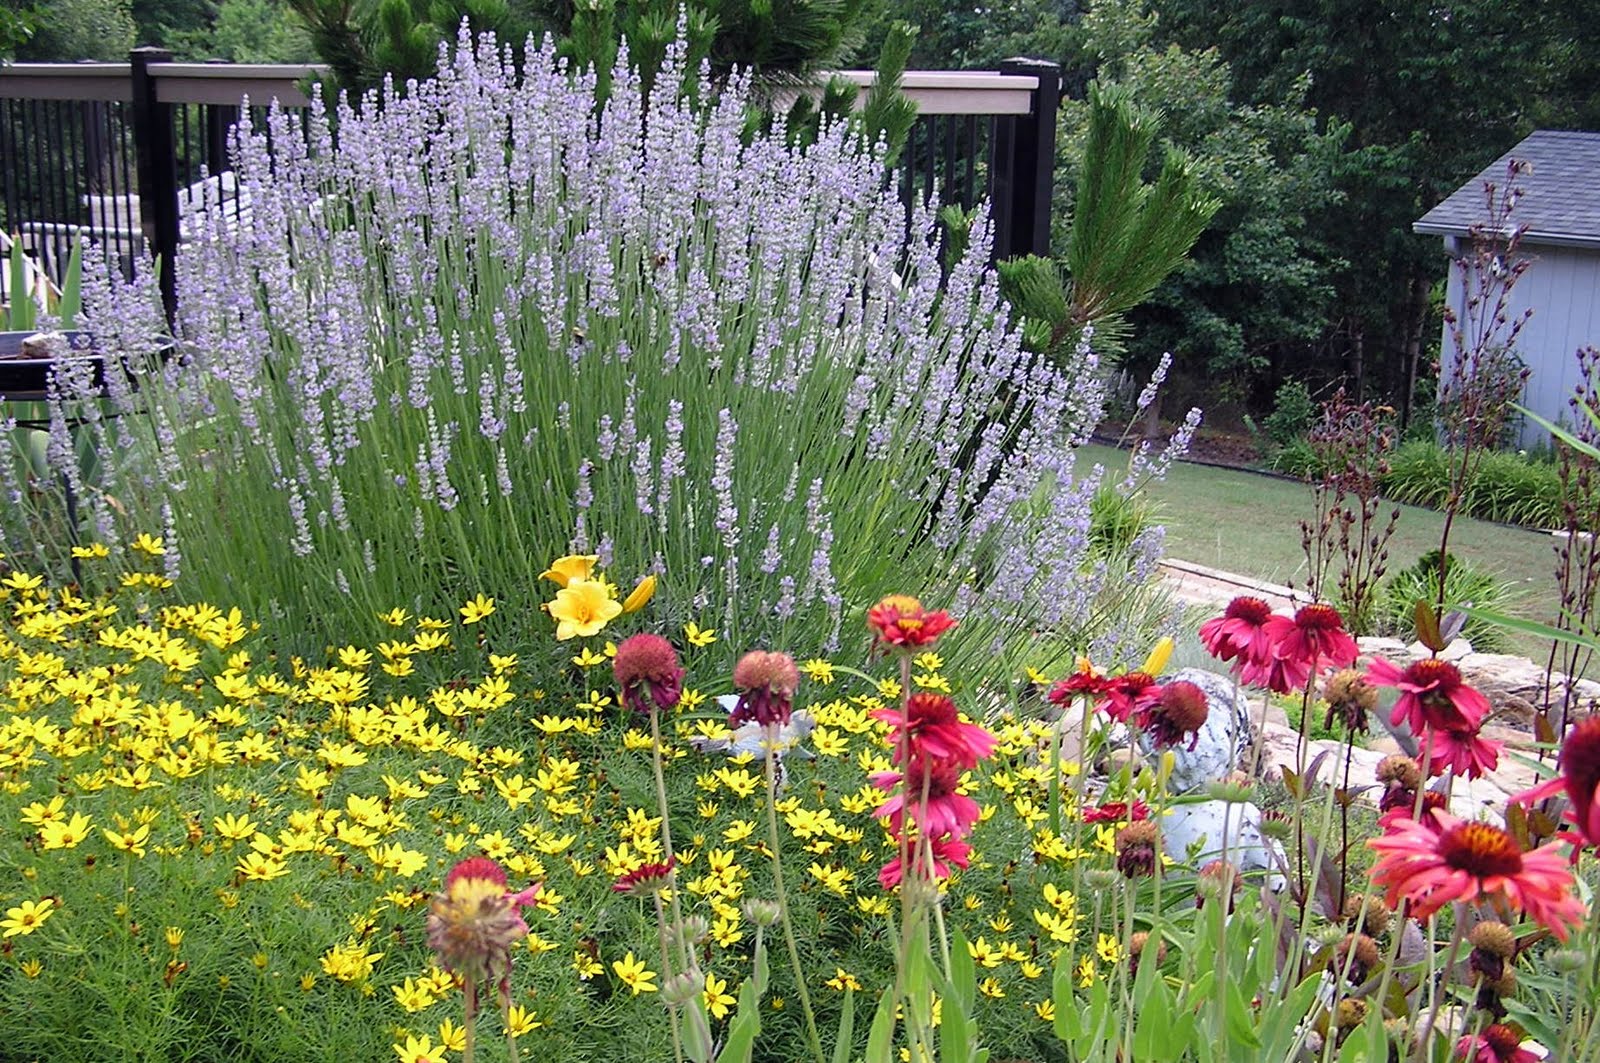
The heat is on, and no rain in sight.  The garden perennials are loving it.  I am not.  At 7:30 last night it was still 92 degrees out side.  But I saw these beauties out back.
I have never seen the lavender this huge.  The lavender spikes really create a beautiful crown behind day lilies and thread leaf coreopsis.


I love this color combination.


 Native brown eye susans against the lamb's ears.


First blooms of the cone  flowers.  I love the texture of the tiny sedum against the rocks.


   It has been six years since we moved to this house.  There was only one tree by the road.  Not a plant around the house, walk ways, or in the back.....  only brown mulch.   Over the course of 2 or 3 years, I realized I needed to use heat loving, sun loving,  multiplying varieties of perennials with the evergreens to get the cottage garden effect I love.   We spent countless hours digging, planting, composting, and mulching.    
My friend, Doreen, came up from Florida and helped plant and lay stones in the courtyard and by the garden shed.  She planted white daisies over Pookie's resting spot for me.  Other friends and neighbors have given us cast offs, cuttings and seedlings.  Each one is a treasure in my garden of memories. 
  Now you see where my inspiration comes for my quilts...especially the watercolor and garden theme quilts, as well as the scrap ones.  It might be the view, or the color contrast, or maybe the visual texture that sets me on a direction that I try to translate in fabric.  Sew to know me,  read my quilts.
Happy stitching.

Friday, June 3, 2011

Still making blocks

  I had a question from Wanda about curving the bias stems with the fused paper on the stem.  So to clarify that,  here's a photo of how I begin.  I remove a couple inches of the paper backing on the fusible.  I usually draw the basic curve  line in chalk before I begin.....otherwise all my stems will curve the same general direction.  I guess it is just the way my hand and mind work.    I pin the end in place and gently stretch the bias in a curve and press with the tip of my iron as I go.  The fusible holds just enough to keep the shape in place, and if I want to change it (or add a second stem), I can easily peel it off the background. 


I love this one...very sassy attitude.  Wish I had those kind of curves!   To finish off the small curved stem, I added a small circle like a "bud" at the end of the stem---rather than try to tuck it under.


This is one where  I added a second stem.  And added a bit of whimsy to it.  The blooms and leaves are fused also and stitched around the edge with a  zig-zag stitch.   I used a stem stitch to create the vein on the leaves on this one. 
    And, yes, I know I have different types of flowers growing on the same stem----my husband pointed out my error.  Big Smile from me ;).
That is what makes it fun.
Happy stitching.


Wednesday, June 1, 2011

There's one in every crowd

I watching a you tube video yesterday on the 10 minute block----which is the 3-D Bow Tie block only larger, much larger, using 10" squares.  What was different was her layout and the curved edge she created in the "knot" area.  Very neat.
  Anyway, I noticed another  video  by Ricky Tims  (and now I can't find it!) where he made dimensional flying geese.  How neat and quick with just one seam!  I thought I would experiment and try it out.  It took me a couple of tries to get the proportions right, so there are a couple of geese that are slightly smaller.  Soon I had a flock of geese.....I tried the curved edge trick on  a few of the geese and love the effect.   I turned the experiment into a journal quilt....There's one in every crowd.   (I left one 3-D and unstitched.)
  I used up some strip scraps, new technique, and curves for this journal project.....yay!
Here's a quick tutorial on the construction I used.

Two squares of background fabric----2 1/2"
One rectangle of goose fabric-----2 1/2" by 4 1/2"
   NoteUse any size square.  The rectangle strip should be the same width and the length is the sum of 2 squares minus 1/2".

  Make a sandwich. 
Fold the goose fabric in half with the right side out.
Place folded goose on top of one background square which is right side up.  Align the bottom raw edges and keep the fold at the top.
Place the second square on top--with the right side facing the goose fabric.   Be sure to keep the fold of the goose at the top of the sandwich.  Note that the folded edge should be 1/4" below the cut edge of the background square. 

Now sew a 1/4" seam along the right side of your sandwich.
When you open it up...this is what you should see.  The goose fabric will be caught in the seam  but loose on the other 3 sides.
Now spread out the goose fabric  along the base of the sandwich to form the triangle. 
Press....How neat is that!
 Final trick is the curved edge, sort of like the cathedral window edge.   I have this one just pinned in place.  Now you just stitch along the folded curve edge ---up one side and pivot to follow the second curve.  Done!   
  Since I do little hand work, this is the perfect technique for me to get this effect.  I may go through the stash for large squares  and make a large version for a lap quilt.  At the very least, I would use up some fabric. 
  Happy stitching.
Related Posts Plugin for WordPress, Blogger...