Showing posts with label art quilt projects. Show all posts

Thursday, February 14, 2019

Happy Hearts today


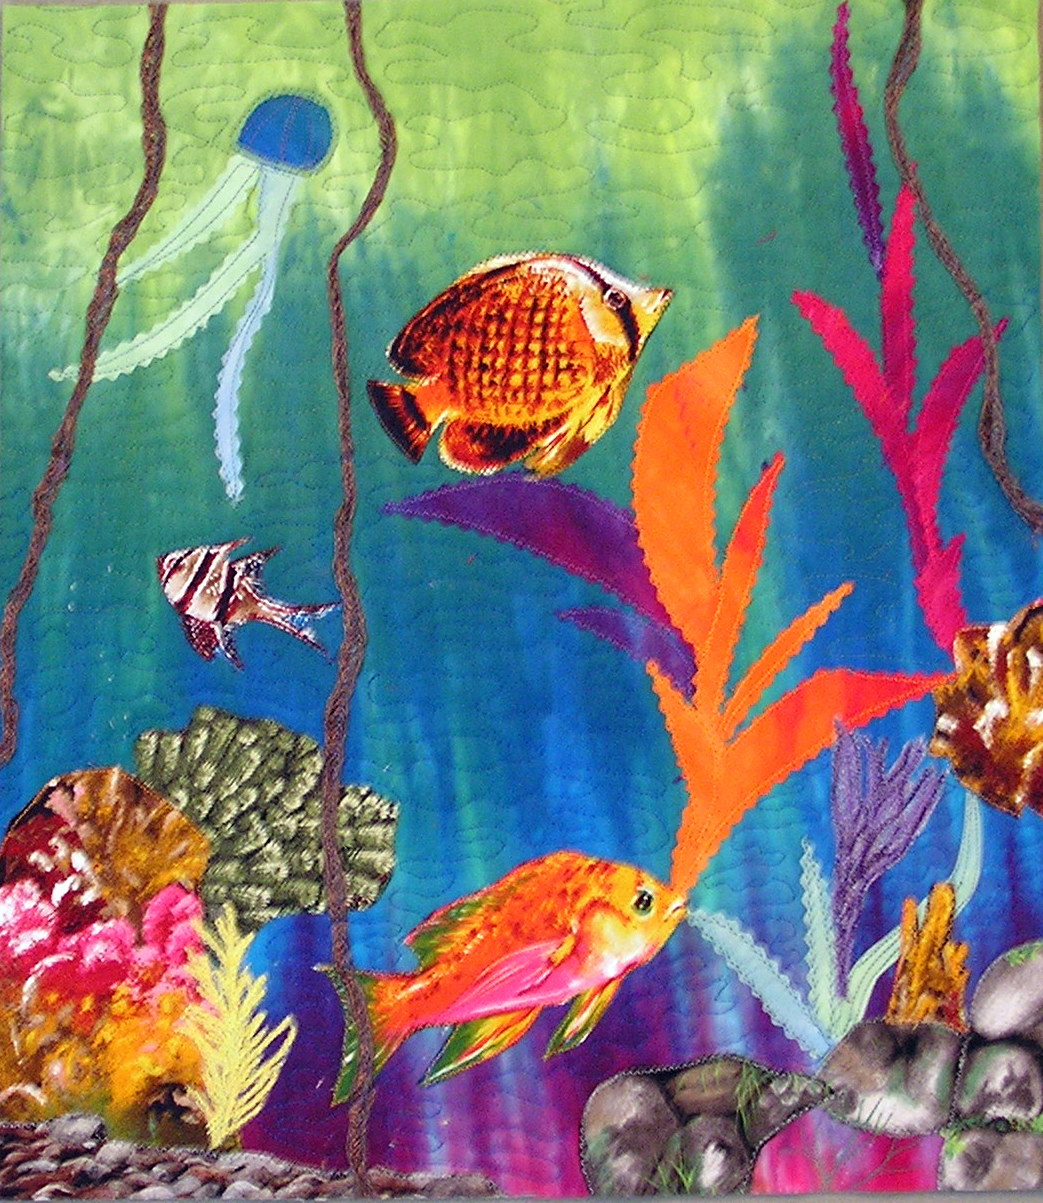
Celebrating a happy heart today for Valentine's Day.  This was an art project from 2012.  I loved using up all the leftover bits this way.  
  • Cut the batting and fusible web to desired size.  
  • Apply the fusible web to the batting.
  • Decide on design/shape like a heart.
  • Lightly pencil shape onto the batting.
  • Begin placing background pieces down first.
  • Then place the shape last, and allow the edges to extend over the background so all is well covered.  
  • Use a pressing cloth and fuse well.
  • Then stitch it all down....lots of stitching....meander or straight lines work well.
  • I then added the backing, stitched the edges and then turned inside out.
  • The edges got a decorative lace added for a finish.  My piece finished at 9'' by 12''---or close to it.  

   I came thru the procedure with flying colors.  All those prayers and thoughts made a difference.  From the scary abnormal screen to a clean examination with no problems seen......the anxiety riddled week or two.....a higher hand took it all away.  The anesthesia caused no real problem---except for the crying jag that befell me as I was coming out of it!  I scared several nurses with my wailing, to say nothing of Sir Old Man!  I don't remember why I started crying, but I had a tough time stopping.  So we put it down to stress related to the anesthesia.  
  Some food, and a long nap at home helped.   I feel much cleared headed today. Big sighs all round.    I am done with big medicine tests for now, and that's a good reason to celebrate.  On to the sewing room.....happy stitching.  

Monday, March 31, 2014

I count March a success

  Mid-Winter Dreams...completed just in time for Spring and waiting for someone to enjoy it.  Care to join me on the porch?

  March needed to be a big quilting and finishing month.  I had the Whopper quilt to bind and three others to quilt and hopefully finish.  I can now say that I count March a successful month.


 Finished!   Never at a loss for Words  is inspired by Jumbled Library by Wanda at Exuberant Color.  All those narrow strips of batik and left over bits that I could not bear to discard were put into this one.   It does remind me of the book shelves in the bedroom and I love all the jumble of color.   So I expressed my love of words through fabric.


   Gum Blossom was the Let's Book It project.  It is already up on the wall and I love it.


Finishes.......

  • The Buzz Saw is bound.
  • Frosty Morn is quilted and bound.
  • Mid-Winter Dreams is quilted and bound.
  • Never at a Loss for Words is finished.
  • Let's Book It is done.
  • McTavishing Lessons done.  
Probably the McTavishiving was my least favorite and thus the least successful for the month.  I tried, I can, but I probably will not do much with it.  I enjoy the swirls and feathers too much when doing free motion quilting.    
  Wow, it will be difficult to top March any time soon!  And that is fine with me because I have a clean slate.  The only thing hanging around are the blocks from the French Roses demo at guild last month.  I may make a few more and turn them into something eventually.

April is a time to start something new!  

  The blended scrap quilt:   I pulled a few fabrics out of the scrap pile to see how I like them together......remember the scrap project I want to start?   I plan on using these fabrics as my first test group.  Then I can begin the hunt thru the scrap bins.  


  And a Let's  Book It  project jumped off the pages of an older McCalls' Quilting magazine and bit me yesterday.   I have had this one earmarked for ages and ages.  

   I think it is the simplicity of it that I love. As well as the floral fabrics.   Unfortunately, I won't be following the directions...she did this by appliqueing each square!  My plan is to adapt this to create a new table topper.  A small project that I am sure to be able to finish.  

A successful month.......I think I need a nap on the porch before I begin April. See you next month....... Happy stitching.

Thursday, December 20, 2012

FMQ Challenge for December

   This is the final month for the FMQ Challenge at SewCalGal.  The finale....the finish....I did not quit....I persevered!  Thanks to Patsy Thompson for this one.

    Since I did not have a project with lots of borders that she suggested, I improvised an art project that was unfinished and destined for the trash can.   I thought it was an "ugly"  effort, and put it aside.  Today I added a couple of border strips to the 2 sides.  And off I went.

 
   When I found the dark purple with the linear graphic, I thought it was perfect for her border quilting idea.   It actually gave me spacing and lines to follow.  And that gave me the idea to use the technique in the background of the center  from another month's tutorial.....the organic quilting of following the fabric motif .  The background fabric was a wipe up cloth from sun painting fabric last year.  I just defined each color area with stitching.


 For the large outer border, I thought I would do multiple rows to simulate multiple borders---wavy curls with semi-straight lines between them.  I like the effect.  In fact I like this ugly now, and will find a binding for it.  It will be a good reminder to think out side my usual box.


Confession time, I wanted to just let this challenge  go several times, and not complete any part of certain month's tutorial.  Sometimes it was too hard, or appeared to be, other times I just did not think I was interested in the technique.  But every lesson offered a tidbit, that one small hint, a tiny jewel of advice that was worth the effort.   I will never be a super, hyper quilter because that is not my style or preference.  Yet, I learned loads of technique and gained much needed experience for the effort.    Big thank you to SewCalGal and all our outstanding teachers.....it has been a good /great / wonderful year!

Happy stitching.

Monday, January 23, 2012

What a hoot....

 A cold and rainy afternoon just fit the bill for some experimenting....not the chemistry kind but the stitching type.  I worked up the owls into a line drawing for a pattern, which I traced onto fusible.  Then fabric selection....fun and fast and not too picky.  Blue tones for one owl, and purple for the second.
And boxes of thread....cotton, and rayons, and polyesters.


I love the crazy eye fabric on this owl. I   took a little liberty with the leaf arrangement and spread them out some what, and extended the branch to reach the edge of the background.  I believe this one is a professor...note the puffed out chest on him.


  And this one is a  probably a cheer leader with the flirty wings and the scalloped shaped eyes.
  I put them both on a pieced background of odds and ends of fabric that worked together, and  covered all the edges with a zig zag stitch.  Not quite sure about the border/s yet, but I think the heart shape leaves will work for the quilting.

Experiment  results:    Relaxing, and really satisfying because I did not have mile high expectations.  Just some quirky time interpreting  photo / drawing  to fabric.  A time let my inner voice speak through the fabric.  

  So if you are interested in the line drawing pattern for these 2  .... here's the link to Owl patterns   .
Enjoy and send me a photo if you use them.
Happy stitching.

Friday, January 20, 2012

Fused mosaic technique

    What a great technique for a quick art project!  It is from Terri Stegmiller this month. She offers a great list of tutorials.
    I am doing a talk for the fiber art group next month in
Tryon .  I have the stack of journal challenge projects to show and hopefully inspire them.  And now this new little heart creation to also share.
  Hint:  All those small triangles and ends  that tend to accumulate from piecing and trimming are perfect for this.  I toss mine into a small bin to use as leaders and enders.  That's where most of this fabric was found.


   This heart is only 8" by 7" and trimmed out with a cotton lace edge.  The fabric bits and snips are fused directly to the batting, and over lapped just the smallest amount.  Then you stitch and stitch and stitch to hold everything down.  I did trim a few dog ears that over lapped first.  Careful stitching is required.....avoid getting the FMQ foot caught in the loose edges.  Ask me how I know.  I did not use a binding, just a length of cotton lace wrapped over the edge and a wide     zig-zag stitch to hold it down.    And I do believe  there is really more thread on this than fabric, but fun anyway!
      I knew the tissue box owl would be a hit for a few of you that love those critters, but what a lot of email I got about the inspiration. I heard from those who are checking the cabinets for tissue boxes, designs on napkins,  and  patterns on paper towels and so on.  Great fun....so be sure to share your hidden design finds with us.     I am working on a pattern, slightly enlarged, based on the owls.  Probably by Monday I will get it together to share.  
     Oh....and I wanted to share a link to a really good tutorial on cathedral windows by Shelia.  She is doing a lot of stash and UFO busting right now, but took the time to share this. I snatched her photo of her progress so far.   This technique is done partly by machine, takes lots of fabric, requires no batting,  and finishes as you go along.  Check it out.

Happy stitching.

Thursday, July 21, 2011

Boogie Woogie Star

  Journal quilt time again.....I snuck in an extra book on Russ's Amazon order last week.  Quilting by Improvisation by Vikki Pignatelli was discounted and called to me.  After reading through it, I wanted to try her curved technique for My Star Dances.  
  No fusing here, just freezer paper and I used the Lapel Stick rather than stitch witchery that she uses.  I like that she works from the front rather than in reverse.   The lapel stick did work great with no gumming up on the needle and dries very quickly.  I did not get all the curves smooth as I wanted....very stiff fingers today, and trying to avoid getting burned.  Then all the edges are stitched down from the front and I used a button hole stitch on this one.  I followed her advise on fabric selection---batiks with little printed pattern, and strong contrast for the star. 
  I named my version Boogie Woogie Star.  For some reason it reminds me of Saturday Night Fever and John T as he dances!  It must be the heat dome we are enduring....it does things to your mind. 
    Anyway, the journal quilt was a nice break before I get to quilting the cobblestones quilt.   Stay cool, everyone.  Happy stitching.

Thursday, July 14, 2011

Think I took a wrong turn

Somehow I got lost on this one.  I was inspired by the  color palette of the month at 3 Creative Studios.  I intended to create a beach scene at sunset, took a wrong turn,  and ended up in the desert!  
  I started with the fabrics to match the given palette.  So far. so good.  I cut a muslin foundation to sew the strips to.  I thought it was fine until the fourth strip was added.  I took the wrong turn here.  I continued with straight strips.  It would have turned out different I think, if I had gone on with curved pieces instead.  But since I hate the seam ripper, I continued on to the desert scene.   I do like the half  frame border that off sets the scene.  So, I will probably finish it up, as a lesson to learn.  Just so you know.
   Insight:  Not every thing turns out the way it was begun.  Live with it and learn.   A good life lesson in this small project.

Wednesday, June 29, 2011

Face lift!

I decided to tackle the UFO from last September that I was "gifted" with....remember this?   The Scarlet Pimpernel had taken a workshop for an under the sea scene with hand painted fabric and  lots of fusing.  She hated it and gifted me with it to finish. 
   So 9 months later, I looked at it.  The colors are beautiful, but the layout of the stuff...well, how do I put this nicely?  Yuck, maybe?   Ok, it wasn't going back to the design wall, so the choice was trash can or face lift.  I began to remove the little mushroom things at the bottom.  Then the woven weed looking thing came off, too.  I left on one of the little jelly fish at the top, and re-arranged the elements I would keep.  .
 

 Next I added a bunch of things from my stash
Rocks, a few fish, some corals, couched cording, and a couple of thread painted things....I call it a face lift.  Now the colors pop, and  there is an overall balance.  I'll get it bound and ready to return to SP at guild meeting next month.  Won't she be surprised!

Insight:  Give a UFO a face lift, or  a re-do.  If it is still not what you want, give it away or find the trash can.   Just don't stick in in the closet!
   I am still getting emails about the String Me Along quilt.  It is up on the wall and is not going anywhere.  And yes, I will do a table runner soon and provide measurements and details.  So glad everyone enjoyed it.

Happy stitching.

Friday, June 10, 2011

Cosmos--Journal quilt challenge


It was time for some fun...so a journal quilt it is.  I decided to try the raw edge collage technique that so many use in the journal challenge.  So here is my version.
  I started with  of a sketch of a cosmos, since they are just coming into bloom.  I love the way they stand so tall on those delicate stems with fine leaves.
  I used freezer paper to create pattern templates for the petals.   I like the freezer paper as templates because it allows me to work on the right side of the fabric instead of the reverse.  Working from the back in reverse hurts my brain----so when I can avoid that, I do. 
  I applied Misty Fuse to the batting, which was cut to size--9" by 12".   I began filling in the background with green scraps, working my way down the sides.  The flower pieces were placed to just overlap the background.  Misty Fuse is slightly tacky and hold the loose pieces in place as you work on placement.  Then once the design is all filled in, you fuse it all at once. 
  Then stitch, stitch, stitch.  Since all the edges are loose, I was careful to try and cover as many of them as possible with close stitches.  I did the cosmos first covering the edges with tiny loops and circles.  Then I  added some thread painting for shading and did the center, too.  All of the flower was stitched before adding the backing.  Then the quilting on the background was done after backing.  Binding is fused 1" strips that I stitched down with a decorative loop stitch. 
  New technique, used scraps, did thread painting.....journal quilt done!

Friday, November 26, 2010

Mosaic?

A few weeks ago I felt the creative urge,  so I tried experimenting with a mosaic technique.... it's really just fusing small bits of color to a black background.  It creates a different sort of stain glass effect.  Each small piece is free hand cut and fused in place.   I started with the flower, added the dragon fly---he kind of gets lost in the background--- and then decided to add the branch and leaves. 
 The options  given  to finish were  to either frame the piece under glass----not for me---or to do an overlay of tulle and stitch closely all over to hold everything down.   Instead, I created a third option.  I placed batting behind the piece and free motion stitched around all the edges, using a straight stitch.  After I get the border on I will figure out how to quilt it.  I plan on a border using one, or maybe two of the fabrics shown here.  I think my first choice is the gold  fabric, but I also like the purple.  Since it's an art project maybe I can just use  both?   Anyway, the technique is easy and fun to do, a good way to use up small bit of fused fabric scraps, but I think the next time I need to actually plan the design and focal point  before I jump in. 
  I was stitching on a new "use up the scraps"  project last night, and the Featherweight started behaving badly.  The foot pedal wasn't making contact inside and it just would not go.  Russ performed a bit of surgery on it by adjusting the contacts inside.  A good cleaning  and oiling and she was humming along once again.  Got to love that man!
Happy stitching,

Wednesday, June 16, 2010

Fractured block?

This is the block I worked on for the AK quilt using the inset strips technique from the Art Quilt Workbook.  I am very pleased with the block, but still think the technique is a pain....  This is not really what the book had in mind, but it captures the image I had in my head of the mountains. 
 Truthfully this is a fractured bargello type technique. I never completed one of those and now I know why!
I used the same blues for the sky and mountain top as I used for the background of the purple moose and fireweed blocks.   Hopefully a little consistency in fabrics will help make this quilt work.  Guess I have learned a few things from doing all the art projects.  And by doing all the exercises I am getting blocks done for the AK quilt.  I like that.

Monday, May 31, 2010

Monday= art quilt project

I have been wanting to try the curved piecing and that is part of this month's Art Quilt Workbook---innovative piecing.  So I drew off the moose and pulled out the fabrics for the background.  I chose 2 blue fabrics for the background, and a blue-green for the ground.  I couldn't have the moose walking in air!  First exercise is using curved piecing.  With the curved piecing method described in the book, you can end up with 2 blocks with the opposite color placement.  This is the one I liked best because the light seems to shining on him.  He will eventually become part of a Alaska travel quilt.  I absolutely love him....our purple moose.
I have an idea for the other exercise that uses insert strips, so that will be next week's project.  But for the theme project, I am at a loss right now as to what I will use.  Hope inspiration hits soon. 
InsightCurved piecing---gentle curves--are not hard to do.  And I can draw a moose!
Happy Stitching...

Thursday, March 18, 2010

Art Group's First Projects

The Thursday morning art group meet today.  What an amazing bunch!  Each of us took the lesson and went in different directions.  It was great to bounce ideas and share techniques we used from our past experiences.  We are all looking forward to the next chapter.  So, here is what resulted from the first project.

This is Maureen's fan-dancing frog.  Her theme is "F words"......we think.  We loved the bright red her dancer is wearing, too.  Would you believe the fans are cut from an old pair of curtains?  She has tacked them in places and left the edges loose.   Maureen's dry humor shows through in this one.
Sandy had a piece of fabric that inspired her first project.  The tiny turtles--good perspective--are buttonhole stitched on her machine.  Her husband suggested the border treatment stripe from the sun fabric.  It really sets the design off.  I just love the serene mood of this piece.
This is Evelyn's project.  Her theme is trees and a scripture to match.  We all liked the colors she chose and the way her inset made the design pop.  She used a lot of the techniques in the chapter---overlapping, color values and the inset.   I would call this piece dramatic.

Jaylyn's theme was easiest to guess....Oriental.  She also has a wonderful collection of oriental fabrics.  Her design shows the most perspective I think.  She used a gray-black to create the shadow underneath the kimono, buttons, and the band with symbols.  Just that tiny detail of shadow gives so much dimension to this piece.   The overall project is so striking.
Ok, this is mine and I have showed it before.  My theme is England--a country I want to explore.   This is my
version of Stonehenge that I call Ancient Ruins.  Enough said.  Great work, gals.  
 Elin, the group knows you are checking in on us....they are interested in your comments.

I can't wait to see what we all come up with next month.  I shared my pair of pears, the good and the bad, as a forewarning of what to watch out for when they chose their fabrics.  We have 2 exercises and another project in the series this next month.  We should all be quite busy.
Related Posts Plugin for WordPress, Blogger...