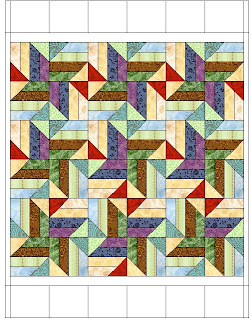
Here's a snapshot from my sketchbook in EQ5 that I used as I worked. So here are the measurement changes I used and my layout.

I created unit blocks that were 8 1/2 inches square --finished--using 2 1/2 inch strips.....because that is the size I had tons of.
For each unit block: ( 4 units to make a large block) . The 2 1/2 inch strips need to be at least 9 inches long.
Two dark or medium dark strips were sewn together and then cut into 9 inch lengths.
Two light strips were sewn together and then cut into 9 inch lengths.
Two 4.5 inch squares---one light and one dark. Draw a line corner to corner on the back of each. This is your sewing line.
The dark square was sewn to the light pair of strips, and the light square was sewn to the dark pair of strips. See Bonnie's site for great details on piecing and assembly.
Look at the diagram and you can set the layout is achieved by alternating the placement of the dark points.
Value---I only used lights and medium-dark to dark values. I saved the medium value fabrics for another project. I wanted the stars points to pop, and using too many medium value fabrics would distract from that.
I saved the cut offs from adding the squares. I made pinwheels out of them and created the top and bottom border. The pinwheels were alternated with plain squares in the borders. No side border on this one, I didn't want to end up with a square quilt. Instead, I just put my twist on it.
Let me know if there are any more questions, and I will try to explain better.
Happy stitching.

No comments:
Post a Comment