Saturday, February 9, 2019

Bargello comfort quilt

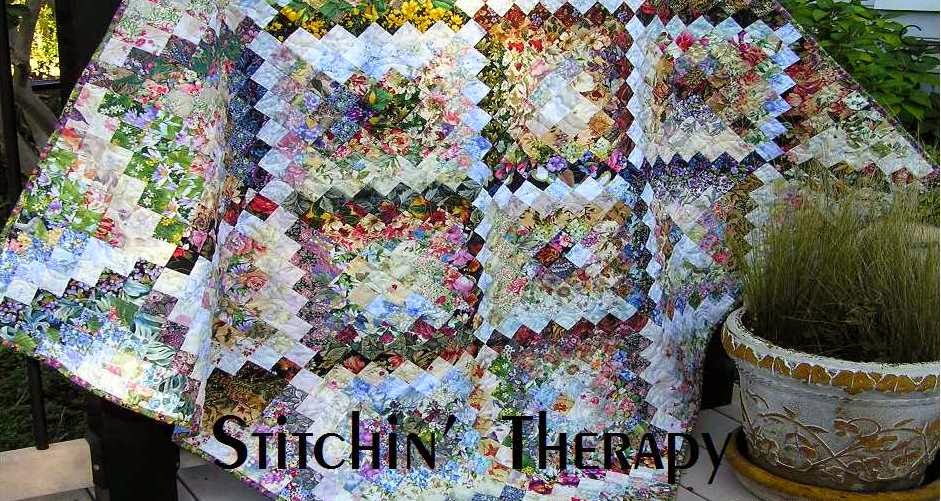
    About three years ago just before I had my extended hospital visit/stay/endurance time....lol....I had lunch with a friend.  Jennifer brought along some "quilt blocks" she had been given by a friend.  The story goes that the friend's Mom had recently died, and the daughter discovered this unfinished  quilt.  But no directions or anything with it.  Jennifer brought it to me for my "expert" opinion.
  She had several width of fabric sections of strata that had been sewn.  The  fabrics blended nicely, and I knew what was intended.  It was the beginning of a bargello.  I attempted to explain it over our meal, but how to you tell a new  quilter about bargello?  Once home, I found an article and instruction for a small bargello wall hanging, which I passed on to her.


Made by Jennifer

 Fast forward to this week.
 I had a call and note from Jennifer and she wanted to share the finished project.  The friend has been diagnosed with breast cancer and Jennifer wanted her to have a comfort quilt at this time.  Want to see what she did?


  Her friend recognized it as the one her Mom had been making, and now she sleeps covered in love each night.    Jennifer said it was worth the 3 days of quilting and 6 hour trip to deliver it to her.
  This was an amazing job.  She got wonderful flow and movement in the design.  A supreme effort and amazing quilt!


  In the sewing room, it has been quiet as I have been going thru rounds of doctor appointments.  I survived the bone density tests, and the mammogram but came home both days tense and in need of a long nap.
   I also went thru the appointment for the colonoscopy......I tried my best to talk them out of it, but with an abnormal screen no one would listen to me.  The ordeal is next week with the liquid diet beginning Monday.   I put up two days of meals  in the freezer for Sir Old Man  since I don't want to cook when not eating.  We bought the extra drinks for electrolytes, and etc.  The doctor's concern is my blood pressure dropping, and I am concerned about the anesthesia.   I just have to put my  warrior face and armor on and get thru it, right?
 
  I have these projects to work on---

  •  Jewel Box Stars  project, sewn into top and ready for a border.  
  •  The Chandelier Bead quilt---ready to pin for quilting.  
  •  The Scrappy Trips project---still making blocks.  

 And that makes three...my limit, or self imposed limit.  No new big project until I get one of these done up.  I selected a tonal fabric to work into the border for the Jewel Box Star, so I hope to work on that over the weekend for some quiet sewing time.
  Sew on until next time.  Happy stitching.

Sunday, February 3, 2019

Why Knot?

   
  I began working on the garlic knot blocks last Spring sometime.  The pattern is also called Arrowhead.   I took my clue  from Bonnie Hunter's column in Quiltmaker.  

  I had tons of 2'' strips already cut, so  it was easy to chop off the 2'' squares needed.   I kept the fabric for the knot in a tonal or more solid appearing fabric.  The center accent squares were picked out of my 2'' squares in the floral stash box.  Then a variety of lights---cream, tan, white and beige were selected to use. 


  I sorted the squares, clipped them together and tossed them into a bowl to work on. 
 I used a 4 patch method for joining my 2'' squares rather than rows as often described for assembling this block. 


  My blocks were 6 1/2'' unfinished.   More than anything I tried to pay attention to the value used..... to have good contrast. 
  My layout was a simple block to block straight setting.  The small trim around the center is a flange of folded 1'' fabric.  It is attached before the border.  It sort of looks like a piping has been added, but it is there for an accent to stop the design.   


  I cut the border  strip 4 1/2'' wide. 

  I like carrying my fabric, color, or bits into the border.   The border strips are cut in half, and the extra fabric strips are added between them sections.   I like the fact that the joining seams are part of the design in this method.  (Rather than cutting the border strip and joining on the diagonal.)   In this full photo you can see the different lengths that happen in the border sections. 


 The garlic knot block turned into the "Why Knot?" quilt.  The play on words is a private joke from my youth.
  the quilting is an overall swirling design that I tend to use all the time. 
   The finish quilt size is 55'' by 67''.

Happy stitching. 

Wednesday, January 30, 2019

A book and a quilt

   I recently re-watched all of the Bletchley Circle programs.   There were only 2 seasons about the girls who were code breakers for England during WWII, but I found it well written and the puzzle solving intrigued me.   Supposedly there is another series and version with 2 of the girls in the US, but I have not seen it yet.

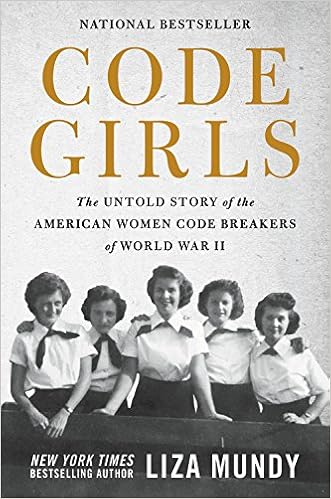
  So recently, I have had my eyes glued to the pages of a book I picked up  at Mr. K's Bookstore.    The Code Girls had me hooked two pages into the introduction.  Just the comparative details of the the 1940's social setting on women and education were eye opening history for me......and then Pearl Harbor happened.
   The male view in that war era comes across when the  government begins to look for  and recruited  "women who like puzzles and are not currently engaged."     Much of what the women of my mother's generation faced before the war was still evident in the 1960's when I came of age.    Other points are quite telling, but I am not here to be on a soapbox.   They were recruited to be code breakers for all the bit of messages and signal traffic of the enemies, to figure out the patterns and details.  To make sense of it all.  Intriguing to me this is.
   Just to say, I have traveled back in time a bit and found a new set of super heroes to admired.   These women, girls really,  made a difference, and saved lives.  I am enjoying the read  so far.


Oh, yes, then the quilting.  I have a finish!
   Those tasty garlic knots have been bound and ready for a label.  It is very windy, quite cold for me, outside, so an inside photo for now.  I will get a better photo when it warms up.
   I added that narrow flange strip for accent before the simple border.   And the binding is leftover strips for a scrappy binding to wrap it all up. 

  The Chandelier Bead blocks are stitched up into a top.  That will be my next project to get quilted when I find a backing. 

I am still stitching together squares for a border on the Jewel Box Star quilt, and then there are blocks for the Scrappy Trips to be sewn.  I have decided to not start another project as these three can keep me occupied.   Another project would just over-whelm me. 

  I am in the midst of those awful, invasive, so-called required tests, and procedures that come around annually.  I  think I will opt out/cop out/just say no next year.  Five appointments in 3 weeks is just too much. 
Stay warm everyone, and happy stitching. 

Monday, January 14, 2019

A pressing slip cover

     I had a light bulb moment  one afternoon last week.  It involved solving the "ugly" problem in my pressing area.   In 2015, I found pressing space by using the pull out work space on the Hoosier I have in the sewing room.   
   A pressing mat worked for a while, and then I had Sir Old Man make a plywood top to sit over it.  The top was covered with 2 layers of batting and decor weight fabric.  It has served me well for 3 years, but began to have the uglies ---you know from starch over spray and water mists stains --- recently. 


   I ran across the extra decorator fabric and wanted to re-cover it for a fresh face.  Then I realized I would face the same problem in a couple of years. 

  Cue the light bulb!  I made a slip cover to fit over the pressing board.  It can be removed and washed when it gets stained or dirty looking.   I used a few T-pins across the top area to keep it all from slipping. 


   And now I am ready to press away.  I finished up a few Chandelier Bead blocks on Saturday while watching Quilt-Cam with Bonnie.   I may have just enough for a throw size quilt. 


   I also worked on the collage......can anyone tell me what I was thinking when I jumped into this?   My memory has really failed because now I remember why I never made more than one block  in this technique.  It's the stitching.....and stitching and stitching.  And you think you are done securing it all and something comes loose.  Stitch some more.  All those small pieces that are wonderful when fused but awful to anchor properly.  Needless to say, my itch to be creative in this manner has been satisfied and put away in its proper place.  On to a new plan.
And make it something that does not involve small pieces in a collage. 
    Happy stitching.

Wednesday, January 9, 2019

Carolina Hurricane Quilt Project

  I offered to help promote the hurricane quilt  project for Carole at From My Carolina Home.  
  This post gives current details and information along with the address for mailing.  I mailed a finished quilt directly to the Catholic charities for distribution. 
  There's a  button on the right sidebar for a direct link to her project.   There are still many, many families affected by the aftermath of the storms.  So any help is greatly appreciated. 
  Thanks and happy stitching. 

Monday, January 7, 2019

Old tip to store fabric

  I spent a while last week cleaning up the piles and stacks of fabrics scattered all over my sewing space.  At least now I can see the cutting table.    That brought to mind an old post on making mini bolts for larger yardage that I thought I would re-share.

Tip for storing fabric:
  My large collection of floral fabrics are usually folded and stored in bins on  shelves in my stash closet.  Mainly those fabric cuts are small and less than a yard.  But what about the larger yardage cuts for borders and backings especially?   
Mini-bolts!

  About 4 years ago, I began using the mini-bolts for storage.  When I first  began this, I was using a thin plastic insert.  Later I switched  to using  foam core board.  The foam core  can be purchased at the Dollar Store in the 2 foot by 3 foot size usually.  I cut the size-- that works best for me-- 11" to 12" high by 8" wide.    It's easy to cut with a craft knife.  I often end up with smaller sections of the boards and they work great for shorter cuts--- those under a yard. 


Today, I am even more frugal.....I use old  yard campaign signs or yard signs of any kind that I find....like house for sale, or other advertising.  They get knocked down or the wires rust out.  I collect them, wash them up, and cut  to the size I like.    I'm saving the land fill (if they would ever make it there) and keeping my dollars for fabric and thread.  


 Fabric is folded just like it comes off the bolt.  Then one more fold---bringing the folded side over to match the selvedge edge.  Roll it up and pin the end.  
     The mini-bolts make it easy to see what I have to work with.  I am  known to be pretty messy and scattered, so this really helps me neater.   And what fun to shop your own fabric store in your stash closet.


Wednesday, January 2, 2019

Scraps and collage

     While I really need to straighten up the sewing room,  I did not have the motivation.  I wanted a little play time.  So I made an even bigger mess and did some cutting  and fusing for a collage. 

  This is really just a trial/test piece.  I need to hunt and dig for more interesting fabric for the background.     The actual floral arranging was easy and went together rather quickly.  Better than what I can create in real life. 
  Plus I now have a better idea of the type of prints to use and dig out for the florals.  And I need to add some shading areas around the pitcher vase to create depth.
  Then the next step is to get every edge stitched down.  Time consuming, indeed.  But this will make a nice small wall hanging.


  Sir Old Man made me a handy little gadget for Christmas.    A seam presser!  I saw one the Cheryl shared on her blog Teapots2quilting, and loved it.   She also shared how to make a magnetic pin dish---be sure to check it out. 
  Anyway, I drew off a similar shape pattern and he headed for the workshop.  This seam press is made of  scrap cherry  wood.  It does a great/wonderful/perfect job on the seams for the chandelier blocks:)


  My brother gave me new steak knives for Christmas.  But there was no room in the knife drawer for them.  A little shopping on Amazon solved my problem and I ordered a wooden magnetic knife block.  Sir Old Man pulled out the tools and hung it up this afternoon.
   Then......made the comment, "I see how they made this.  No problem.  I can get earth magnets." 
  So sometime in the future I expect another magnetic knife block will appear and hang on the other end cabinet.  Oh, heck, he could get slap happy and make them for Christmas gifts next year.  BTW, all recipients loved their serving trays. 
    Ok, I'm going to put away at least one stack of fabric today.  At this pace, I might get my fabric stored away in a couple of years.  Happy stitching. 
Related Posts Plugin for WordPress, Blogger...